We will jump a few steps and start creating today. Let’s see how practical and efficient we can be. This aims to make you sense what it feels like to design with AutoCAD.
We should begin with a brief overview of the environment, possibly uncovering unique terminology AutoCAD drafters use. Understanding the correct settings and needed modifications before using AutoCAD is also crucial.
Drawing an object in AutoCAD
If you have not downloaded AutoCAD yet, download AutoCAD now.
Once you are ready, open a blank drawing file.
Two simple steps
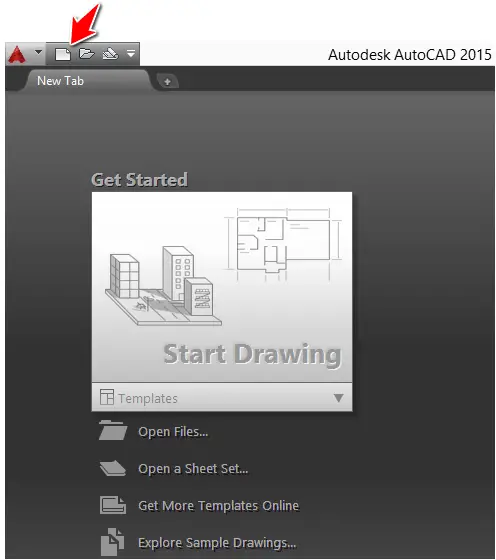
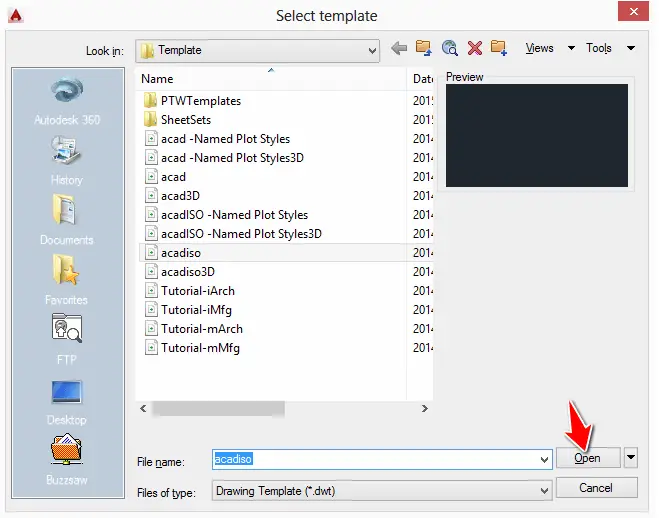
1 – Click on the white sheet on the left upper corner
2 – Click on Open
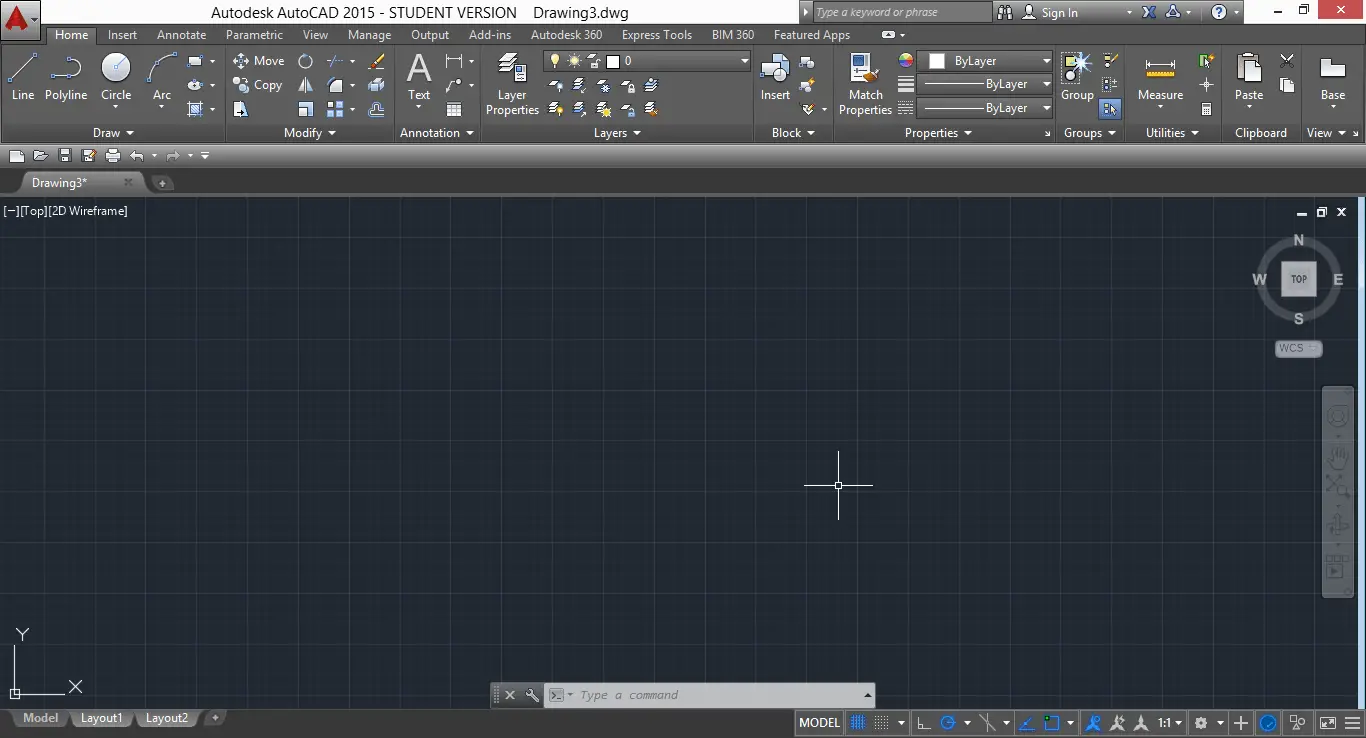
You are now in the main window. Feel free to close the window on the left side (if you are working on the same version as I am), it won’t be helpful for now.
If you did close the left windows, the following image is what you should be left with.
We are now set.
Drawing a line in AutoCAD.
Not to go too fast, we are going to draw a line.
Google says that in analytic geometry, a line in the plane is often defined as the set of points whose coordinates satisfy a given linear equation, but do not worry! we are not going to start talking about equation and algebra here, I would like to deteriorate that definition a little to make it more simple for us.
Google.com
We will define a line here like a straight rope that needs two points to hang on.
How will this definition help us here? It will help us remember that AutoCAD needs information about the location of the two points to be able to draw a line, provided that the line command is activated.
A line
To draw a line in AutoCAD:
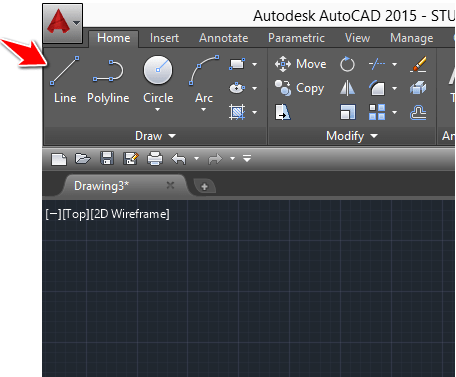
1 – Activate the LINE command with a click on its appropriate icon.
2 – Click anywhere in the drawing area to tell AutoCAD where you want the first point to be
3 – Repeat the previous step after moving the cursor away from the first point.
4 – Press the ESC key on your keyboard to cancel the command.
If you have more than a line to draw, you don’t have to start each by starting all over again. You might have noticed that after step 3, AutoCAD let you draw another line, considering its beginning was at the end of the previously drawn line.
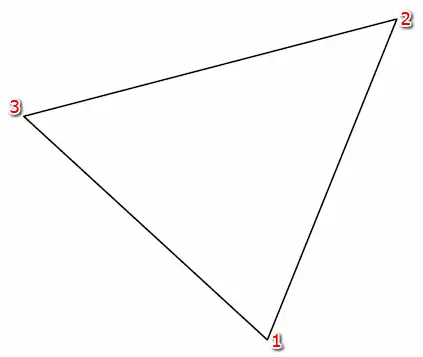
If you look at the object below, you will see that it has 3 points.
If we were to draw this (we do not care about dimensions and line inclinations for now), we would
- Activate the Line command
- Click to indicate point 1
- Click to indicate point 2
- Click to indicate point 3
- Click on point 1 again
- Press the ESC key
You must still have many questions about drawing a line; no worries! More will be covered in the upcoming tutorials.
These tutorials might be useful:
- Breakline AutoCAD
- Tutorial 20: Convert Line to Polyline
- Tutorial 19: Convert Spline to Polyline
- Tutorial 04: How to draw inclined lines in AutoCAD
- Tutorial 03: Mastering the LINE command in AutoCAD
