Moving and copying are frequently needed when working on a CAD project.
It is time to learn how to Move and Copy objects in AutoCAD. These two simple commands are very important.
The following commands work just as they would in other Drawing software.
Move an object in AutoCAD
The MOVE command will help change the location of an object in the drawing area.
To use the MOVE command
- Select the object to move (or objects to move)
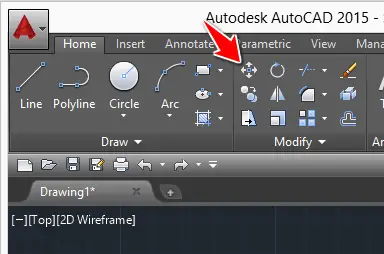
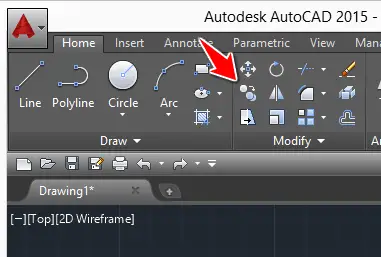
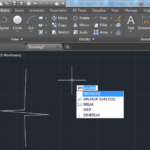
- Click on the icon shown in the image above.
- Select the base point with a click (don’t hold)
- Move and drop
Notice that when Moving an object, you can activate the ORTHO mode and use the command area to enter the exact distance you want to move the object. The ORTHO mode will ensure you are moving in a straight line.
Example
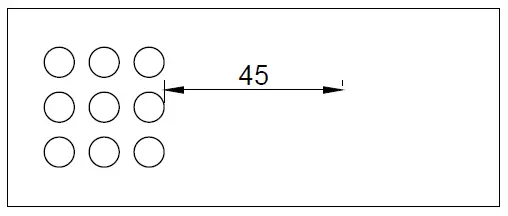
Let’s Move the 6 circles below to the right
Step 1
Activate the ORTHO mode to constrain the cursor movement orthogonally
Step 2
Select circles

Step 3
Click on the MOVE icon
Step 4
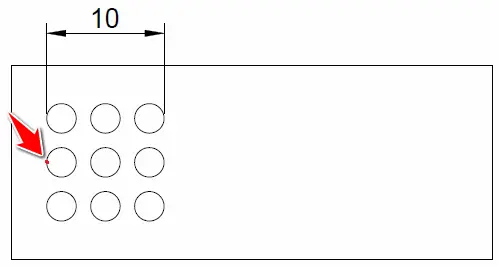
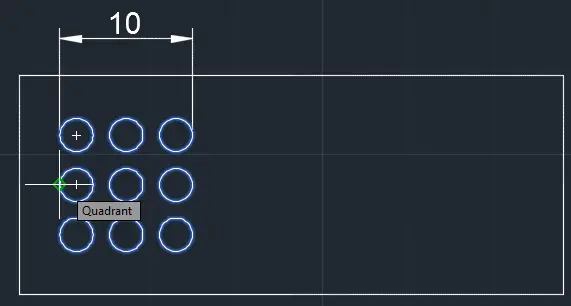
Select the base point
Step 5
Move your cursor to the right, leave the mouse in that position, Enter 55, and Hit Enter.
Final figure

Copy an object in AutoCAD
The COPY command works similarly to the Move command, leaving a copy of the original object in its position.
It works as it would in other Windows applications, and feel free to use the Ctrl+C and Ctrl+V to copy and paste objects in AutoCAD.
To copy Objects in AutoCAD, you need to select them first, and you can also use the technique we used above to place the copy at a certain distance and angle from the original item.
Quizzes
Practice Exercises
- Learn AutoCAD in 21 DAYS | Great series to help you learn AutoCAD 2D
- AutoCAD exercise 00
- AutoCAD exercises
- AutoCAD exercise 01
Related posts:
 AutoCAD Tutorial 00: AutoCAD Free Download Full Version
 AutoCAD and its Uses: What is AutoCAD Used for?
 AutoCAD Tutorial 16: Chamfer and Fillet command in AutoCAD
 Learn AutoCAD Basics: DAY 5
 Learn AutoCAD Basics: DAY 14
 AutoCAD Tutorial 19: Convert Spline to Polyline
 Save Your Life With the SPHERE Command in AutoCAD
 AutoCAD Tutorial: Breakline AutoCAD