It is a long way to solving these AutoCAD challenges. If this is your first time here, I will invite you to check the list of all AutoCAD tutorial series here.
Learning AutoCAD Basics
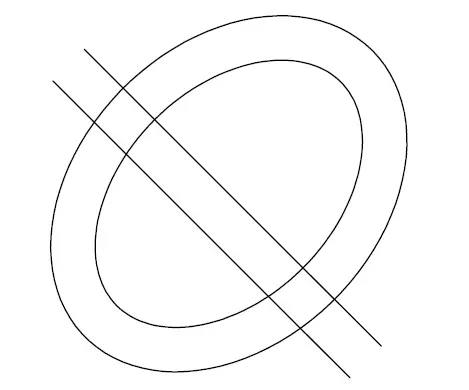
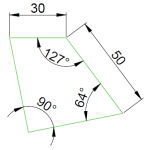
Figure 1
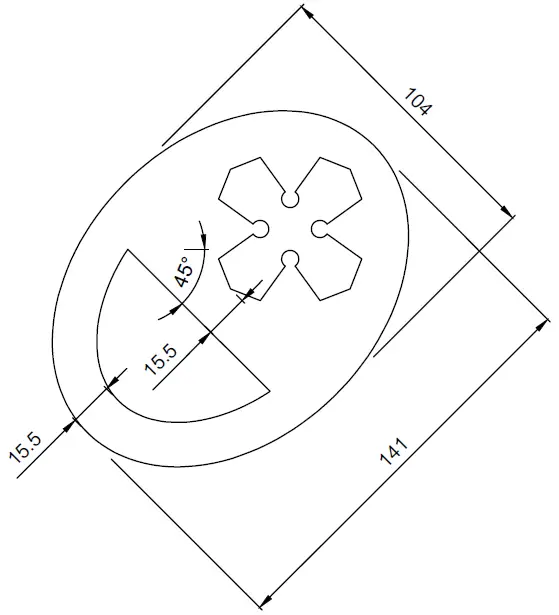
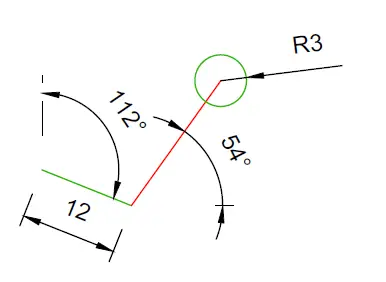
Figure 2
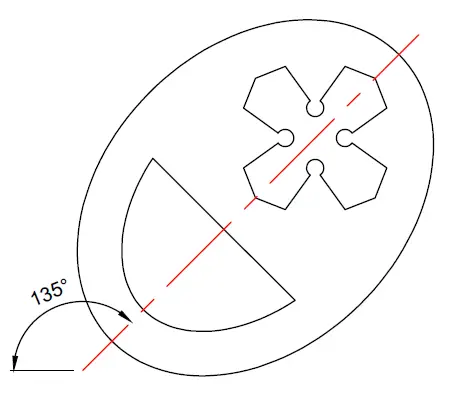
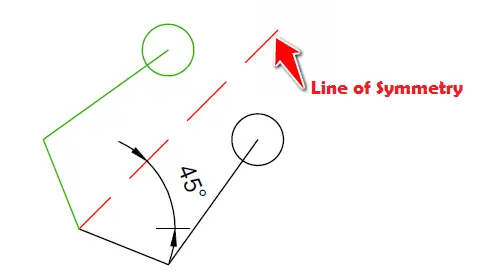
Figure 3
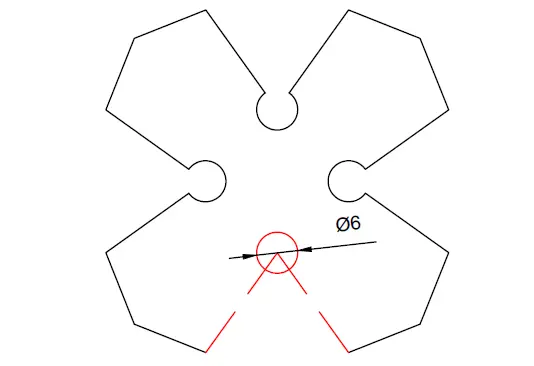
The two red lines are both axes of symmetry of the object.
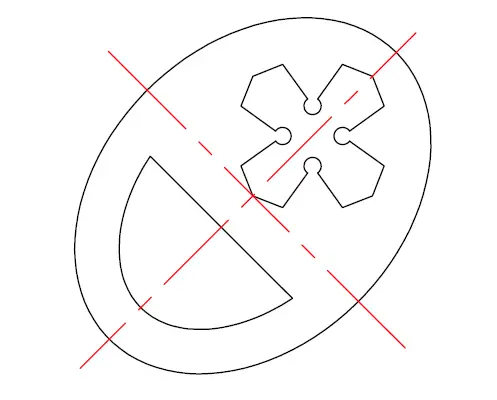
Figure 4
Details about the object inside the ellipse.
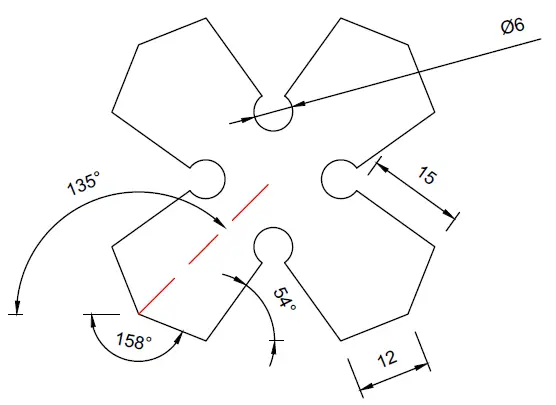
Figure 5
Execution
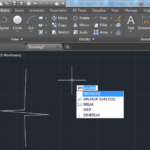
The ELLIPSE command in AutoCAD
We will need to use the ELLIPSE command in this session.
To use the ELLIPSE command
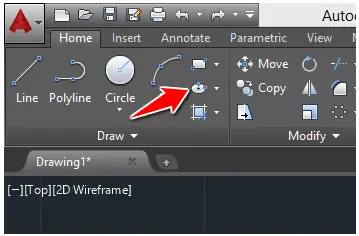
- Click on the ELLIPSE icon
- Specify the center of the ellipse
- Move the cursor in the direction of the first axis, type its value, and press Enter.
- Type the value of the second axis and press Enter
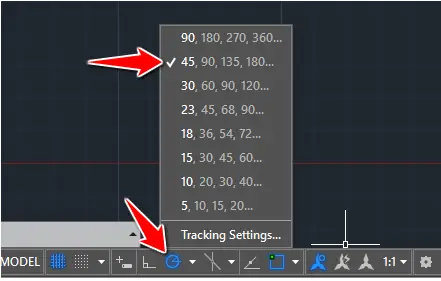
The Polar tracking
For this experiment, we will use POLAR TRACKING. Activating the following mode of POLAR TRACKING will help ease our task.
Creating the Ellipse
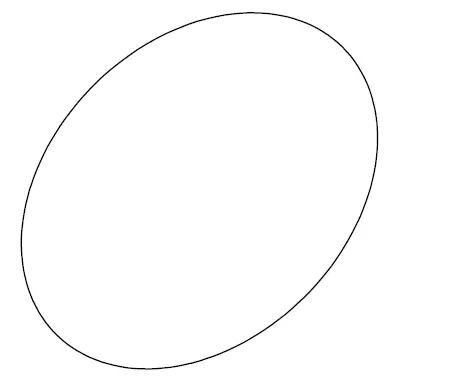
The ellipse is bent with an angle of 45 degrees.
- Activate the ELLIPSE command.
- Specify the center of the Ellipse.
- Track 45 degrees
- Type 70.5 and press ENTER
- Type 52 and press ENTER
You should have the following.
After creating the ellipse, all you need to do is find the centerline of the ellipse, OFFSET the ellipse and the line with an OFFSET value of 15.5. The resulting image should look similar to the following.
Use the TRIM command to obtain the wanted object.
Creating the remaining piece
To create the cross, you need to:
Step 1
Create the following: you can find the length of the red line using the information given earlier.
Step 2
Create a mirrored copy of the current object. The line of symmetry should have an inclination angle of 45 degrees starting from the left end of the drawing.
Step 3
Create a vertical line that will serve as the new line of symmetry. The new line must have an end familiar with the center of the newly created circle.
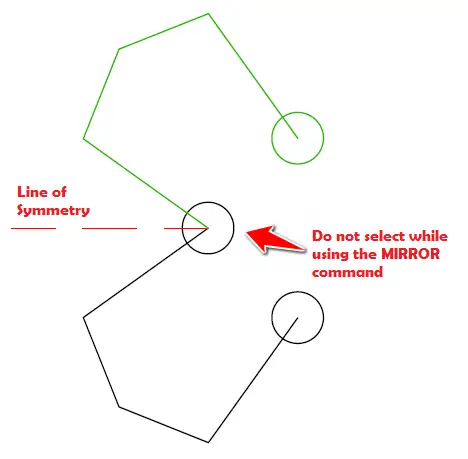
You don’t have to select the highlighted circle using the MIRROR command.
After obtaining the figure we have just received, you can use the same trick to get the other part of the image. And that will be it. Combining both structures should not be an issue.
Learn AutoCAD Basics in 21 DAYS
Related posts:
 AutoCAD Tutorial 00: AutoCAD Free Download Full Version
 AutoCAD and its Uses: What is AutoCAD Used for?
 Unique 2D Autocad Exercises to Improve Your Skill Now
 Learn AutoCAD Basics: DAY 4
 Learn AutoCAD Basics: DAY 14
 AutoCAD Tutorial 19: Convert Spline to Polyline
 Save Your Life With the SPHERE Command in AutoCAD
 AutoCAD Tutorial: Breakline AutoCAD