The rectangle is one if not the most basic shape in geometry. Here, we will deal with creating a 3D rectangle using AutoCAD.
It is one of the easiest figures to get while using AutoCAD in 3D. Creating a 3D rectangle will take close to a second if you know how to go about it.
The following are few routes you can take to create a 3D rectangle in AutoCAD
Drafting a 3D rectangle in AutoCAD
What is a 3D rectangle?
A 3D rectangle is simply a rectangle that has been extruded to a certain height thus making it have a height, width and length.
Using the BOX command
One of the ways you can create a 3D rectangle in AutoCAD is: using the BOX command. It helps create a box while controlling the length of its length, width and height.
Here is how it goes:
- Type BOX and press ENTER
- Click on the drawing area once
- Type L and press ENTER
- Specify the Length and Press ENTER
- Specify the width and Press ENTER
- Specify the height and Press ENTER
(What I mean by “specify” is “enter a value”)
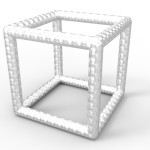
Here is what you get

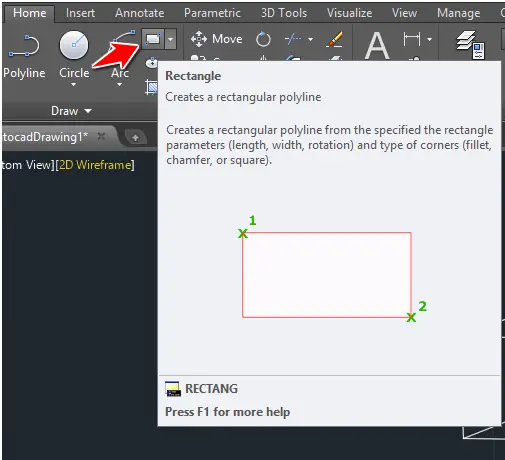
Using the RECTANGLE and EXTRUDE command
Using this method, you will need to create a RECTANGLE first, then EXTRUDE it. The height of the extrusion will be the height of the 3D rectangle. (It is also to be noted that you are free to choose which of the side is height, width or length)
To create a rectangle, simply use the RECTANGLE command.
Then use the created rectangle as the base of your 3D rectangle, extrude it with your given height to get our rectangle in 3D.

Finding the volume of a 3D rectangle in AutoCAD
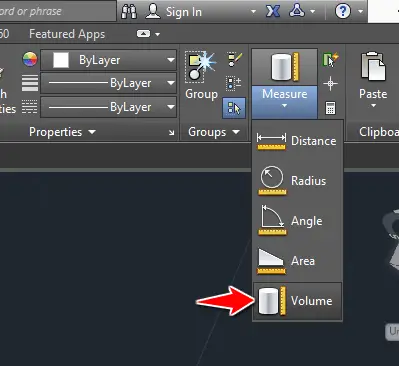
AutoCAD can help you find the area of a rectangle and the volume of a 3D rectangle or any 3D object.
Use the icon shown on the image below to activate the command.
After activation of VOLUME, the following will pop up.
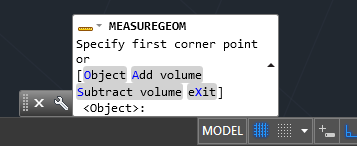
Type O, Press ENTER and select the 3D object to get the value of its volume.

These methods are one among many that could help you easily draft rectangles in three dimensions and to compute either the area of the base of the 3D rectangle or the whole volume of it.
AutoCAD 3D how-to tutorials
- 3D AutoCAD drawing
- Subtraction of objects in AutoCAD
- 3D Intersection in AutoCAD
- How to unite 3D objects in AutoCAD
- Drafting a 3D rectangle
- Shell in AutoCAD
- Save your life with the SPHERE command in AutoCAD
- Sweep in AutoCAD
- 3D rotate in AutoCAD
- AutoCAD 3D Drawing
Related posts:
 AutoCAD Tutorial 00: AutoCAD Free Download Full Version
 AutoCAD and its Uses: What is AutoCAD Used for?
 Unique 2D Autocad Exercises to Improve Your Skill Now
 Learn AutoCAD Basics: DAY 4
 Learn AutoCAD Basics: DAY 13
 AutoCAD Tutorial 18: Basics of Annotation in AutoCAD
 The Best Way to Learn AutoCAD
 Save Your Life With the SPHERE Command in AutoCAD
Learn AutoCAD Basics: