Let’s go back in time a little today with this simple exercise for the only purpose of getting a bit of ego boost. Today’s challenge is way easier than the two previous ones, so this should be a quick one.
Now, we are going to look at the CHAMFER command and play with the UCS command a little bit more than we did in the past days.
Learning AutoCAD Basics
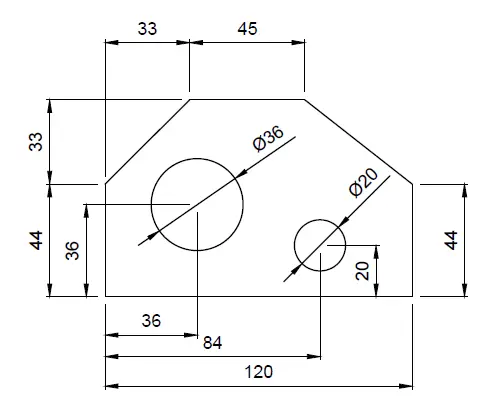
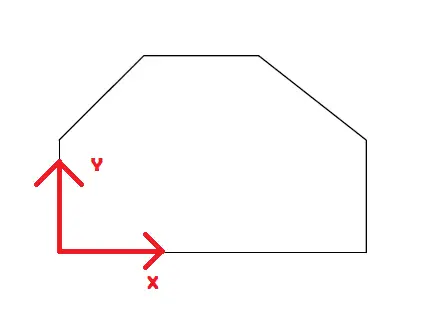
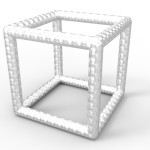
Here is the object to replicate in this challenge, pretty quick one huh!?
We have been in a more difficult situation in the past!
Execution
Remember you can do it your own way, but here is how I will suggest you do it.
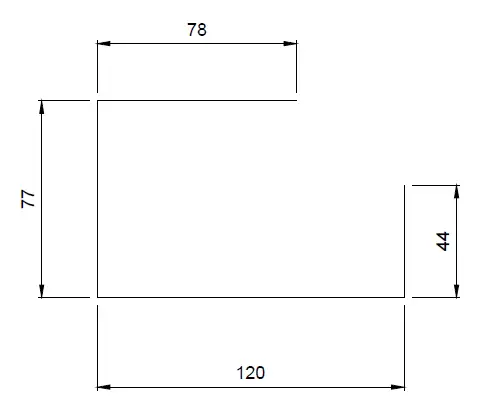
Start with the following. Four lines, you have all dimensions, pretty easy
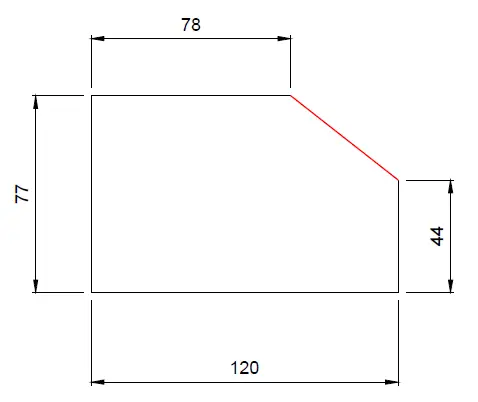
Then, use a line to close the object. You do not need to know the length of the red line, just use those two points to hook its ends up to.
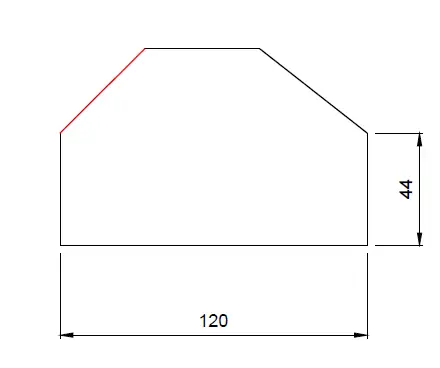
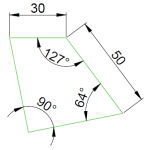
Now use the CHAMFER command on the left upper corner. The Chamfer distances are 33 x 33 units.
Learn how to use the CHAMFER command in AutoCAD
We have made extensive use of the UCS command earlier. Move the UCS to the position shown on the picture below, that will allow you to get the circles we are trying to create at their right positions.
After Getting the UCS at the position shown above, the center of the bigger circle will be at the point of coordinates (36,36) and the center of the small circle will be at the point of coordinates (84,20).
Learn AutoCAD Basics in 21 DAYS
Related posts:
 AutoCAD Tutorial 00: AutoCAD Free Download Full Version
 AutoCAD and its Uses: What is AutoCAD Used for?
 Unique 2D Autocad Exercises to Improve Your Skill Now
 Learn AutoCAD Basics: DAY 4
 Learn AutoCAD Basics: DAY 14
 AutoCAD Tutorial 19: Convert Spline to Polyline
 Save Your Life With the SPHERE Command in AutoCAD
 AutoCAD Tutorial: Breakline AutoCAD