In this challenge, we will perfect how to handle positioning and location in AutoCAD.
This session will require the Object SNAP mode. The exercise is easy, but you must be cautious while working on the project.
It will be helpful to be able to use the OFFSET command and create a circle using the features Tan, Tan, and Radius.
Learning AutoCAD Basics
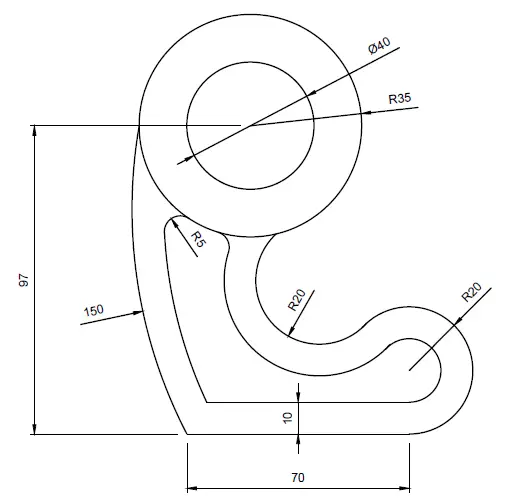
The following is the exercise we will be using in this session.
Figure 1
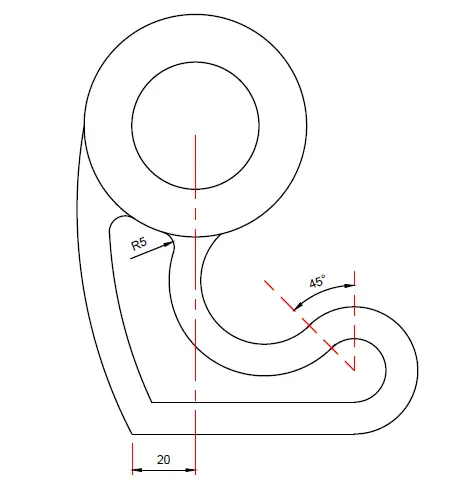
Additional important information is indicated in the following picture.
Figure 2
Execution
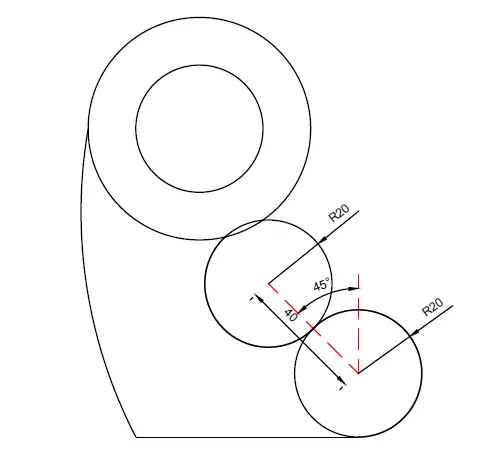
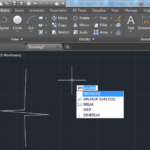
The following is the key image that will help complete this project.
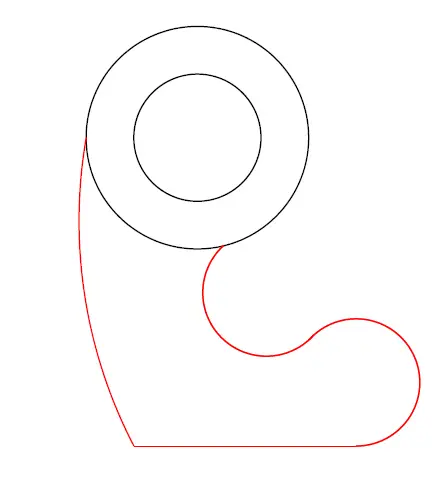
You need first to get the above image and then trim it. It would be best if you got the following:
You need to give the red part an OFFSET of 10 units now, and you will end up with the following.
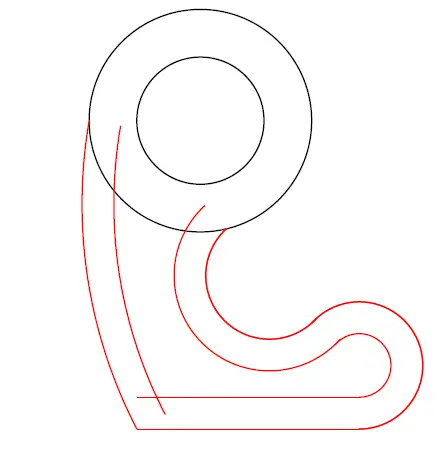
I imagine it is all clear now. You undoubtedly know what to do next to complete this. Do not forget the two FILLET of R5 located below the two circles.
Learn AutoCAD Basics in 21 DAYS
Related posts:
 AutoCAD Tutorial 00: AutoCAD Free Download Full Version
 AutoCAD and its Uses: What is AutoCAD Used for?
 Unique 2D Autocad Exercises to Improve Your Skill Now
 Learn AutoCAD Basics: DAY 4
 Learn AutoCAD Basics: DAY 13
 AutoCAD Tutorial 19: Convert Spline to Polyline
 Save Your Life With the SPHERE Command in AutoCAD
 AutoCAD Tutorial: Breakline AutoCAD
Tried this one too…. But not getting the desired result……
Alright. If that works, it is fine. If you jump on the video version of this exercise, you will have more clarity about the way I looked at it, but it does not have to be the only way though.
Feel free to go freestyle on these exercises, as long as you get to the result.
“The end justifies the means”
Im stuck on this. Can you guide me exactly what to do with the 150 radius
TAN TAN RADIUS could do depending on the version of AutoCAD you are using. If that does not work, you will have to figure out a way to get it done.
It is very doable.
Keep up!
PS: I doubt your sketch is right but I might be wrong on this, Just a feeling though!. Can you put some dimensions on it to check if you are right? that will be better
The 150 radius arc is NOT tangent to the circle.
Use the ARC command with Start, End, Radius. The Start is the left quadrant line of the outer circle. The End is the left end of the lower line. The Radius is 150.
Works fine for me.