We are slowly but surely approaching the end of this series. It has been a good number of days, and we’ve been getting our fit wet with these AutoCAD challenges. If this is your first time here, I suggest you check the list of all tutorials.
This should be among the easiest of the series at the moment. You will agree with me that if this exercise appeared earlier that would look more difficult than it should, at this point.
With all you have accomplished so far, this should be a piece of cake, just helping you retrain some of the stuff you have been learning here.
In this challenge, it could be required to use the ROTATE command and the OFFSET command a lot. So, feel free to check out those if needed beforehand.
Learn AutoCAD basics
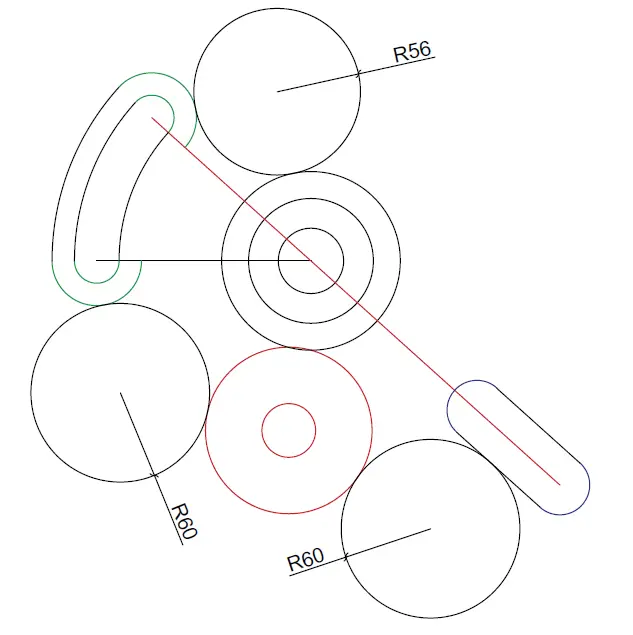
Figure 1
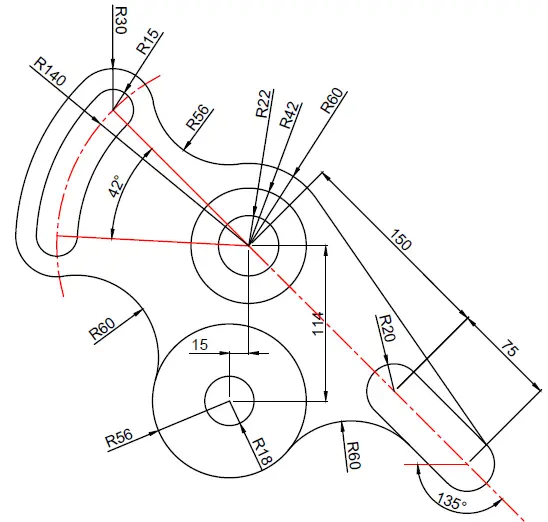
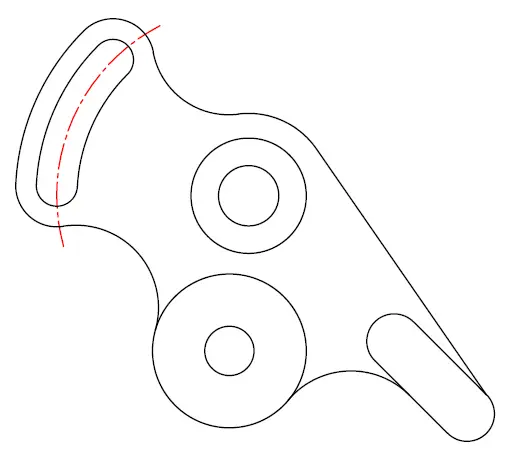
Figure 2
The following figure is exercise without annotation.
Execution
After many people asked for the solution to this challenge, I decided to explain a lot more in the following steps what you need to do to solve the challenge.
Spoiler alert: You might need to try figuring it out yourself before checking the solution. You can pause here and go trying to solve it on your own before checking how I did it.
Step 1
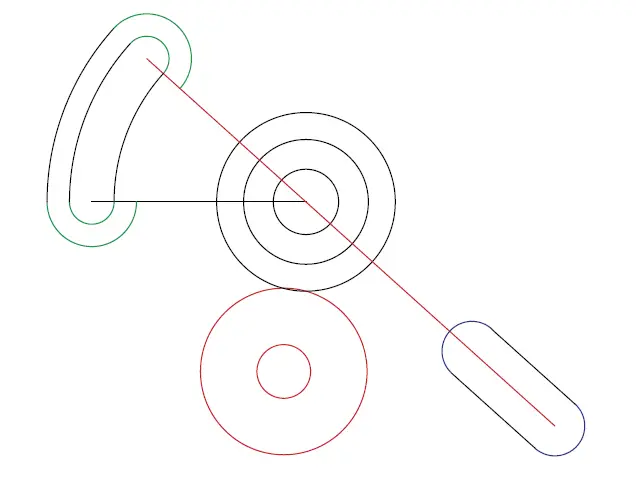
Draw the following circles
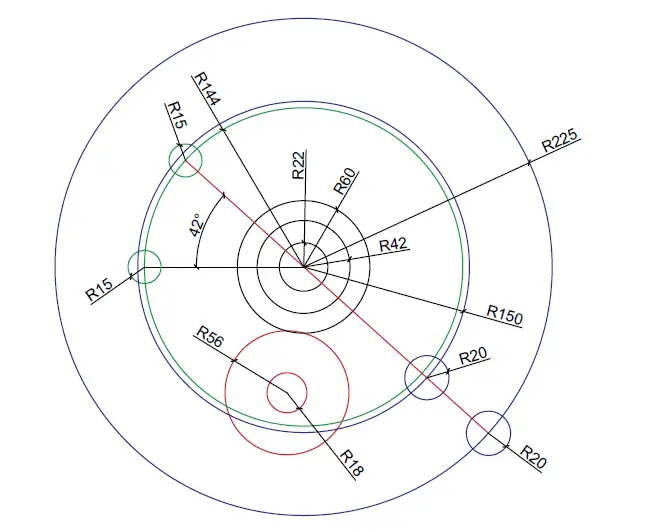
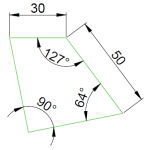
The red line is straight. On the upper side, it intersects with the green circle R144, allowing us to place the two circles R15 (Use the information about the angle to place them; the black line is horizontal). On the lower side, the same red line intersects with the blue circles R225 (resulting from 150+75) and R150. Each of the intersecting points should allow you to find the centers of the two blue circles R20.
The red circles, R56 and R18, have the same center, which you can find using information from the exercise.
Step 2
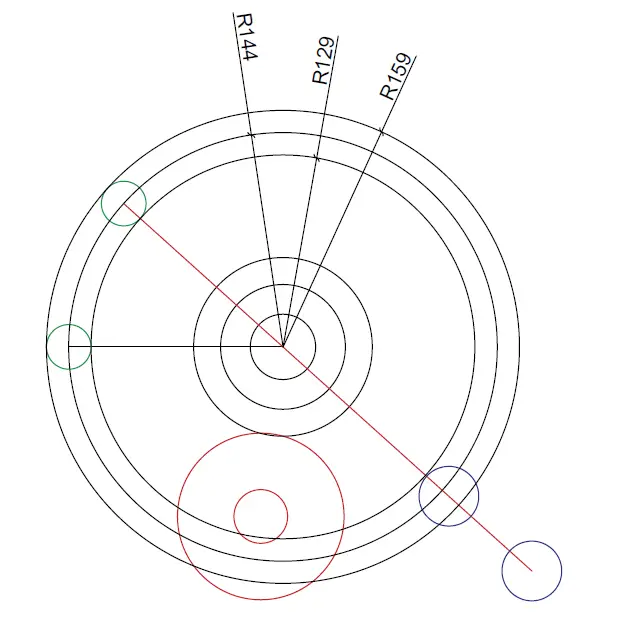
Delete other circles and create the two new ones in the picture below. (R129 and R159)
Step 3
Delete R144. Trim the two biggest circles and the two green circles to have the following.

Step 4
OFFSET is the piece we just created with an offset distance of 15. Join the two blue circles with straight lines and trim them to have the following.
Step 5
Use the tan tan Radius technique to create these circles.
Step 6
Create a line from the end of the blue arc and tangent to R60, as shown below.

Step 7
Trim all unnecessary parts and There you have it!
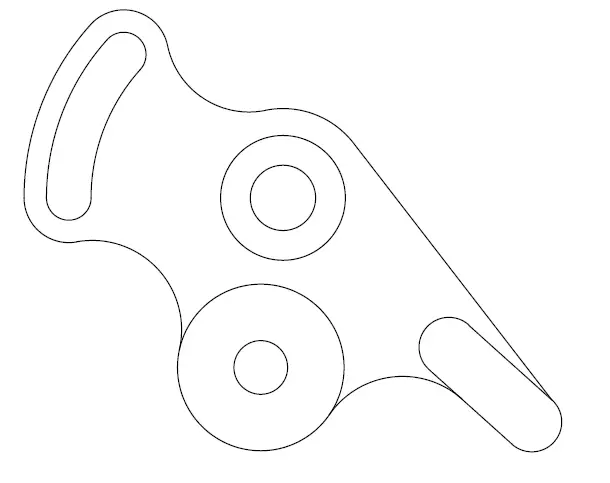
And here you go. I hope you enjoyed this as much as I did.
Learn AutoCAD Basics in 21 DAYS
Related posts:
 AutoCAD Tutorial 00: AutoCAD Free Download Full Version
 AutoCAD and its Uses: What is AutoCAD Used for?
 Unique 2D Autocad Exercises to Improve Your Skill Now
 Learn AutoCAD Basics: DAY 4
 Learn AutoCAD Basics: DAY 13
 AutoCAD Tutorial 19: Convert Spline to Polyline
 Save Your Life With the SPHERE Command in AutoCAD
 AutoCAD Tutorial: Breakline AutoCAD