The TRIM command in AutoCAD is one of the most used commands when working in two dimensions and is by far the first command anyone should learn from the MODIFY section of the commands in AutoCAD for this simple reason: You are clearly not going far without the TRIM command. You cannot do much without it.
What does TRIM mean in AutoCAD
TRIMMING in AutoCAD just means that you have some parts of an object or objects, often lines which you want to get rid of, but you do not want to get rid of the entire objects. Here is an example where the trimming comes well in handy in AutoCAD.
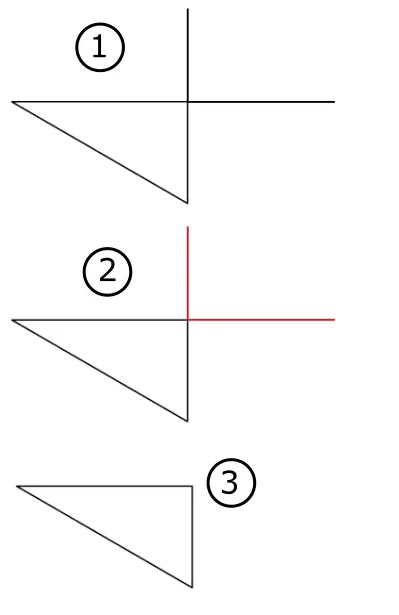
The following images show an object made of 3 lines, we desire to get rid of parts of the vertical and the horizontal line. To get to step 3 from step 1 using AutoCAD, we need to make use of the TRIM command.
Using the TRIM command in AutoCAD
Let’s use the example above to show how this can be done using AutoCAD. Assuming you have already drawn the image we have in step 1.
- Click on the TRIM icon
- Select the vertical and horizontal lines and press ENTER on your keyboard
- Select the two red parts shown on the image in step 2 on the image above.
- Press ENTER on your keyboard when you are done.
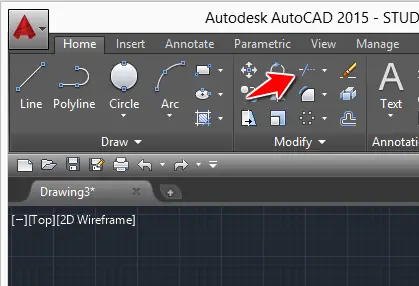
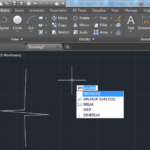
The figure below help you locate the Trim Command.
How will the Trim command be helpful?
Here are a few examples where you can not do without the Trim command.
Example 1
You want to get rid of the two inner parts of the circle.
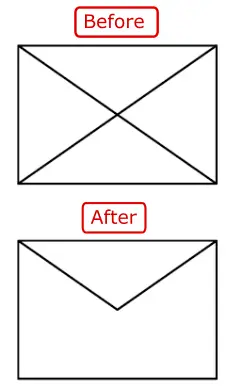
Example 2
You want to get rid of the two lower parts of the two lines.
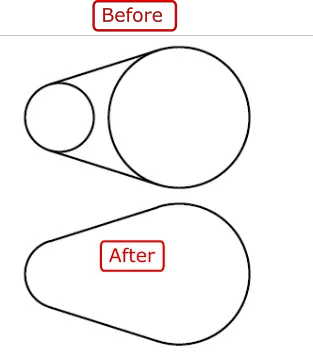
Example 3
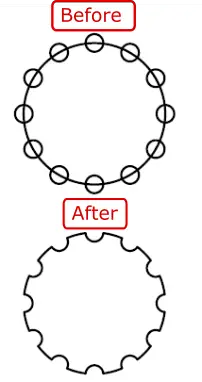
You want to get rid of the outer part of the small circles and the part of the big circle inside the small circles.
Here is a good exercise to take if you want to apply what we have just learned, but before starting, note that you should be able to:
- Draw a line in AutoCAD
- Draw a circle in AutoCAD
- Have your SNAP setting activated
- Insert Excel Into AutoCAD
Make sure to check its sister command, the EXTEND command.
Let me know how it went in the comment section.
Related posts:
 AutoCAD Tutorial 00: AutoCAD Free Download Full Version
 7 Reasons Why You Need to Learn How to Use AutoCAD
 AutoCAD Tutorial 16: Chamfer and Fillet command in AutoCAD
 Learn AutoCAD Basics: DAY 5
 Learn AutoCAD Basics: DAY 14
 AutoCAD Tutorial 19: Convert Spline to Polyline
 Save Your Life With the SPHERE Command in AutoCAD
 AutoCAD Tutorial: Breakline AutoCAD