If you have data in Excel that you want in your AutoCAD file and are finding it challenging, fret not! Learn how to seamlessly insert Excel into AutoCAD and incorporate your spreadsheet data into your drawing.
Insert data from Excel to AutoCAD
If you want to install a table from a given Excel sheet to an AutoCAD file, here is how to do it:
- Have the Excel file ready
- Type TABLE and hit ENTER on your keyboard
- Tick From a data link from the Insert options section
- Launch the Data Link manager dialog window
- Create a new Excel Data Link
- Enter Data Link Name and Press the OK button
- Browse to find your Excel file and Hit OK three times
- Select the inserting point
Let’s check what it is really like.
Step 1
Get your Excel file saved on your computer.
Step 2
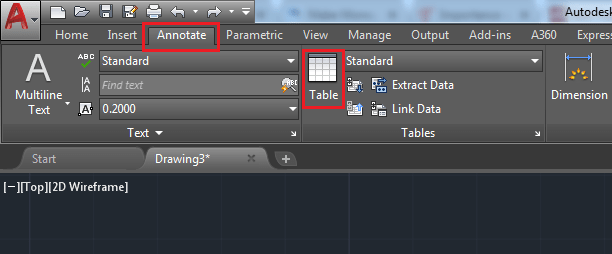
Instead of typing TABLE, you can click on the Annotate tab and click on Table, although this is long compared to the latter.
Step 3
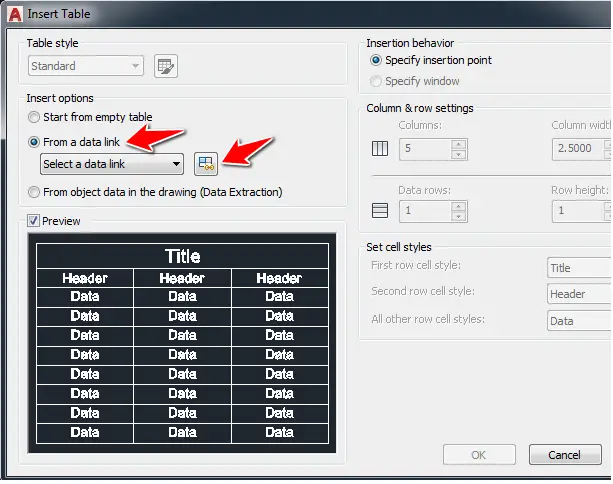
From the Insert options section, Tick From a data Link and Click on the button shown on the image below to upload and link your Excel table.
Step 4
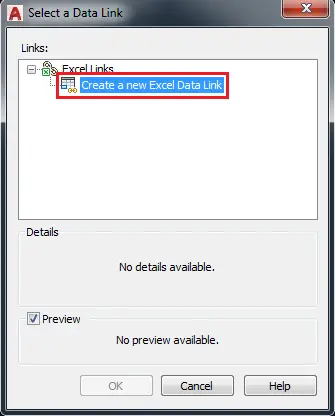
Click on Create a new Excel Data Link
Step 5
Enter a name and Click on OK

Step 6
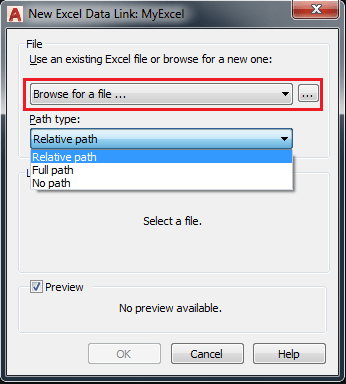
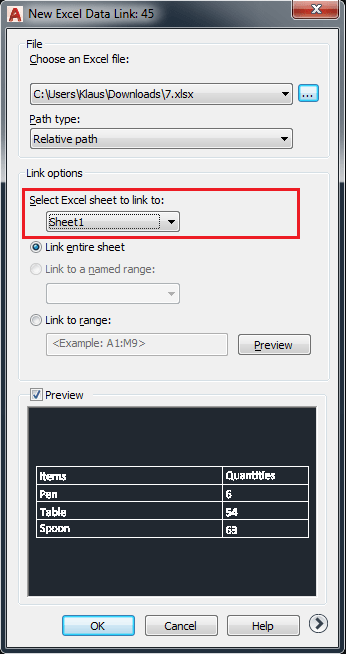
Browse your computer to link your Excel file and select the Path type.
Specifying the No Path option is useful when moving a set of drawings to a different folder hierarchy or to an unknown folder hierarchy.
If you select Full path, that means your Excel file location will never change as the Excel file will be linked to the AutoCAD file. If you later Move the Excel file, AutoCAD won’t be able to find the file anymore.
If you select Relative path, You will need the Excel file to be in the same folder with the AutoCAD file, so if the folder moves to a new location, as long as it contains both files, your Excel file will still be linked to your AutoCAD file. You can even send the folder to someone else, and the linked Excel file will still be valid when included in the folder.
Full path is the recommended option.
Step 7
You can decide what Excel sheet to load, or part of a sheet. When it is done, click on OK three times and indicate the inserting point to insert the table in your Drawing.
And there you have it!
At every opening, the Table will update its values from the Excel file. Every change made on the Excel file will reflect on the table in AutoCAD.
If you want to update the table manually, double-click on the table, and click on Download from Source.
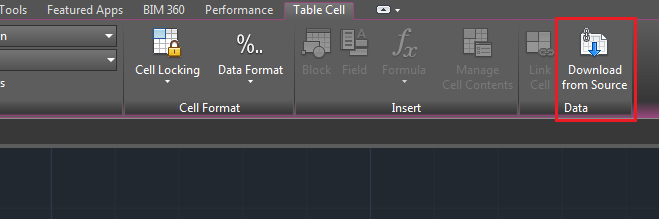
The content of the table is locked by default, but you can unlock it using the Cell Locking option.
In conclusion, integrating Excel data into AutoCAD opens up a world of possibilities for a smoother and more efficient design process. By following our step-by-step guide, you’ve gained the skills to seamlessly insert Excel data into your AutoCAD drawings. Now equipped with this knowledge, you can confidently leverage the synergy between Excel and AutoCAD to elevate your design projects and achieve greater accuracy in your drawings.
Tricks
- How to use the command prompt in AutoCAD
- What computer mouse are you using while modeling with AutoCAD?
- Convert Spline to Polyline
- Convert line to polyline
- Polyline VS line
- Create an array around an ellipse
- Measure the distance and angle between 2 points in AutoCAD
- How to Calculate an Area in AutoCAD
- Convert DWG to STL | Important for 3D printing
- AutoCAD scale factor: Setup
- How to scale in AutoCAD: Step by Step
- Learning AutoCAD 3D
- AutoCAD 2D to 3D tutorial
- AutoCAD tutorial – Free series to help you learn AutoCAD fast
Related posts:
 AutoCAD Tutorial 00: AutoCAD Free Download Full Version
 AutoCAD and its Uses: What is AutoCAD Used for?
 Unique 2D Autocad Exercises to Improve Your Skill Now
 Learn AutoCAD Basics: DAY 4
 Learn AutoCAD Basics: DAY 13
 AutoCAD Tutorial 18: Basics of Annotation in AutoCAD
 The Best Way to Learn AutoCAD
 Convert DWG to STL