You can not Model with Autodesk Tinkercad if you have not properly understood how to Move, Rotate and Copy objects.
We have lately worked on diverse 3D projects for beginners here were we intensely made use of tools allowing us to get these manipulations done.
In this session, we are coming back to lessen the difficulties many have been having making use of those this far by spending more time Moving, Rotating and copying objects, all of which are controlled in a lot more different ways they are while using AutoCAD or Draftsight.
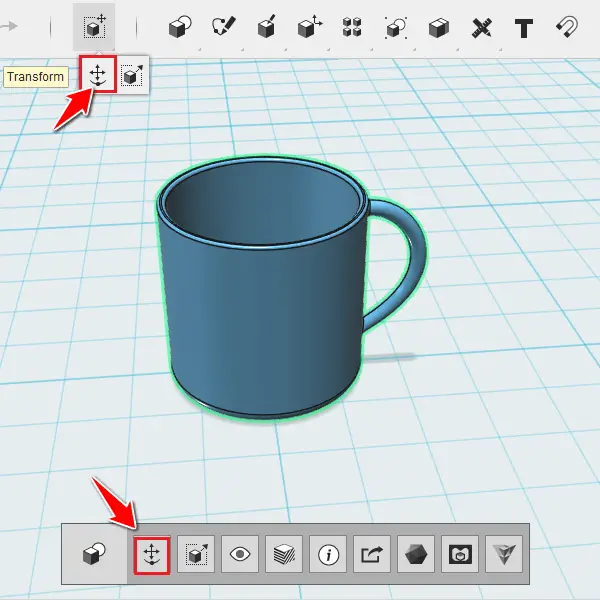
Move an object in Autodesk Tinkercad
To move an object in TInkercad,
Step 1
Select the Object to move and click on any of the two icons shown on the image below
Step 2
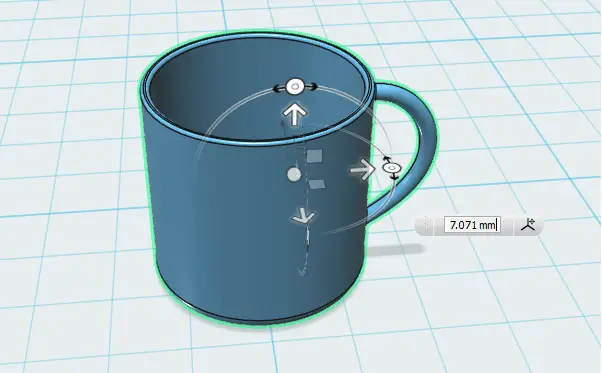
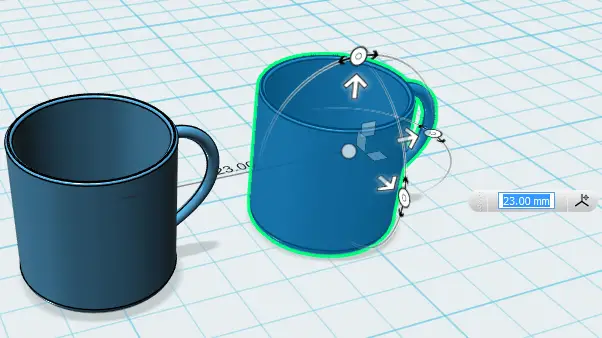
Use the white arrows to move the object along the appropriate axis (x, y or z-direction). After selecting one the arrow, you can enter the distance by which you want to move it, remember to use the negative distance if you want it to move in the left direction.
If you are enjoying this, you will surely like the following:
- An easy Modeling 3D project
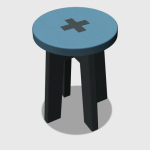
- 3D Design project for beginners – A Stool
- CAD projects for Beginners – 123D Design
- Modeling a Vase in 123D design
- How to assemble in 123D Design
- Beginner’s tips – Autodesk 123D design
- Design a mechanical part with Autodesk 123D Design
- Modeling with AutoDesk 123D Design
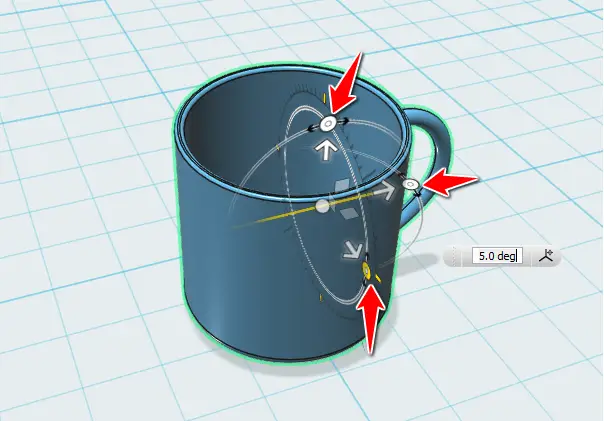
How to Rotate an Object in Autodesk Tinkercad
Rotating an object is similar to moving it, at the only difference that at step 2, instead of moving arrow to move the object, you will have to move the circles shown on the image below to rotate the object.
How to copy an Object in Autodesk Tinkercad
To copy an object in Tinkercad:
- Select the object
- Press Ctrl+C
- Press Ctrl+V
- Move the copy away from the original.
Mastering these will help you increase your productivity while modeling with Autodesk Tinkercad.
Related Post: Looking for an Architect Desk, check this post. If you happen to use a drawing table for your daily activities, here is a best drawing tablet list.