Here is a cool 3D design project to work on as a beginners.
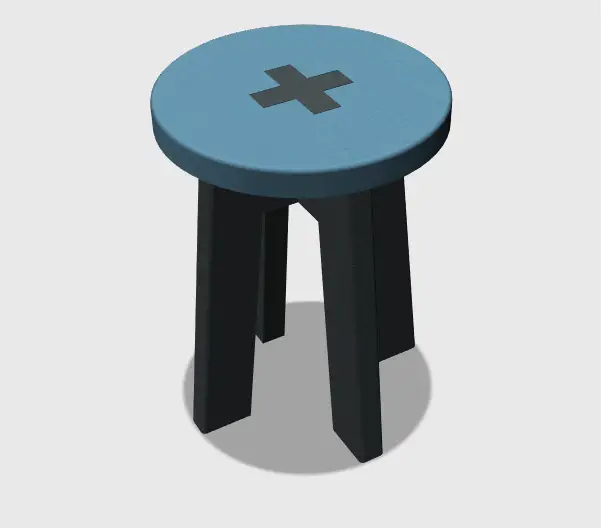
In this session, we will use Tinkercad to model the stool you can see on the picture below.
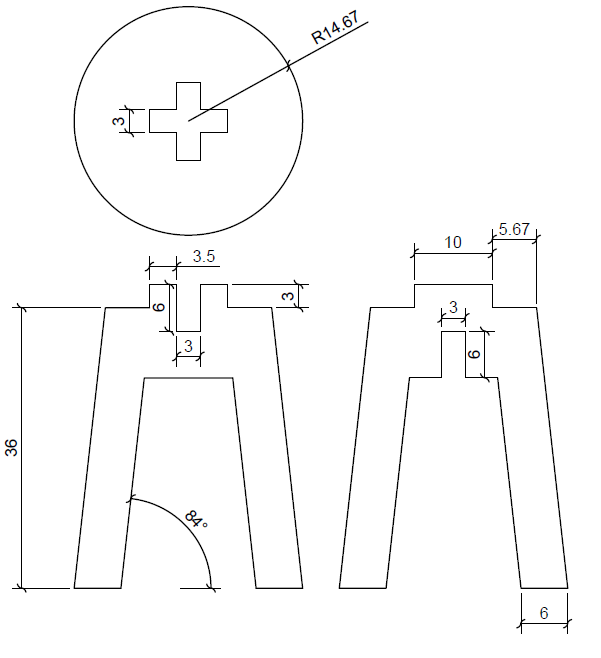
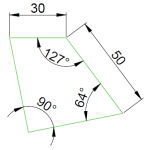
Here are the 2D representations of each part of the stool with dimensions.
Step 1
Open the software and make sure you are working on a 2D view. Remember you can download Tinkercad for free here.
Here is how the drawing area should look like at this stage

Now that you are on a 2D plane, we can start sketching.
Step 2
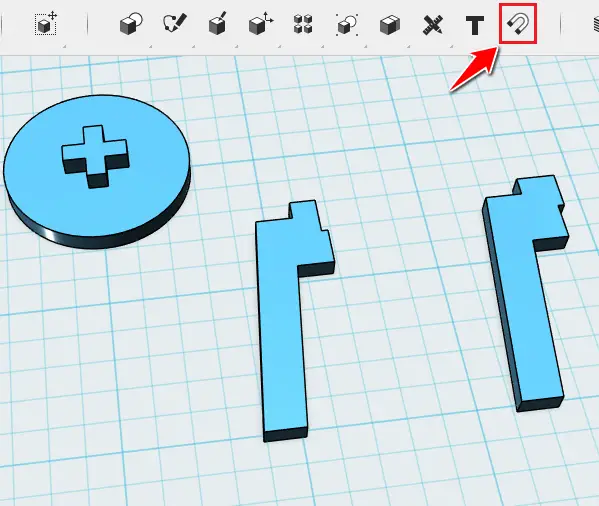
Get the following image created

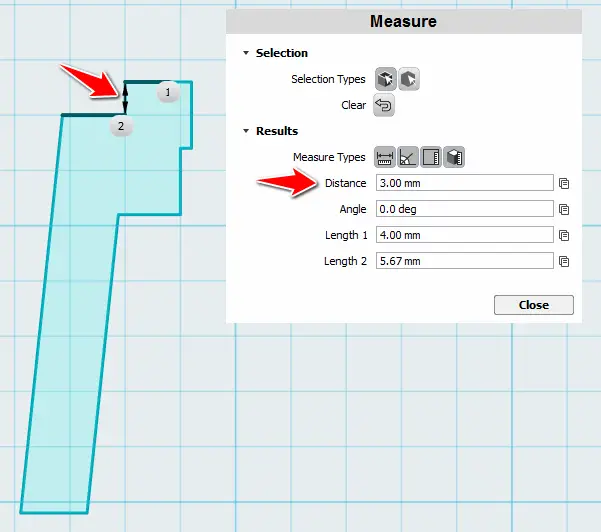
You can deduct the dimensions of these objects looking at the 2D representations we had in the beginning of this post. (You can decide to draw the whole legs like in the image where we had dimensions ON, I decided to draw only half of each legs to save time)
The information below can help you move faster
Step 3
Extrude each piece by 3 mm

Step 4
Snap the cross on the seat. (Simply click on SNAP, select the top face of the cross and select the top face of the seat)
Step 5
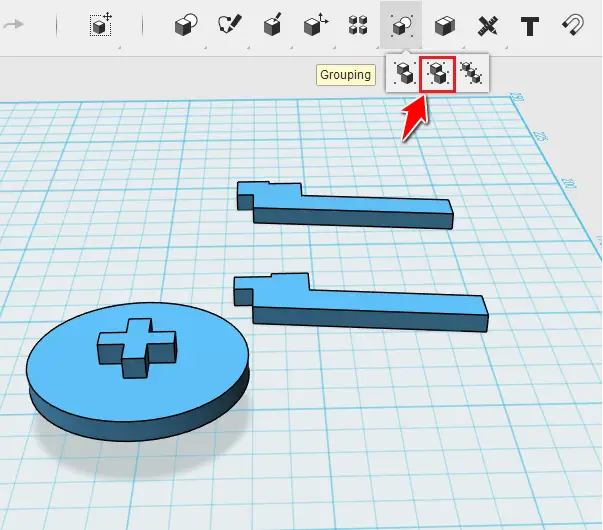
Un-group the cross and the seat
Step 6
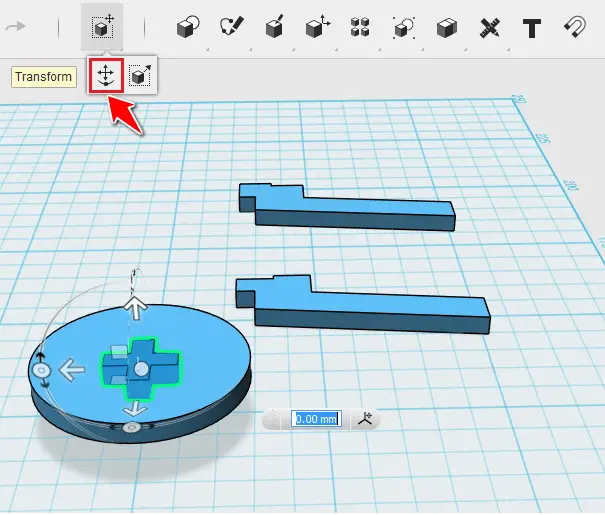
Move the cross 3 mm downward.
Step 7
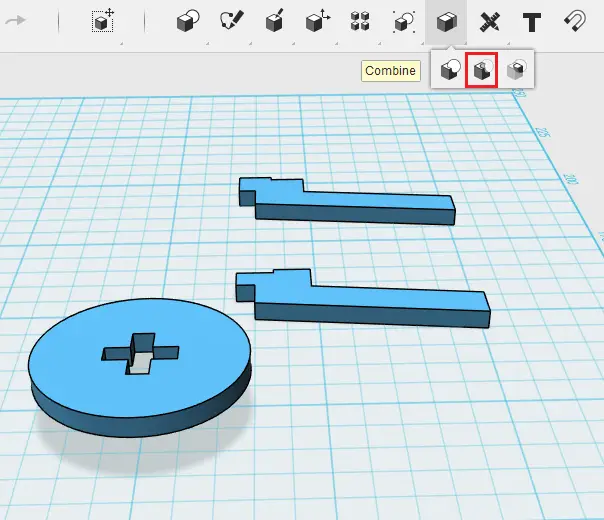
Subtract the cross from the seat
Step 8
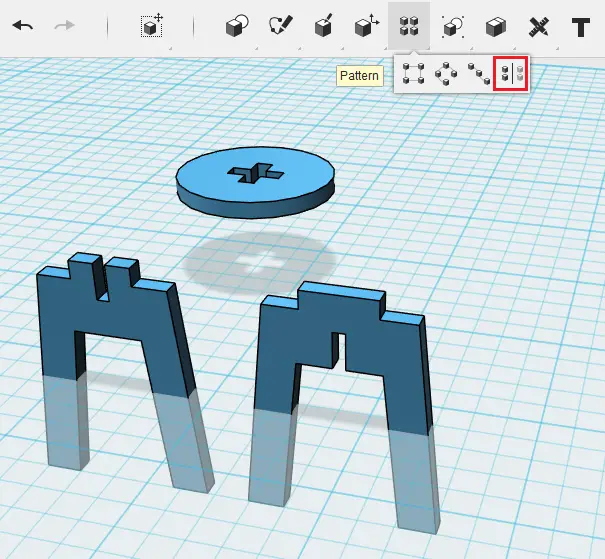
Rotate the legs by 90 degrees, and MIRROR each to obtain the whole legs.
Step 9
Use the same SNAP tool we used in step 4 to assemble all together
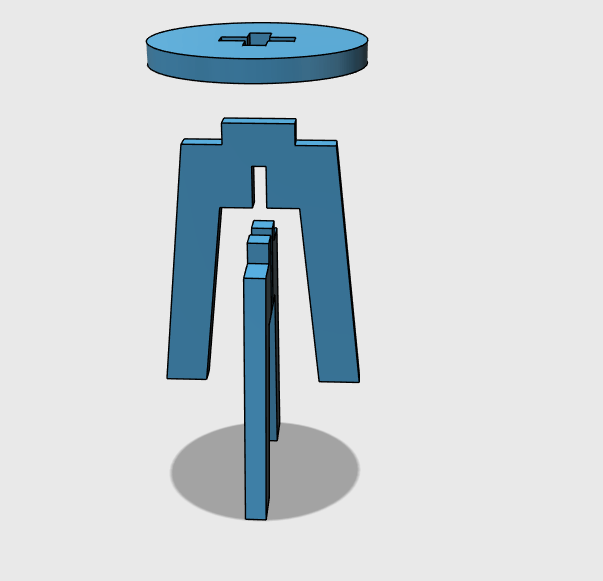
Here you have it!
You can now use the FILLET tool to make the design more realistic.
3D Projects (Good 3D practice exercises)
- 3D Design project for beginners – AutoCAD
- An easy Modeling 3D project
- 3D Design project for beginners – A Stool
- 3D design project for Beginners – A table
- CAD projects for Beginners – Tinkercad
- REVOLVE in AutoCAD
- How to assemble with Tinkercad
- Beginner’s tips – Autodesk Tinkercad
- Design a mechanical part with Autodesk Tinkercad
- Modeling with AutoDesk Tinkercad
- 2D to 3D AutoCAD
Related posts:
 Autocad 3D: Save Your Time With These Tricks
 3D Design Project for Beginners – AutoCAD
 3D Design Project for Beginners – A Table
 Design a Mechanical Part With Autodesk Tinkercad
 AutoCAD Tutorial 00: AutoCAD Free Download Full Version
 Unique 2D Autocad Exercises to Improve Your Skill Now
 AutoCAD Tutorial 18: Basics of Annotation in AutoCAD
 Convert DWG to STL
Hello
I like this tutorial, do you mind if I translate it to Dutch and for AutoCAD and place it on my site?
http://www.cadsite.be/cursus/cur_oefeningen.php
Hey @disqus_NjJ3tQjQd0:disqus
Go ahead, but please remember to link back to the original article.
Thanks