Let’s dissolve the boundary once more!
Here will be a quick but complex 3D mechanical modeling project you can use to practice your skill in 3D using any software you find handy.
Although this would have been a nice practice exercise for AutoCAD users, We will be using Autodesk Tinkercad for this challenge, maybe we will come back to this same design later using AutoCAD.
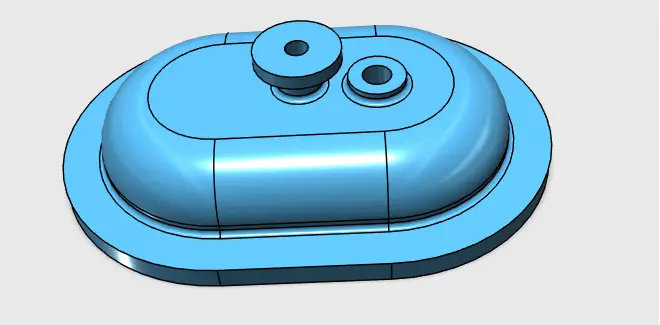
Mechanical part in Tinkercad
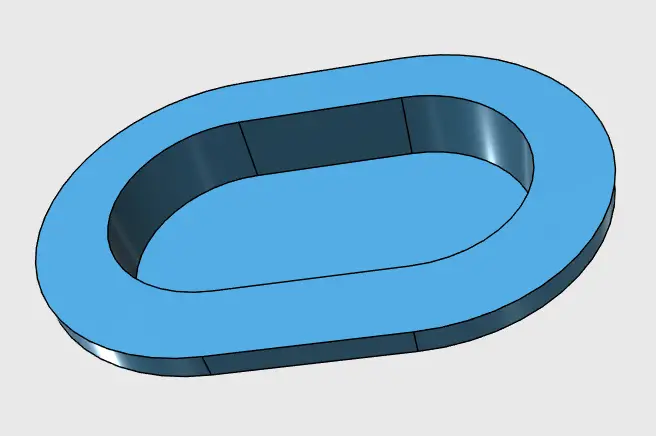
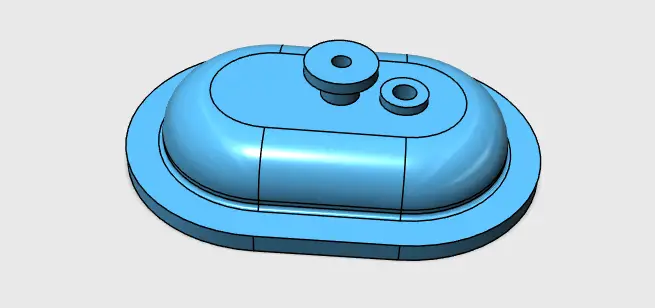
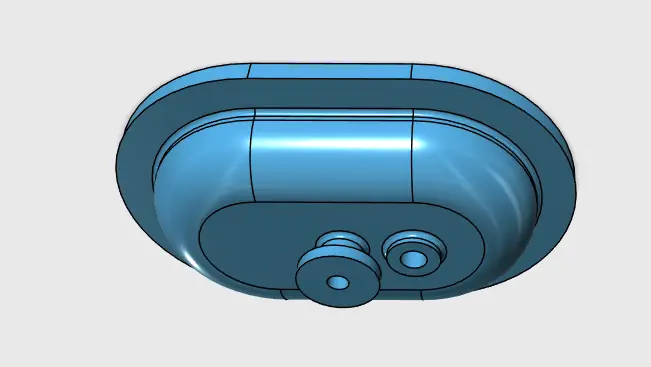
Here is what the finished design looks like in 3D
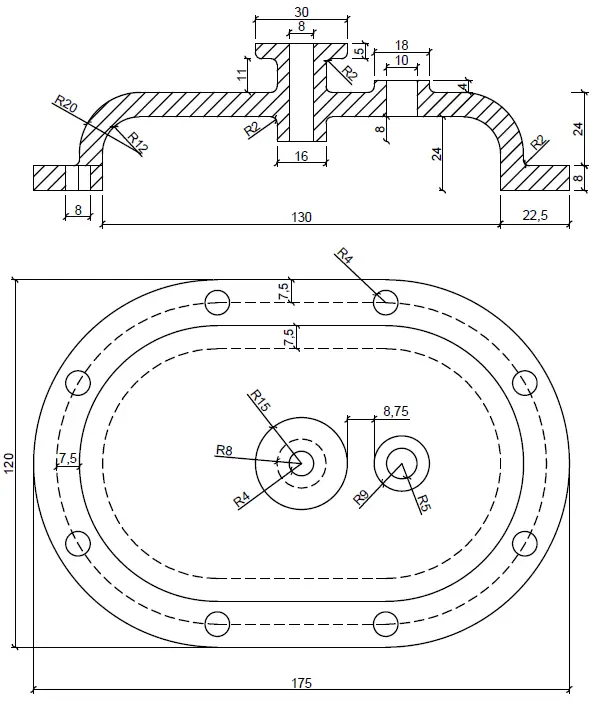
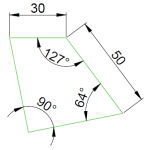
And below you will find all dimensions you need to know to replicate the design with accuracy.
Without further due, let get into it
Step 1
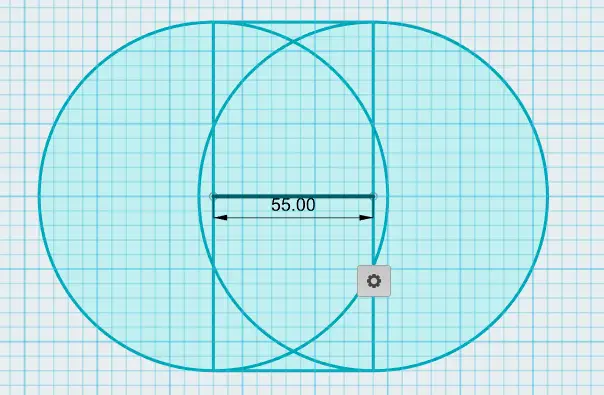
As usual, we will start with the 3D sketch we judge the most convenient to help propagate sketches into 3D. It depends on how you look at it.
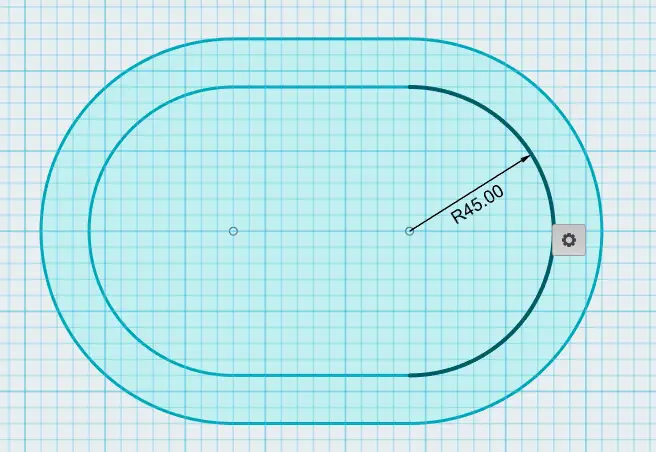
I will start with the sketch of the second image.
I first need to get this sketched
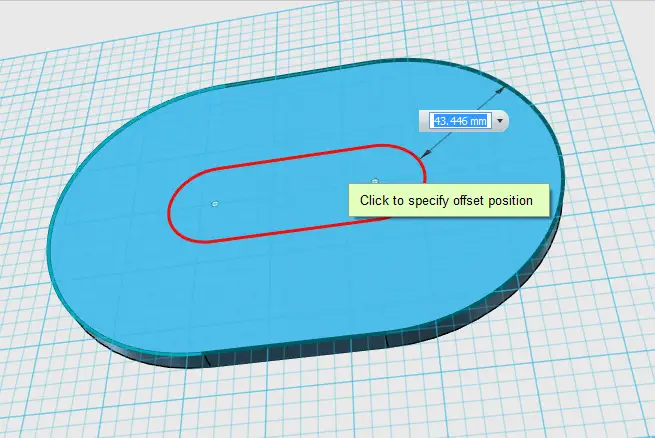
Step2
Use the offset command to create other shapes.
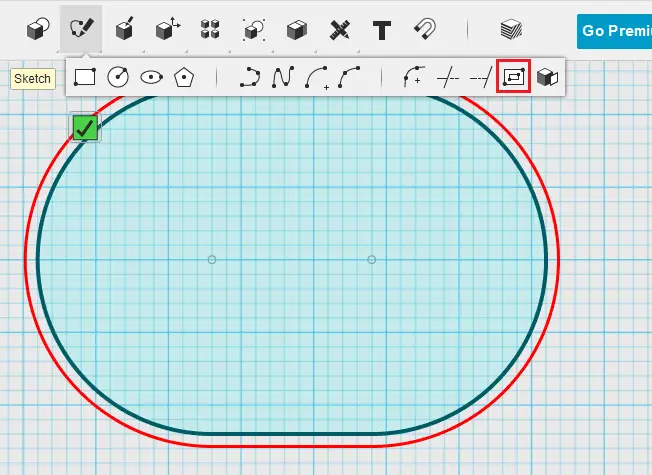
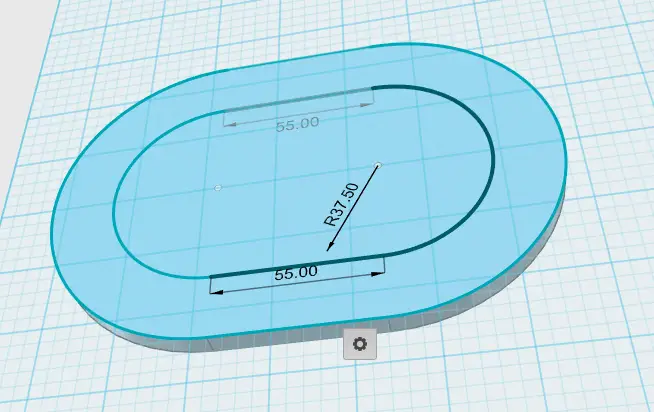
Step 3
Here is what you should be left with after the previous stage
Step 4
Extrude both shapes in opposite directions, the biggest one by 8 and the smallest one by 24. (You might need a few steps before Tinkercad allows you to extrude both independently. You may just decide to copy and paste, tweak it a little bit before joining both objects again)

Step 5
MERGE Both, and FILLET the upper edge by 20 and flat edge by 2.

Step 6
Turn the object on his belly, use the previously created sketch and the FILLET command to create the following shape.
Step 7
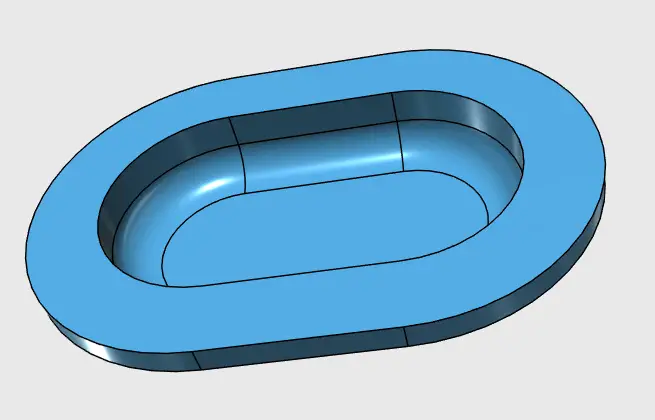
Here is what you need to have
Step 8
Extrude the shape created in the previous step by 24 inwards.
Step 9
Delete the 2D sketches and FILLET the inside edge by 12
Step 10
Create a cylinder and place in on the top of the whole.
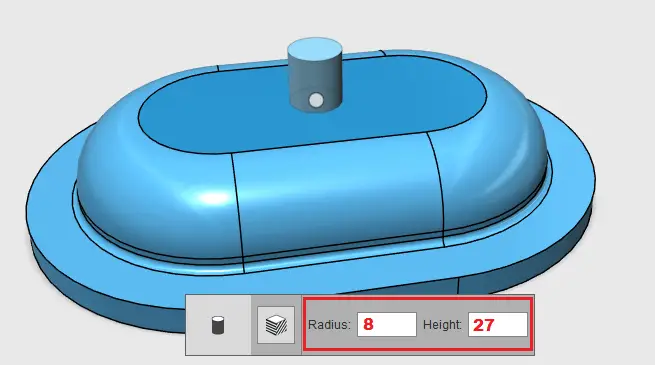
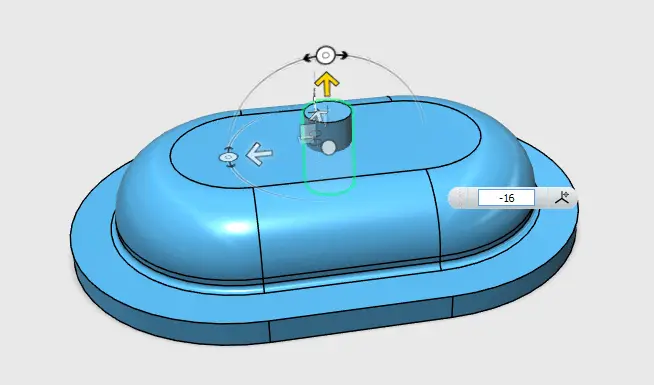
Step 11
Move the cylinder downward by 16, and merge the whole.
Step 12
Place a cylinder of Radius 15 and height 5 on top of the previous cylinder
And create a cylinder of radius 4, longer enough to help create the circular hole in the middle of the previously created cylinders
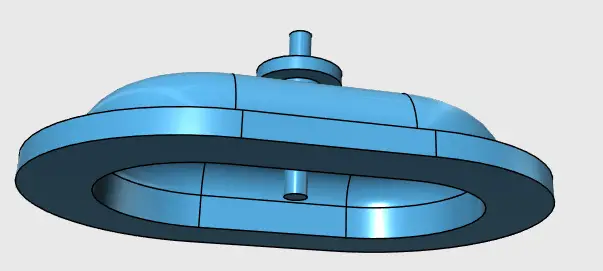
Step 13
Merge the whole except the last created cylinder, and subtract the latter from the whole.

Step 14
Do the same to create the other part of the design
Step 15
FILLET necessary parts of the object to complete the project.
3D Projects (Good 3D practice exercises)
- 3D Design project for beginners
- An easy Modeling 3D project
- 3D Design project for beginners – Modeling A Stool
- 3D design project for Beginners – Modeling A table
- CAD projects for Beginners using Tinkercad
- Modeling a Vase with Tinkercad
- How to assemble with Tinkercad
- Beginner’s tips – Autodesk Tinkercad
- Design a mechanical part with Autodesk Tinkercad
- Modeling with AutoDesk Tinkercad
- REVOLVE AutoCAD
Related posts:
 Autocad 3D: Save Your Time With These Tricks
 3D Design Project for Beginners – AutoCAD
 3D Design Project for Beginners – A Table
 3D Design Project for Beginners – A Stool
 AutoCAD Tutorial 00: AutoCAD Free Download Full Version
 Unique 2D Autocad Exercises to Improve Your Skill Now
 AutoCAD Tutorial 18: Basics of Annotation in AutoCAD
 Convert DWG to STL