In this AutoCAD tutorial, we have learned how to grow an array on an ellipse. Today we are going to combine that skill with others.
That being said, we suggest you master the tips we share on DAY 12 and the use of the ARRAY command in AutoCAD before trying this one out.
Learning AutoCAD Basics
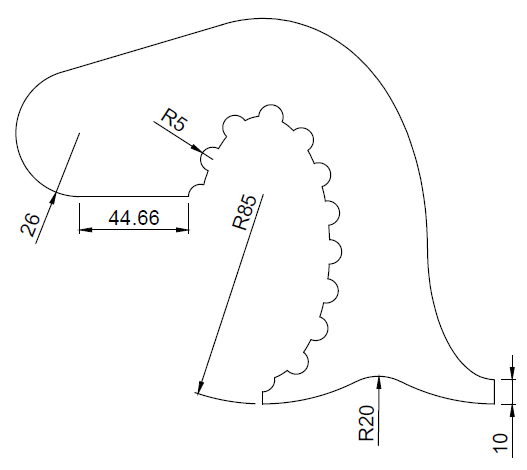
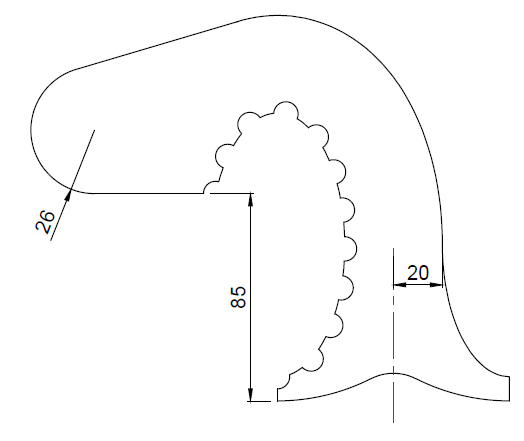
The following is the image of today’s experiment.
Execution
Now, we would love to provide the following images. These will lessen your confusion and help you know where to start.
Notice an ellipse of 55 x 108 in the figure below, it is what you have to use to create the array. Those small circles are equally spaced around the path of the array.
The center of the Big circle is shown on the image below and denoted by A.
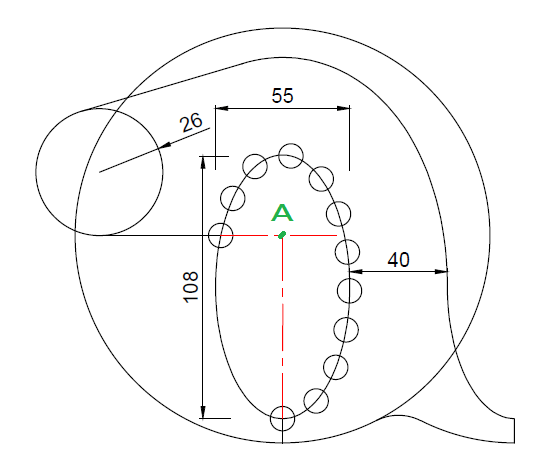
The following image gives a dimension that will be important while designing.
The red line on the last image shows a line of symmetry that will be used to get the down part of the object completed.
If this is confusing, I will invite you to check how to build such an ARRAY here.
Note you will be required to use the OFFSET command in this exercise.
Learn AutoCAD Basics in 21 DAYS
- Learn AutoCAD – Day 17
- Learn AutoCAD – Day 15
- Free AutoCAD Tutorial Courses
- AutoCAD tutorial– Tips and tricks
Related posts:
 AutoCAD Tutorial 00: AutoCAD Free Download Full Version
 AutoCAD and its Uses: What is AutoCAD Used for?
 Unique 2D Autocad Exercises to Improve Your Skill Now
 Learn AutoCAD Basics: DAY 4
 Learn AutoCAD Basics: DAY 13
 AutoCAD Tutorial 19: Convert Spline to Polyline
 Save Your Life With the SPHERE Command in AutoCAD
 AutoCAD Tutorial: Breakline AutoCAD
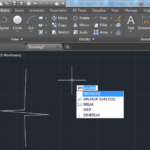
Draw the Ellipse. Things will start unfolding from there
Hey!
How do I even position the smaller circle on the bigger circle? I tried starting with the ellipse also…got stuck trying to figure out the location of the big circle centre.
If you draw the ellipse and create those circles around the ellipse, you can use the appropriate one of those circles to start that 44.66 units line that will help you position it.
How can I make the incomplete array path? Can you please help me to do it?
Okay, I think I’m the only one stuck on this part, but can someone help me get the line from the 40 Unit offset to the R26 circle?