It’s been fun playing with Autodesk Tinkercadlately. In this post, we are longing to get down to the nuts and bolts of really jumping into Tinkercad and start creating from the first day.
Tinkercad tutorial
2D sketch
Ninety percent of the time, you will start your design with a 2D sketch while using Tinkercad. It is more than important to be knowledgeable in 2D sketch before moving to forward.
Coming from AutoCAD, I had a little trouble finding my way using Tinkercad while completing 2D sketches, but things surely went smoothly using the background I had gained on the extended use of AutoCAD.
If you are interested in mastering 2D, I will suggest you take the 21 days of 2D challenge if you have not taken it yet.
Transitioning from 2D sketch to 3D
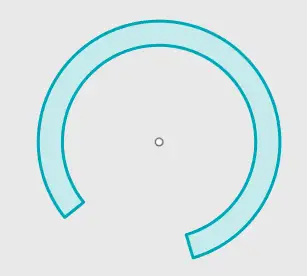
If you would like to obtain an object like the one below: To get the 3D model on the left, you will be better off creating the 2D sketch on the right and extrude it to obtain the one on the left. (that is not the only way though but it is the more convenient)
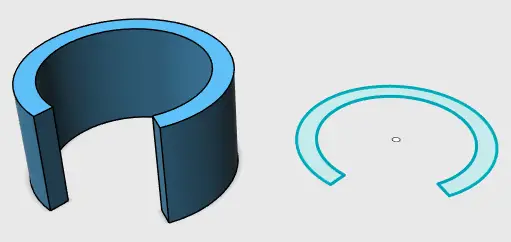
That’s where 2D sketch come to your rescue.
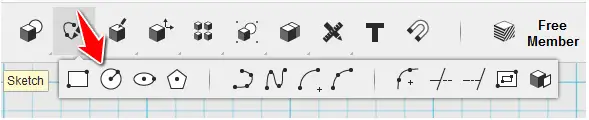
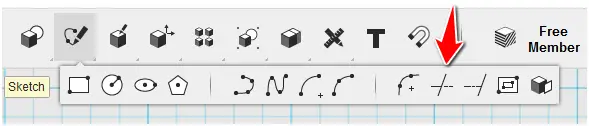
In the current version of Tinkercad, here are the tools that allow you to sketch in 2D.
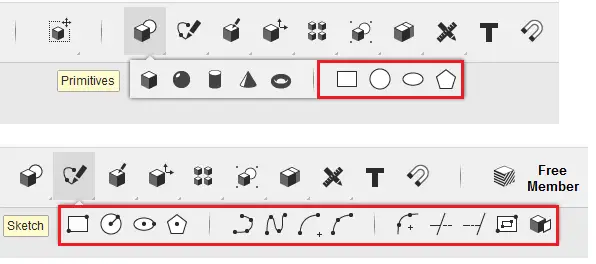
The following tools play the same role, at the only difference that the creating process is different.
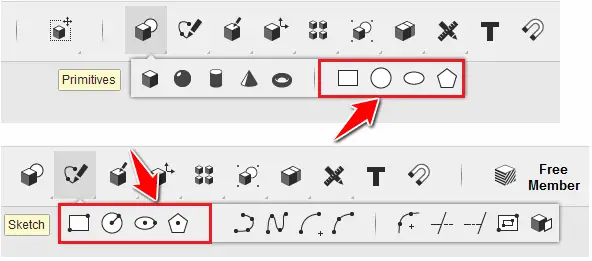
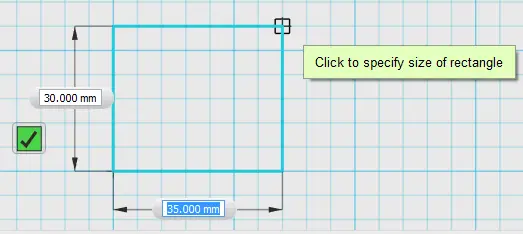
Let’s say you want to create a rectangle using the RECTANGLE tool on the Primitives tools-bar, you will have to indicate the length and the width of the rectangle and then place it on the drawing window.

Using the second alternative, we are given the freedom to choose the starting point and the diagonal ending point of the rectangle, and we can alternatively specify the dimensions of each side (width or height) of the rectangle.
The same goes for the circle, the ellipse and the polygon.
let’s now consider the simple 2D figure below.
How do we actually get this done in Tinkercad.
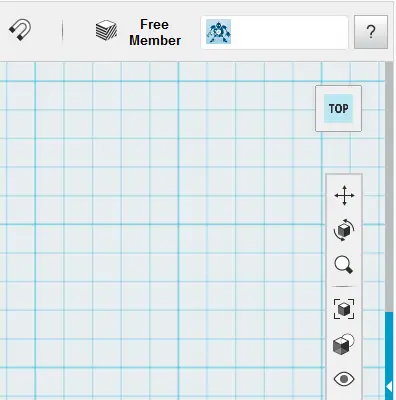
First thing, make sure you are on a 2D face.
To switch to a 2D face, Click on the upper side of the cubic form on the upper right side.

You should see the following after clicking
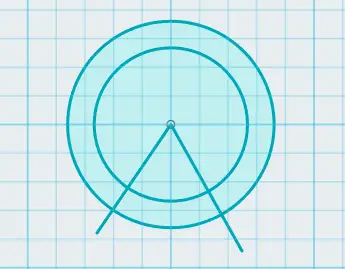
Create 2 circles with the same center using the sketch circle. Both circles should be in the same entity.
Select the center of the first circle, and then specify a radius. Start the second circle using the same center as the previous circle immediately. then, Draw a line using POLYLINE.

- Click on the icon shown above
- Click on the created sketch (to edit the sketch)
- Select the center of the circles as your first point
- Select a second point outside of the two circles to form the first line
- Press ESC
- Restart from step 1 but at step 4 select a different point from the one already selected but it also has to be outside the circles.
here is the result
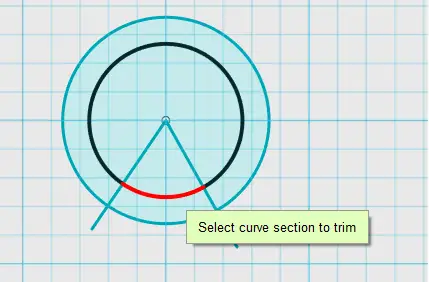
Now we can use the TRIM command to removed the unwanted part.
- Click on TRIM
- Click on unwanted part to delete them
And you should end up with the following.

To get a 3D model from this similar to the one we had at the beginning of this post, you can simply get on an isometric view, select the 2D sketch and Extrude.
To get on an isometric view, you can click on the ORBIT icon.
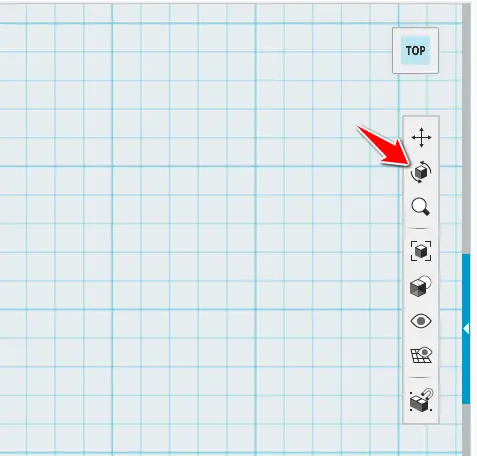
The following will appear at the center of the drawing window.
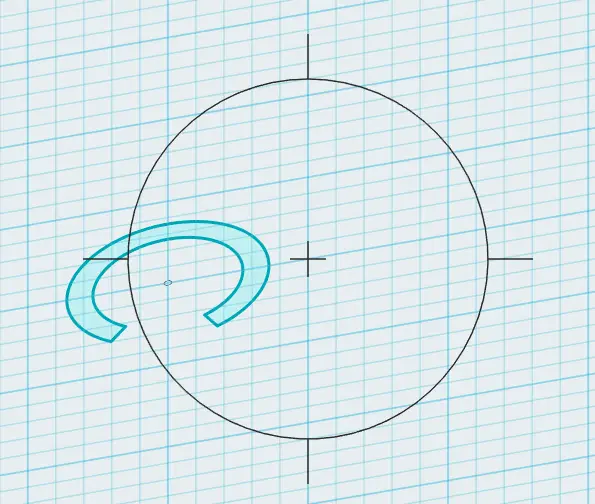
Click in the middle of the circle, hold and drag until you have the wanted view. Press ESC when you are done.
Now Activate the EXTRUDE command
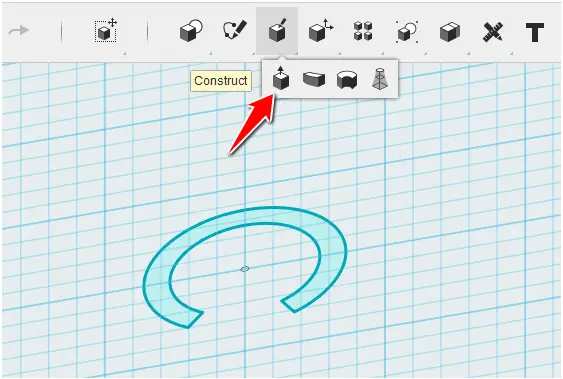
Select the 2D sketch and pull the white arrow upward (or downward)
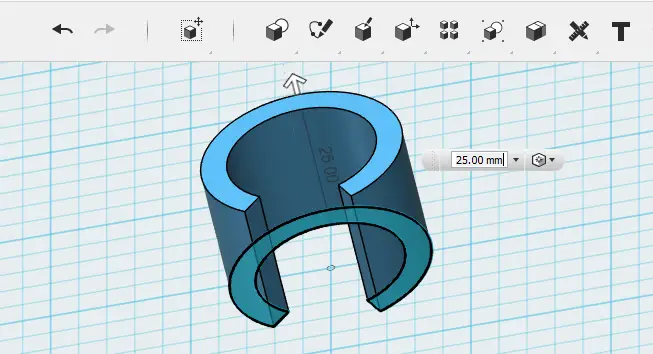
And there you have it.
We have extensively created 3D objects here using Tinkercad, and in each post, we have made sure the most important instructions were displayed to help you follow the tutorial with no hassle.
Going through these small projects will assure you get the complete feeling of what modeling with Tinkercad is like.
Remember you can always hover the cursor on any icon, and a little description box will pop, in which information will be given about the icon, and you can hit the F1 button on your keyboard to access the help window as well.
Tinkercad video tutorials
Here are some videos likely to help you take the digestion process to the next level.
You can watch the whole series here.
3D Projects (Good 3D practice exercises)
- 3D Design project for beginners – AutoCAD
- AutoCAD 2D to 3D
- An easy Modeling 3D project
- 3D Design project for beginners – A Stool
- 3D design project for Beginners – A table
- CAD projects for Beginners – Tinkercad
- REVOLVE AutoCAD
- How to assemble with Tinkercad
- Beginner’s tips – Autodesk Tinkercad
- Design a mechanical part with Autodesk Tinkercad
- Modeling with AutoDesk Tinkercad
Related posts:
 Model a Vase in AutoCAD Using The Revolve Command
 Modeling a Vase With Tinkercad
 3D Design Project for Beginners – A Stool
 How to Assemble With Tinkercad
 Beginner’s Tips – Autodesk Tinkercad
 An Easy Beginner 3D Modeling Project
 Design a Mechanical Part With Autodesk Tinkercad
 Best Mouse for 3D Modeling