Some of the early 3D printed models or objects that took the world by storm and introduced 3D printing to a wider audience involved the printing of prosthetics. Between 2015 – 2017, there were multiple attempts by kids to 3D print functional prosthetics and many of these attempts were successful. Although, how well the printed prosthetics functioned over time is not known due to little or no research into 3D printed prosthetic use, but 3D printing prosthetics is a task that can be done with the right knowledge.
If you are interested in 3D printing prosthetics, then you will definitely like to know more about how compatible these prosthetics are and if they are truly functional. According to MachineDesign, the early prints were not so reliable and comfortable for users. This was due to limitations within the 3D printing technology itself and the available materials a 3D printer could print with.
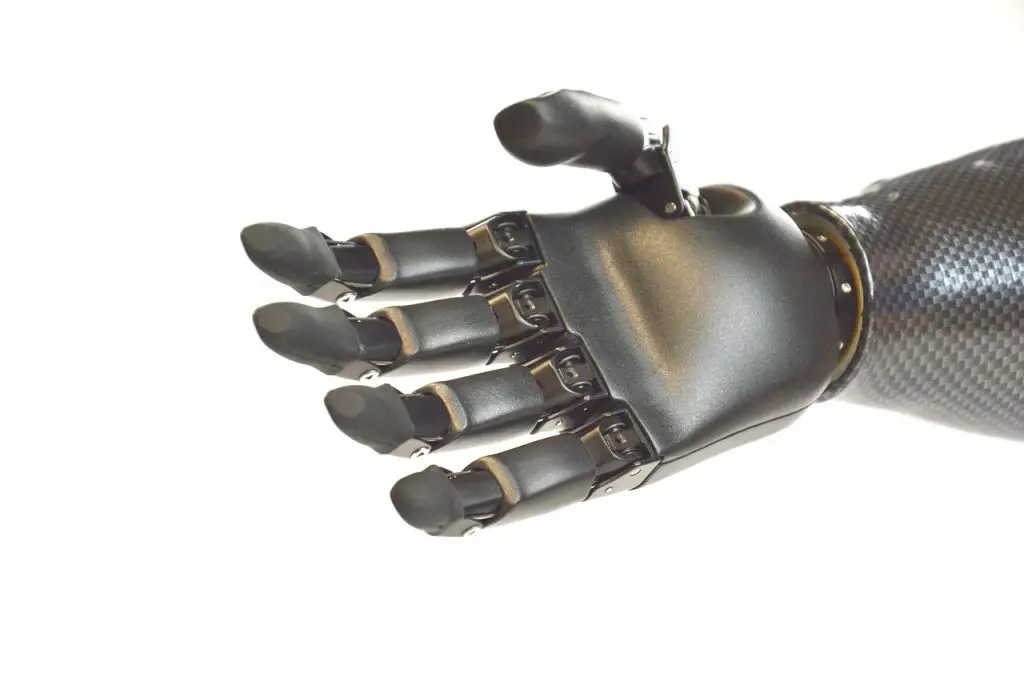
In three to four short years, the 3D printing community has come a long way. There are practically few materials left that you cannot 3D print with and the printing techniques have also evolved in terms of quality, speed, and accuracy. According to E-NABLE, a company that produces affordable prosthetics, the major challenge with 3D printing prosthetics is durability as printed parts break far more than traditional prosthetics. To solve this problem, E-NABLE made use of a material called Filaflex which delivered exceptional results with a catch. Using Filaflex was expensive and 3D printed prosthetics cost approximately $2,000 which eliminated the promise of a durable, functional, and cheap prosthetic for public use.
Regardless of the challenges 3D printed prosthetics currently face, the practice is here to stay and many DIYers now choose to 3D print prosthetics as regularly as they need them when older prints disintegrate. So if you chose to go the DIY route, here are some important tips to know about 3D printing prosthetics.
Tips for 3D Printing Prosthetics
Although a $2000 prosthetic hand cannot be called cheap, when compared to other traditional options this cost becomes more attractive. The option of also constantly updating 3D printed prosthetics is also another reason why 3D printing may be the future of prosthetics development. The tips that will be discussed here cover design, selecting materials, tools, integrating sensors or embedded electronics, and other ideas. Starting with:
Define Limitations
The first step to building and prosthetic – using traditional means of a 3D printer – starts with the design and definition of the features of the prosthetic. The choices to make are quite varied and they include:
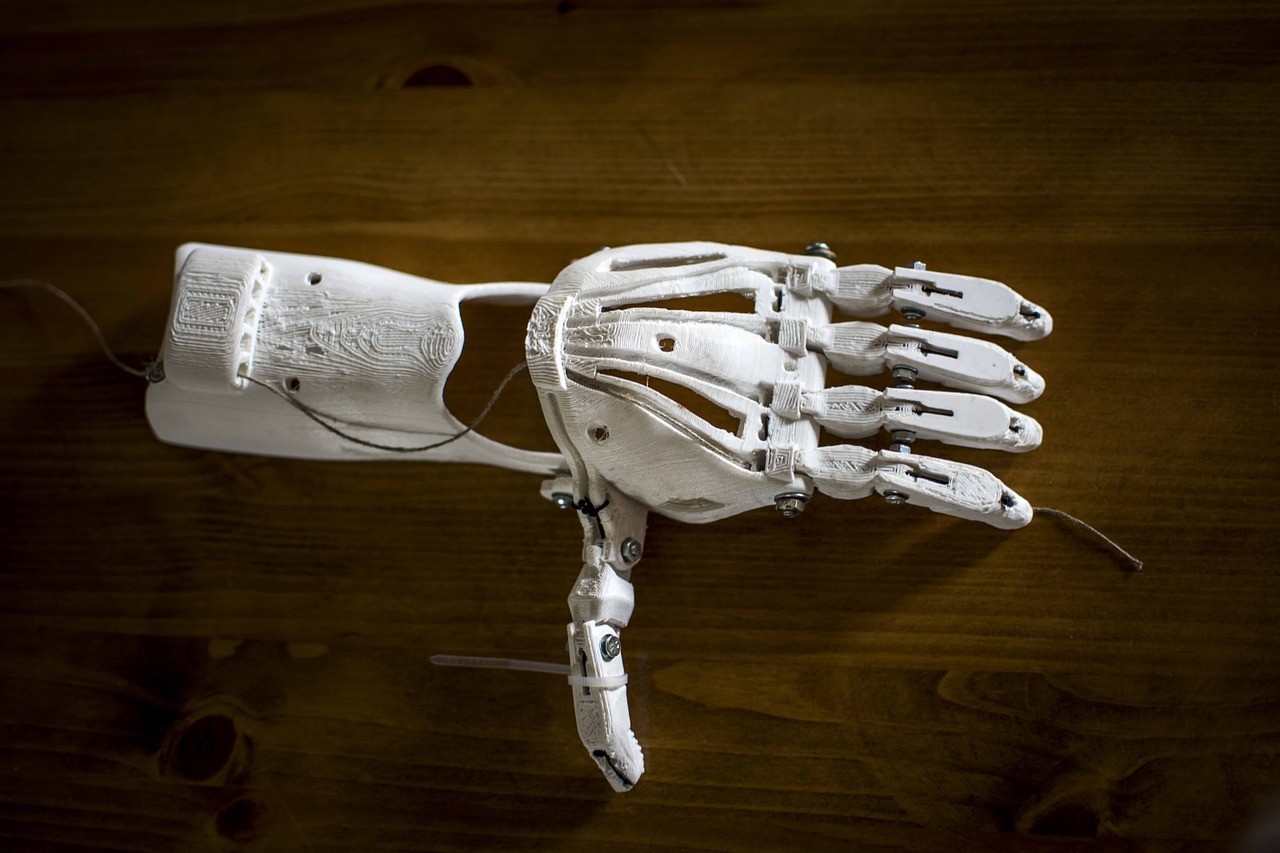
- Mechanical or Intelligent Prosthetics –Mechanical prosthetics refer to options that are not equipped with electronic hardware and are limited in features. Although they can help with grasping objects, these prosthetics are generally tendon-driven and can be used to grasp simple objects. Intelligent or smart prosthetics refer to prosthetics with electronic hardware or devices such as sensors. These embedded devices lead to a more proactive or intuitive prosthetic which can react to muscle and nerve movements.
- Joint Design – One of the benefits of 3D printing prosthetics is the ability to eliminate the need for pins holding joints in place. You can choose to design a pin-less prosthetic or go with the option of pins holding joints in place. In most cases, were more degree of freedom is required, pins may have to be used to ensure joints function properly.
Materials to Use
The next step is deciding the best material for your prosthetic design. Prosthetics are expected to be durable and flexible enough to execute diverse functions. Thus, making use of the traditional hard plastic when 3D printing more-responsive prosthetics may not cut it. In most cases, if you are recreating an idea found online or in forums, the issue of material choice will already be solved and the best options for the design will be provided. If this is not the case, then these are the features to consider when choosing materials:
- Durability and flexibility – If the prosthetic is to be constantly used, then a durable yet flexible material must be used when 3D printing the prosthetic. A durable filament will ensure the prosthetic works long term without the need for change.
- Compatibility with skin – Most prosthetics come in close contact with the skin which means if the material used is too hard or rough, it could lead to chafing and discomfort to the user.
Choosing a 3D Printer
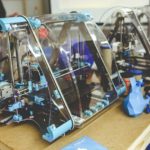
There is so much that goes into choosing a 3D printer for printing prosthetic that it may require a separate post on its own. When choosing a 3D printer, diverse considerations must be made. These considerations include determining the size of the prosthetic to be printed, as well as, its 3D model. Other considerations include print quality, the materials the 3D printer can print, its accuracy levels, and grade.
You can choose to 3D print with an entry-level 3D printer but one must realize that the quality of prosthetic it would produce may not be comparable to the prints coming from an industrial-grade 3D printer. This means the quality of the prosthetic and how its intended use has a role to play in choosing a 3D printer. But do not fret, because in many cases, a semi-professional 3D printer with an average build space can be used to 3D print prosthetics. All that you will need is enough experience using it as your tool of choice as many DIYers have developed prosthetics using desktop 3D printers of varying quality.
Lightweight Designs are encouraged
Prosthetics are expected to be supported by the limbs, carried around, and used constantly without limitations. If a designed prosthetic is too heavy for use on a daily basis, this means one of the important goals of developing one was not met. Thus, when designing prosthetics for 3D printing, allowances must be made to ensure the final 3D print is lightweight enough for regular use.
To accomplish this, the focus should be placed on using flexible lightweight filament for developing the sockets integrated into the prosthetics. Materials such as Ninja flex and Filaflex can be used to reduce the overall weight of the sockets and flexible sections of a prosthetic. If correctly used, this leads to an easily supported prosthetic as can be seen from the Hero Arms designed and 3D printed by open bionics.
Getting Your Prosthetic CAD Models and STL files
The 3D printing process starts with the design at hand which means you must know what to look for, how to edit CAD models or how to design models from scratch. This is because, although hundreds of resources are available online, these free resources do not take the prosthetic user’s exact measurement into consideration. Thus, the 3D models have to be modified or edited before use.
There are also hundreds of CAD applications that can be used to handle edits. Blender and FreeCAD are examples of free options DIYers can use to make edits or design models from scratch. For designers who are CAD-savvy, modeling the prosthetic from scratch may be the better option as it allows you to customize the 3D model from scratch. Also, designing from scratch provides the opportunity to create aesthetically pleasing prosthetics that will please the user. It is also important that the final 3D model is printable and does not consist of sections that will affect its quality.
This means tolerance levels must be adhered to, hole designs for pins must be concise, and the prosthetic designed according to an orientation that is easy to print. You can also choose to run the 3D model through the 3D printing modules available in CAD files as they can repair the models. Getting the STL file is an easier process and you can choose to use the slicing application you are comfortable with.
Scale the Prosthetic to Fit
As stated earlier, generic or already designed 3D models come in dimensions different from the end-user. Thus, the prosthetic must be scaled to fit the new user, as well as, the dowel pins, screws, and other fastening devices to be used. If you intend to also make use of embedded devices and sensors, then the size of these devices must also be considered.
When scaling sections for dowel pins and screws, it is generally recommended that smaller sized holes be used. A drill press or a hand drill can then be used to widen the hole to meet the required recommendation. Making use of larger holes can lead to structural problems, stringing, and other defects. In most cases, generic designs or STL files come with preset sizes for these sections and they should be adhered to even when scaling other lengths such as a component’s length or width.
When scaling, ensure you take photographs of the limb the prosthetic is being built to fit. This ensures the correct measurements are used to modify the design. You can use the photos to determine the scale for every aspect of the prosthetics. It also ensures modifications that fit can be made with ease.
Print the Rigid Parts of the Prosthetics First
Now to the 3D printing process. It is recommended that the rigid parts without any moveable options such as fingers be printed first. The rigid parts could be the parts attached to the femur or tibia and the flat surface of the palm. Depending on your design, some supports may be needed to ensure rigid parts come out well. But it is advisable to eliminate the use of supports when designing the 3D model as this simplifies the printing and post-processing task once the print is completed.
To get the perfect rigidity that fits your application, you should experiment with infill percentages until you are ok with settling down with one. If using an average desktop 3D printer which is not industrial grade, use enough glue and blue tape to ensure warping does not occur during the printing process. A printer with a heated bed will also work excellently to reduce the possibility of warping.
Printing the Flexible Prosthetic Parts
The joint of prosthetic hands should be flexible yet durable enough to handle constant motion. This means while you can choose to use a hard durable filament for the rigid parts, the flexible areas must be printed with flexible filament. There are diverse types of flexible filament options to use but once again your 3D printer must be able to print the material chosen.
When replacing rigid filament with more flexible options ensure that the settings of the 3D printer are tweaked to meet the printing specifications of the new filament. Here again, a good knowledge of how the 3D printer being used functions is important. If the prints are not turning out so well, tweak the settings by slowing down the print speed to ensure it forms correctly after hitting the print bed. In situations where the filament strings when forming, increase the temperature and try again.
You should also ensure a sticky bed is used when printing flexible parts to eliminate warping. In situations where you are not so conversant with the 3D printer being used, referring to the user guide or automating certain processes such as bed leveling, temperature and print speed can help.
Assembling the Prosthetic Components
The assembly process should be guided by the initial 3D model or the instructions provided by the designer if you used generic STL files. For mechanical models, the wrist and joints can usually be assembled using hot glue if there are no pin spaces for the design. Screws should be fastened in place using hand drills until the assembly firmly fits.

Elastic filament strings generally serve as tendons due to their flexibility and durability which ensures they do not break with constant use. Some 3D printing professionals also recommend using hand-made piano wire springs to when assembling joints. This should obviously be done if space has been made for them. Electronic components or devices should also be assembled within the sections created for them. In some cases, a knowledge of electronics and soldering may be needed to integrate and provision electronic hardware.
Post Processing
3D prints don’t always come out as intended or the user may need additional aesthetics to ensure the print looks pleasing to the eyes and this is where post-processing techniques are important. If supports are used when 3D printing the components for the prosthetics, the supports can be removed by breaking them off or dissolving them in water depending on the type of material it consists of.
Defects such as uneven surfaces and bumps can be removed by applying sandpaper to the 3D print. This should be done carefully until the elevated area is resurfaced. To achieve a more aesthetic finish, you can choose to paint the surface using a brush or a small spray gun to accomplish the task.
Prosthetics can also be made more comfortable in a variety of ways. This includes placing foam pads around joints or sockets to ensure they do not chafe the skin when moved. Mechanical prosthetics can also integrate the use of straps to relieve some of the weight from the limbs. Velcro straps can be used to fasten parts of the prosthetic to the body.
Conclusion
There is a great need for affordable prosthetics today and 3D printing is slowly but surely filling the gap. This is due to the availability of diverse materials and the ability to 3D print them. Although the traditional prosthetic still retains some advantages in terms of durability, 3D printing is catching up. It is important to note that advances in metal 3D printing will also change the prosthetics landscape in the near future. This is because when 3D printing with titanium and other metal alloys becomes cheaper and more mainstream, traditional prosthetic manufacturers will also explore its benefits and apply them.
With continuous growth in the 3D printing industry and the technologies powering it, 3D printed prosthetics will become the popular thing to do within a couple of years.
Related posts:
 The Top 6 3D Printers Under 500 USD
 How to Get 3D Models for Printing
 3D Printing Accessories for your 3D Printer
 Rare 3D Printed Moving Parts You Can Build Now For Free
 How to Edit STL Files
 Revolutionizing Healthcare with 3D Printing: 5 Ways Additive Manufacturing will Change Medicine
 3D Printing Revolutionizing the Oil and Gas Industry One Nozzle at a Time
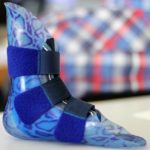
 The Advantages of a 3D Printed Cast (Orthopedic Casts)