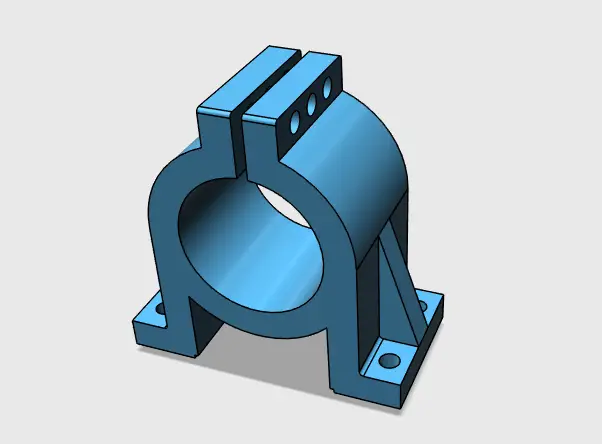
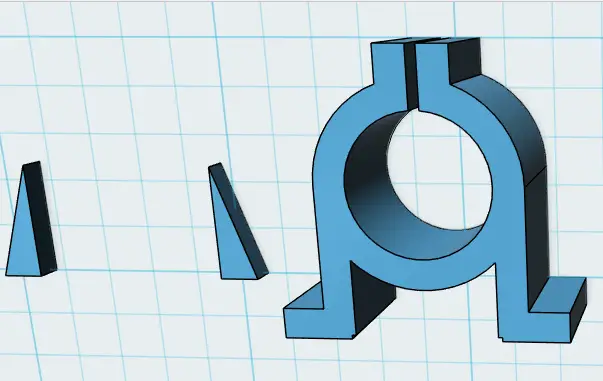
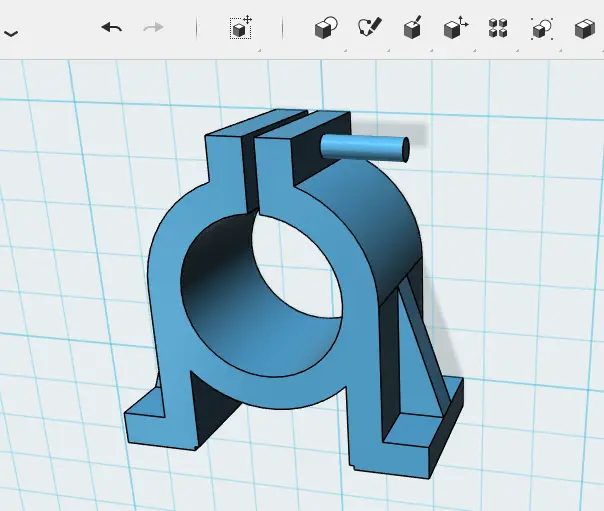
Here is another 3D projects to help beginners grasp how assembling is done in Tinkercad.
Here is the project we will be working on in this sessions.
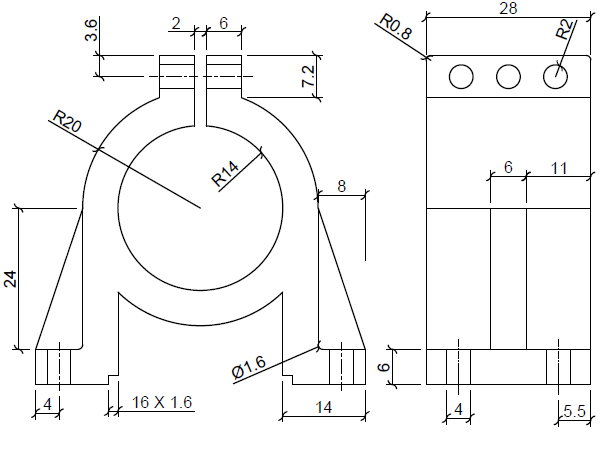
The following image will give us information that will help replicate the object of today’s exercise.
How to assemble With Tinkercad
The ultimate tool helping you to assemble in Tinkercad it the SNAP tool.

Most time, designing 3D objects comes all down to, designing many parts and assembling them at the end to form the whole.
Let model the object above to practice assembling using Tinkercad.
For the modeling, we will use the dimension above.
Step 1
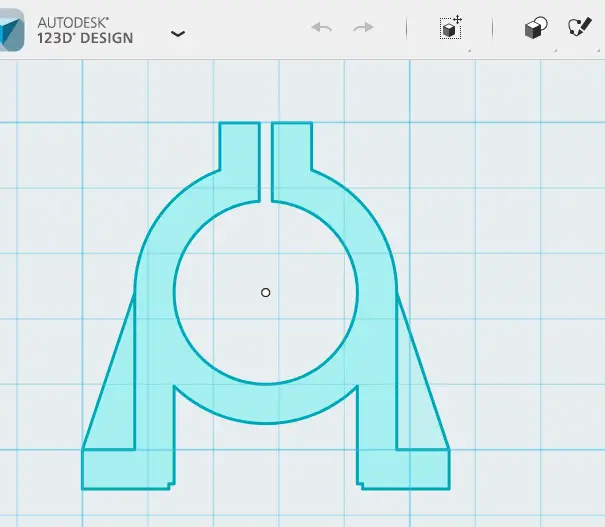
Sketch the following 2D image with Tinkercad following given information
Step 2
With this, we are almost done with the sketching part of this design project. Now extrude the middle image by 28
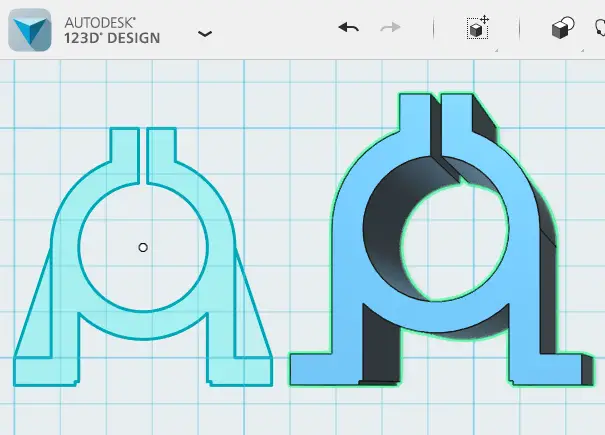
(I’ve kept a copy of the original object to make it easy to see what I meant in this step)
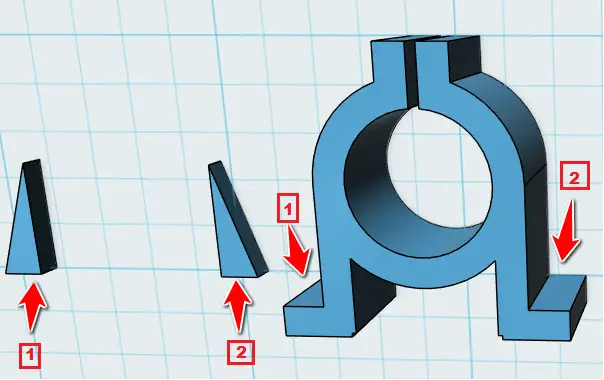
Step 3
Extrude both wings by 6 (I deleted unnecessary information)
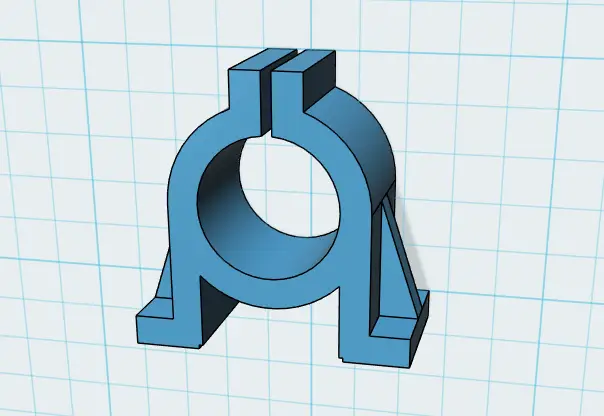
Step 4
Now we need to put those wings where they belong to. We will make use of the SNAP tool.
What you do now is, Activate the SNAP command, click on the down surface of a wing, and click on the top surface of the leg of the main object. Each on its turn.
It might be difficult to select those two faces without using the ORBIT tool. Remember you can select the first surface, use the ORBIT in between to help you rotate the view, and then select the second surface.
One of the solution is to rotate those wings and put them in a position where you will be able to select the concerned surfaces without having to use the ORBIT tool.
You should end up with the following image.
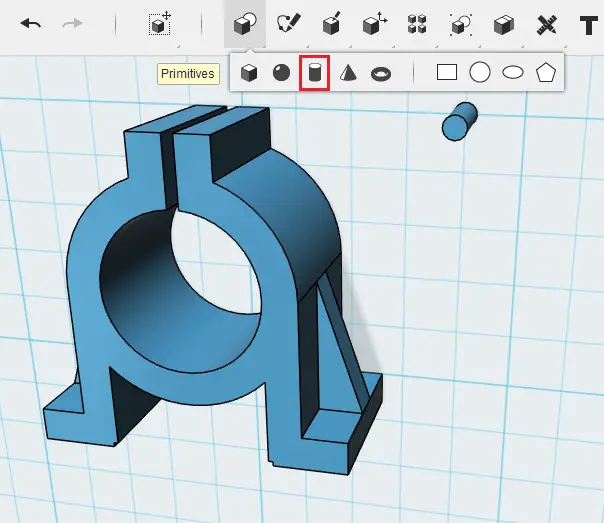
Step 5
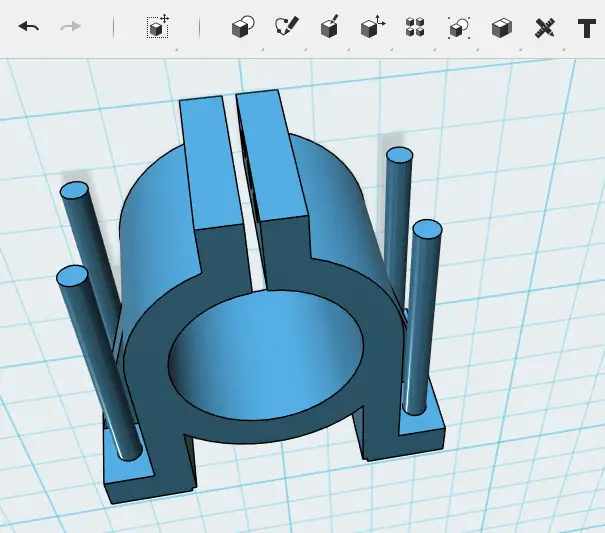
Now we will create a cylinder with the radius 2 and its height 14 units (You can go above 14 units or length but not below)
Step 6
SNAP one face of the cylinder on the appropriate surface as shown on the image below
Step 7
Copy the cylinder and move a copy 7 units to the left, and a copy 7 units to the right. You can use the keyboard key combination Ctrl+C and Ctrl+V. Remember to un-group the whole after SNAPping.

After pressing Ctrl+V, you need to select the axis you want to conduct the translation on, and enter the appropriate distance. Move one copy by 7 units and the others by -7 units.
Step 8
Select all the cylinders and move them 14 units inward.
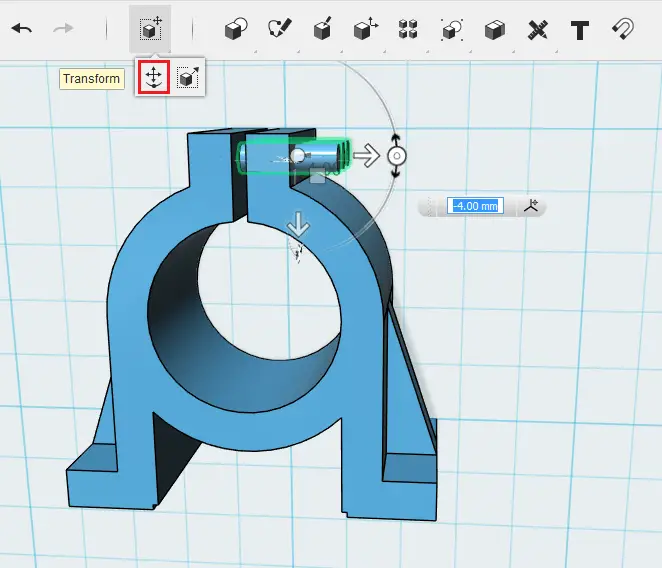
Step 9
Subtract the cylinders from the whole.
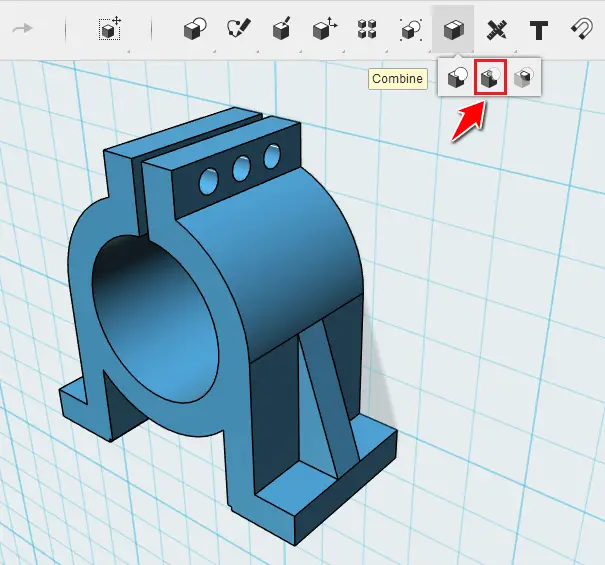
Step 10
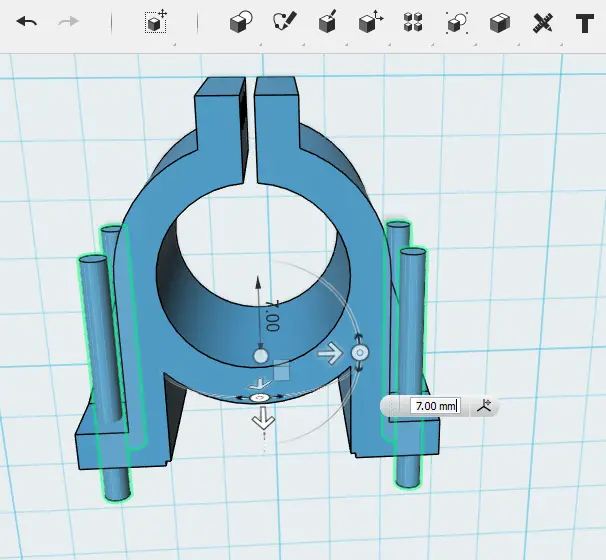
Create the last four cylinders, and use the SNAP tool to have the whole looks like the following.
Step 11
Select those cylinder and move them downward.
Step 12
Subtract those cylinders from the whole.
Step 13
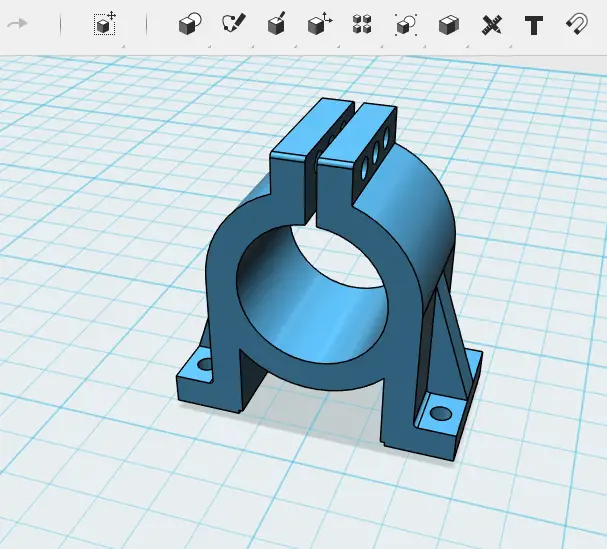
Use the FILLET command to make the object identical to the first image we have at the beginning of this post, and you are done.
3D Projects (Good 3D practice exercises)
- 3D Design project for beginners – AutoCAD
- AutoCAD 2D to 3D For Beginners
- An easy Modeling 3D project
- Modeling A Stool
- 3D Modeling A table
- CAD projects
- Modeling a Vase with Tinkercad
- How to assemble with Tinkercad
- Beginner’s tips – Autodesk Tinkercad
- Design a mechanical part with Autodesk Tinkercad
- Modeling with AutoDesk Tinkercad
Related posts:
 Model a Vase in AutoCAD Using The Revolve Command
 Modeling a Vase With Tinkercad
 3D Design Project for Beginners – A Stool
 Beginner’s Tips – Autodesk Tinkercad
 An Easy Beginner 3D Modeling Project
 Design a Mechanical Part With Autodesk Tinkercad
 Modeling With AutoDesk Tinkercad
 Best Mouse for 3D Modeling