Are you looking to get into the world of Arduino and see what you can do with this technology? Below, there are projects for beginners perfect for a low level of programming. These projects should give you a basic idea of the potential of Arduino and maybe you can find inspiration to learn more about this versatile platform.
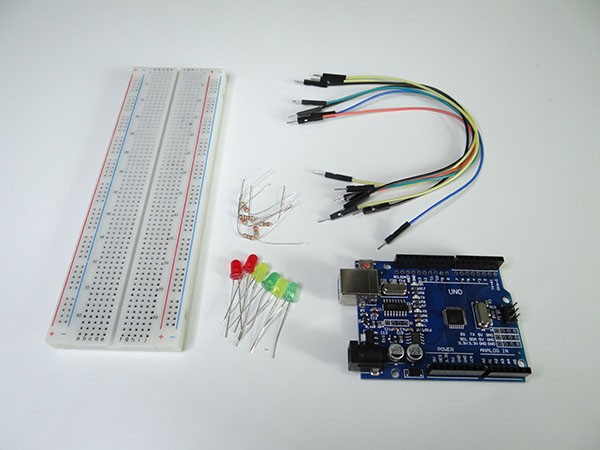
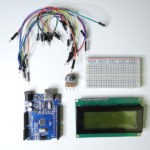
Arduino is open-source hardware design, so everyone with enough knowledge can make their own boards. There are also lots of beginner’s kits that include an Arduino Board and basic components, such as sensors, breadboard, relays, controllers, LEDs, jumper wires and motors. All projects mentioned below use only the most basic Arduino components.
Arduino Projects For Beginner list
- Arduino Projects For Beginners #1: The Knight Rider
- Arduino Projects For Beginners #2: PIR Motion Sensor
- Arduino Projects For Beginners #3: Ultrasonic Distance Sensor
- Arduino Projects For Beginners #4: Arduino Decibel Meter
- Arduino Projects For Beginners #5: Asynchronous LEDs Blink
- Arduino Projects For Beginners #6: Arduino DC Motor Control
- Arduino Projects For Beginners #7: Rainfall Detector
- Arduino Projects For Beginners #8: RGB LED Arduino
- Arduino Projects For Beginners #9: The Stepper Motor
- Arduino Projects For Beginners #10: Arduino Relay Project
- Arduino Projects For Beginners #11: Arduino 7 Segment Display
- Arduino Projects For Beginners #12: Clap ON Clap OFF Light
- Arduino Projects For Beginners #13: Arduino Stopwatch Project
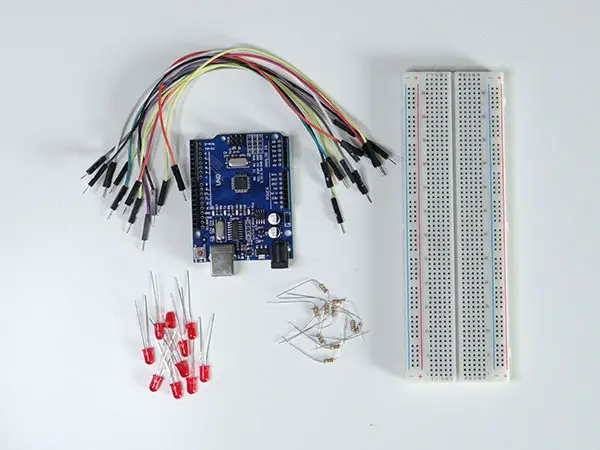
#1: The Knight Rider
The Knight Rider is simply several LED lights blinking one after another. It’s one of the easiest Arduino projects you can find. Before you start, prepare the following components:
- 10 LED lights
- Arduino Board
- 10 x 200Ω or 220Ω resistors
- Breadboard
With this project, you will learn to use LEDs for loops which will help you proceed to more complex projects. Start with connecting everything together.
Always use a resistor or you can damage your Arduino Board and your LEDs. Even though everything can work without a resistor, it is not worth risking your platform.
Take a negative leg of the LED and put it in the negative bar of the breadboard. Take the positive leg and put in the positive bard of the board. Connect the resistors to the LED and to the board with a jumper wire. Do the same for other LEDs.
Now, all you need to do is to upload a program. After everything is done, the Knight Rider should be working. You can change its speed and add more LEDs.
#2: PIR Motion Sensor
PIR sensor is a movement sensor so every time something moves, it sets Out to High. With this project, you can control the High state and the sensitivity of PIR. During this project, you will learn how to use LEDs and a piezo buzzer and how they can detect motion. Below, there are the components that you will need:
- Arduino Uno Board
- PIR sensor
- Buzzer
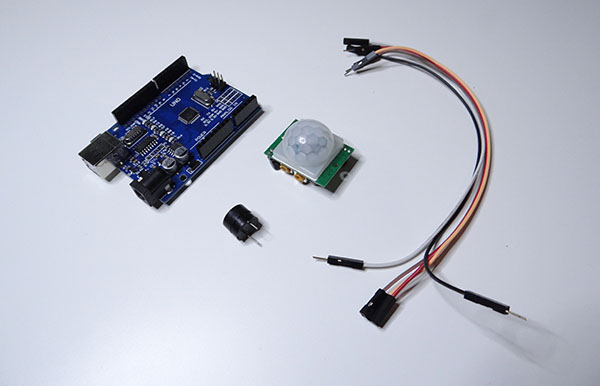
The first thing you need to do is to get all the connections right. You will need to take 5 jumper wires and connect everything. Keep in mind that you should take male-female connectors.
Now, upload the program to your Arduino. Set the frequency to 3,000 Hz. When everything is done, you will hear the sound (just like a blink when you work with LEDs) when your PIR detects the movement. You can change the delay time to change the time of the beep.
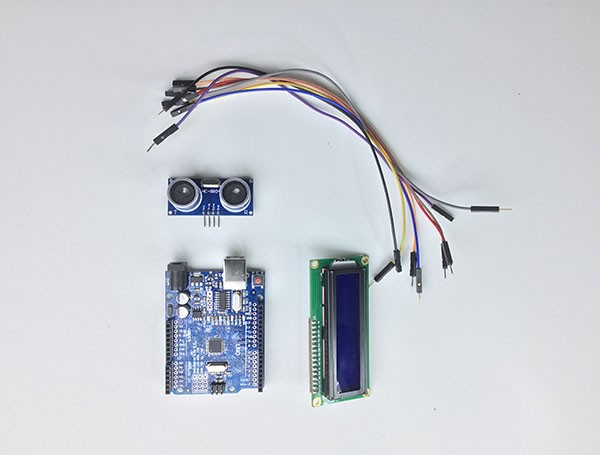
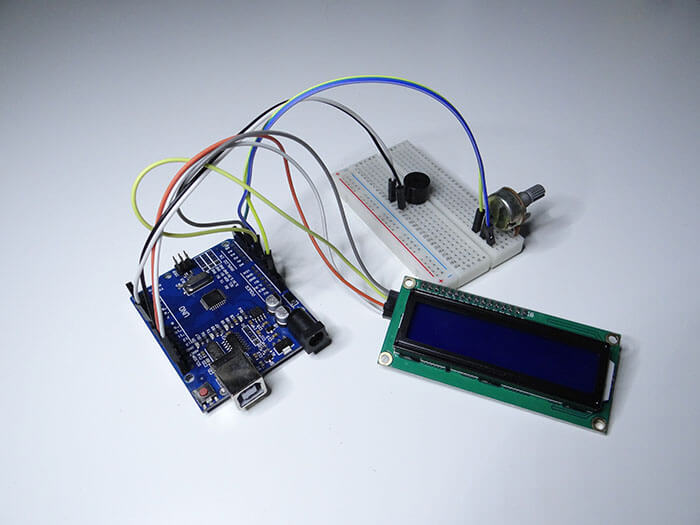
#3: Ultrasonic Distance Sensor
With this project, you will use a popular HC-SR04 ultrasonic sensor to allow your robot avoid obstacles and move in different directions. When you’re done, you will have a device that will sense the distance and display in on a screen.
Here is what you need to take for this project:
- Arduino Uno board
- HC-SR04 ultrasonic sensor
- LCD with I2C converter
- Jumper wires
Start by making all the connections with the jumper wires. At this point, you shouldn’t add your LCD. Now, take an LCD and connect it accordingly. After that, download the library using the Arduino IDE. Just open Sketch – Include Library – Manage Libraries – LCD I2C. And you’re done! This is a very quick project that gives you the skill necessary to build complex robots.
To make everything easier, it’s recommended to take an LCD with an I2C converter so you only need 4 cables to connect it to your Arduino board. The fits loop will be the LEDs setup and the second one is to control the lights. You can change its sensitivity by changing the value in the code.
#4: Arduino Decibel Meter
The aim of the project is to create an Arduino volume meter using LEDs and a microphone. Here is what you will need:
- Arduino microphone
- 10 x LEDs
- 10 x 200-220Ω resistors
- Jumper wires
- Breadboard
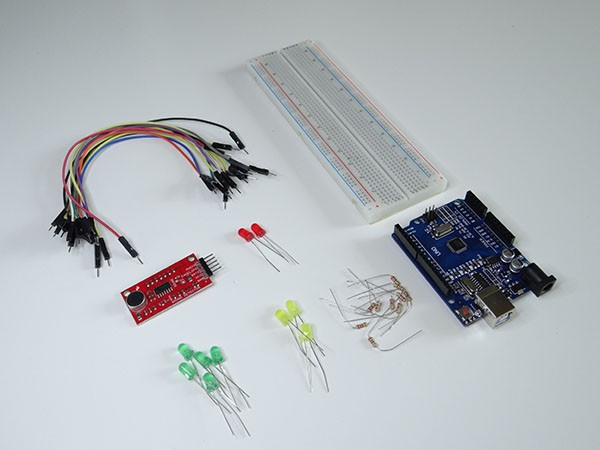
You can use any microphone compatible with your Arduino board that has an analog output. Moreover, the final result looks best if you take 5 green, 3 yellow and 2 red LED colors.
All you need to do is to connect everything using your Arduino board. Make sure LEDs and resistors are properly connected. Take male-male cables. Then plug the microphone module to the breadboard and you’re done.
- Charlieplexing LEDs With The Arduino BoardAdding LEDs to a project soon uses up valuable pins. What if you could control a row of 12 LEDs to show changing values with only 4 digital pins? There is a way and it is called Charlieplexing. It was first proposed in 1995 by Charlie Allen. It relies on two properties that you may …
- Arduino to LCD projects – Using 3 Different Types of LCDsThe Arduino IDE provides a serial monitor window which proves to be quite useful when it comes to printing values to debug a project. However, you can further enhance this functionality by attaching a small screen to your project that can provide feedback, display menus, and show results, improving its utility significantly. Moreover, this modification …
- Nokia 5110 Arduino Project From Start to HeroThe Philips PCD8544 driver chip is connected to a recycled screen from the popular Nokia 5110 phone. Because the screens are second-hand, the glass cover often has small scratches/blemishes. They are rehoused in a metal box on a PCB with 8 connections. You need to solder on the supplied pins. The screen is a Liquid …
- Arduino Touch Screen ProjectThe AZ-Delivery 2.4” TFT LCD Touch Display boasts 320x 240 pixels with 16-bit color. It has Touch capabilities, a built-in SD card drive, and plugs straight onto the top of an Arduino UNO or Mega. Amazon charges less than £11 for this device. It offers a major step up from the tiny SSD1306 128×64 monochrome …
- Alegoo Super Starter Kit and UNO R3 Project Reviews – Gift GuideAcquiring a solid foundation in electronics and programming starts with understanding the basics, tinkering, and expanding one’s knowledge base through practical experiences. The Elegoo UNO Project Super Starter Kit with UNO R3 allows every budding electronics and programming enthusiast to explore the world of electronics. To ease the learning and teaching process for students and …
- Mcp2515 Arduino Project: Using a Controller Area Network (CAN) with ArduinoThis guide presumes that the user is adept in integrating LEDs, potentiometers, and sensors into the Arduino platform, has worked with SPI and I2C devices, and is prepared to level up and initiate data exchange between Arduinos. Employing this network is more straightforward and more comprehensible than radio communication; however, it necessitates wiring between the …
- Learn How to Use a Multimeter Like A ProWhen you begin creating your own projects, whether using a breadboard or stripboard, you may encounter more complex circuits. You might also make minor mistakes, resulting in projects not functioning as anticipated. This is when you’ll need to learn how to utilize a multimeter to assist in troubleshooting your project. Your issues could be due …
- Arduino MOSFET ProjectIf you’re familiar with Arduino, you’re likely aware of the frequent need to incorporate motors into projects, especially those involving robotics. In a previous tutorial, we discussed using a transistor to control small motors. But what if you find yourself needing to control a larger motor? The solution to this requirement lies in using a …
- Arduino Communication With the nrf24L01At some point, most Arduino owners will decide that their next project requires communication between two of their microcontroller boards. You might want to control a long strip of NeoPixels decorating your room from the comfort of your armchair without tripping over cables or read the temperature and humidity of your greenhouse without putting on …
- A Review of the Grove Beginner Kit for ArduinoAnyone interested in developing electronics hardware and dabbling in IoT is recommended to start with Arduino projects. This is because the average Arduino kit opens your mind up to the possibilities of building unique ideas from scratch with just a board, soldering tools, and electronic components. The Grove Beginner Kit is one such tool that …
- A Practical Introduction: Controlling LEDs With ArduinoLED strips are one of the most popular light sources in the world today. From car modding, interior design, to cosplay, it’s hard to find a place where LED strips haven’t been used. Their size, ease of use, and fairly low price led them to become a staple for makers everywhere. They also make an …
- 21 IoT DIY Projects You Need to Replicate NowThe world currently makes use of approximately 30 billion IoT devices to build a more interconnected world where information sharing and automation is done with ease. Although a large percentage of available IoT devices are deployed across commercial facilities, the use of IoT for home automation in domestic spaces is at an all-time high. IoT …
- 25 Useful Shields for Arduino to Improve Your ProjectsBefore diving into the naming of the most useful shield for Arduino as the topic highlights, it is only right to provide a little background into shields for individuals who intend to work with one for the first time. Shields are pieces of hardware that give Arduino a specific purpose. That is the short definition. …
- Ubuntu vs Linux Mint: All You Need to Know Before Making a ChoiceAs Linux distros go, Ubuntu and Linux Mint are some of the more popular options out there anyone interested in using an operating system outside of the big two, Windows and Mac, are likely to explore. The reason why a new user is more likely to explore either Linux Mint or Ubuntu is due to …
- The Most Popular Open Source Tools for Home AutomationThe interconnected world is expected to change the way every industry functions and usher in industry 4.0 and this includes domestic households. Interconnectivity is expected to be driven by the Internet of Things (IoT) which consists of both hardware and the software needed to run entire systems. At the domestic or home front, the application …
#5: Asynchronous LEDs Blink
This is a very simple project to teach you the basics of blinking LEDs built with an asynchronous set. You need to take:
- Arduino board
- 6 x LED of any color
- 6 x resistor 200Ω
- Jumper wires
As you can see, this project uses the most basic elements of Arduino. The most important part is the hardware part. Always put the longer leg of the LED to the positive pin and the shorter leg to the negative pin. Plug the longer leg to resistors and the shorter leg to the breadboard. Always use resistors when working with LEDs.
#6: Arduino DC Motor Control
There are plenty of expensive transistor models for Arduino but beginners don’t need them. In this project, you will need a cheap and simple transistor to control a motor. It’s a simple way to build a functional H bridge. You will need:
- Arduino Uno board
- BC547 transistor
- 47K ohm resistor
- Motor
- breadboard
- Jumper wires
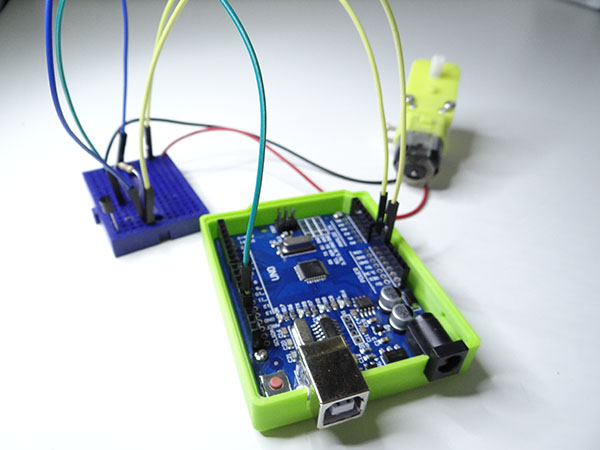
Start with the wires and make sure everything is properly connected. You don’t have to use this transistor, almost any other will do the job. Just make sure its current and voltage are enough for your motor.
You can use different resistors, but the 47K ohm resistor is very cheap and does its job very well. There are ways to calculate resistor values using a multimeter, but it can be too hard for a beginner so this resistor is recommended.
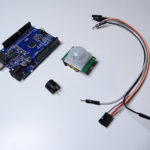
#7: Rainfall Detector
A rainfall detector is one of the most useful Arduino projects for beginners. The detector will beep, so you will know that the rain has started. For this project, you will need:
- Arduino board
- Rain sensor
- Buzzer
- Jumper wires
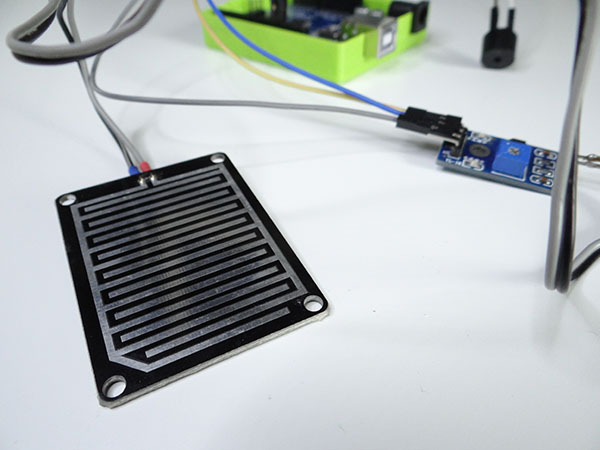
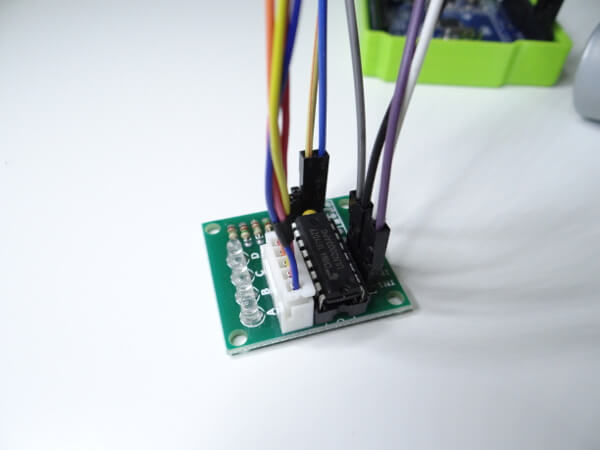
Basically, the rain sensor is a simple PCB board that opens traces when raindrops close the circuit. The special circuitry gives a signal to the digital output pin that you can hear. There is also an analog output pin that you can use to read the values from the sensor.
You have full control of the threshold for a digital output with the potentiometer on your board. Use red LED lights to tell you the rain is detected, and you should touch the sensor with a hand or squeeze it a little bit too see the light. The skin resistance is big and the light will be bright.
You can make your rain sensor useful by putting the sensor outside and leaving other parts inside to protect them from the rain. When the rain starts, you will hear the beeping sound.
#8: RGB LED Arduino
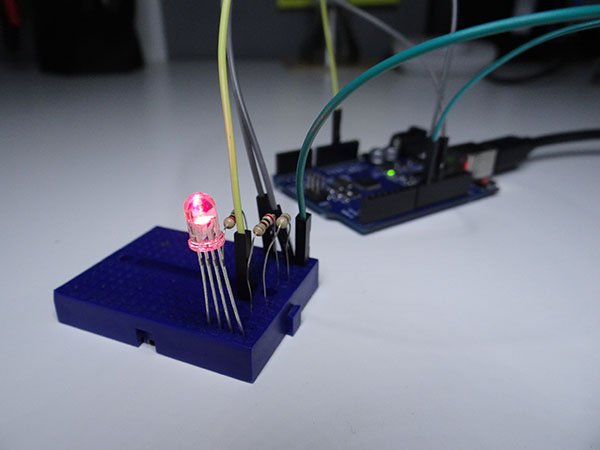
The RGB lights are an LED that contains 3 LEDs: red, green and blue. The RGB can shine in millions of colors and is as easy to use as a regular LED. And LEDs are perfect for beginners because they are very affordable, easy to use and you can make thousands of Arduino projects with them. But this is one of the most interesting LED type, which is different from other LEDs. For this project, you will need:
- RGB LED
- 3 x 200 – 220Ω resistor
- Breadboard
- Jumper wires
Just connect everything together and you’re done!
To make the LED light shine brighter, you can use foam that comes in boxes to protect shipped items. Just make several holes for the LED to go in and the foam will start changing its colors.
#9: The Stepper Motor
A stepper motor means a precise motor that can be rotated one step at a time. You can find them in robotics, 3D printers, and CNC machines. Some of them can be very expensive and as a beginner, you don’t need them. For this project, take the cheapest stepper motor you can find. The motors are available online.
In this project, you’re going to use 28byj-48 stepper and there are many other projects this motor is suitable for. It’s easy to connect to the Arduino board. For this project, you will need:
- Arduino Board
- 28byj-48 stepper motor with driver
- Jumper wires
You will need 6 cables with female-male connectors. You just need to connect the motor to the driver and that’s it! You can also add a small piece of tape on the rotating head to see that it actually rotates.
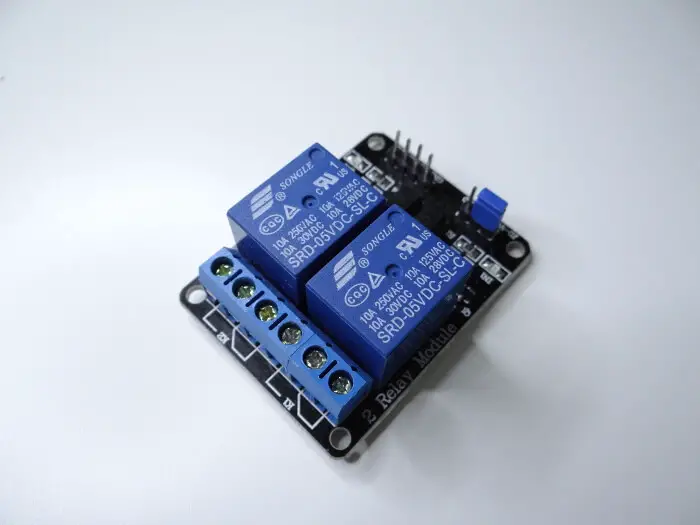
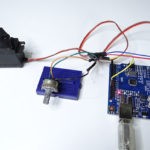
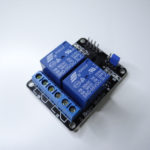
#10: Arduino Relay Project
Even if you’re new to Arduino, you can control one of your appliances with it. For example, with this project, you will use different components to create a bridge from the Arduino layer to appliances with a high power rating. For this project, you will need:
- Arduino Uno board
- Relay board
- Cable with socket and plug
- Jumper wires
- 230V lamp
You need to prepare the socket and the cable by removing the insulation from the cable. Then, connect the cable to the socket and connect another wire to the socket. The best appliances to control with your Arduino board are a lamp, a washing machine, and a motor. For example, you can program your Arduino board so that it swatches the power input of your washing machine off at a certain time of the day.
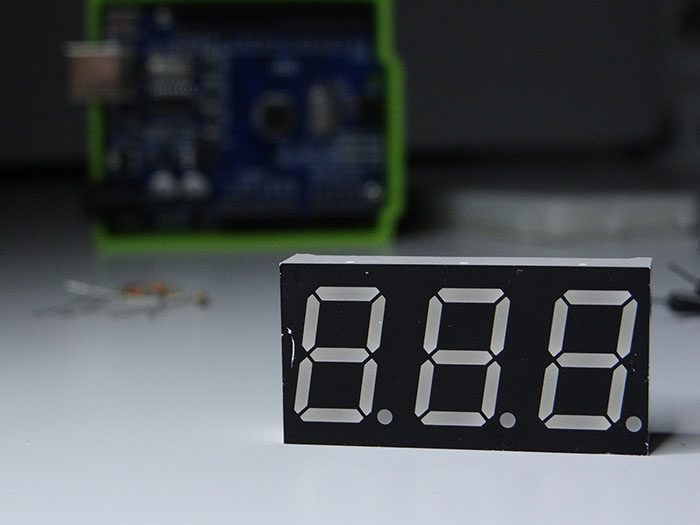
#11: Arduino 7 Segment Display
With this project, you will learn how to use a display and how to properly connect it. Displays are used in many other Arduino projects, so learning the basics will be very helpful. You will need:
- Arduino Board
- 7 segment display 3 chars
- 3 x 300Ω resistors
- Jumper wires
- Breadboard
One of the easiest ways to connect a display to your Arduino board is to plug it into the breadboard and take male-male cables. Later on, you will be able to plug male-female connectors to display but it’s quite hard for beginners. You will also need resistors to connect an LED to Arduino and protect the board from burning, and you should also connect resistors to your display because it’s made of LEDs.
#12: Clap ON Clap OFF Light
The name of the project is self-explanatory. To make the light, you will need:
- Arduino Board
- Relay
- Microphone module
- 230V lamp
- Jumper wires
- Cable with a plug and a socket
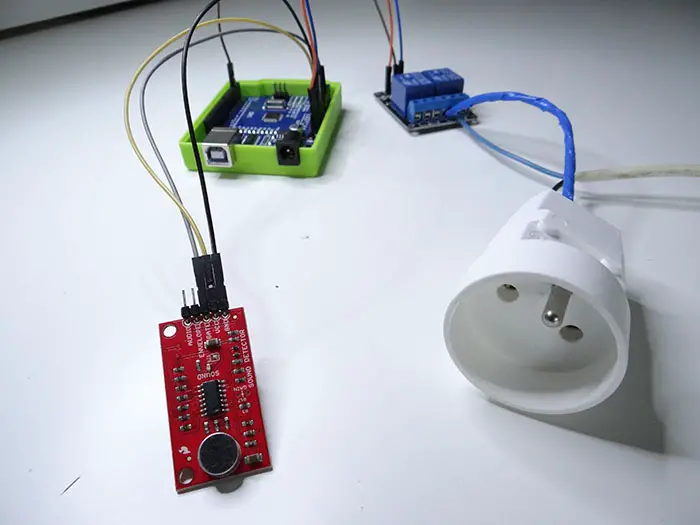
Begin by connecting the relay and the microphone. Use the analog output of the microphone and connect the relay to pin 2. When you turn the loud music on, the lamp starts blinking.
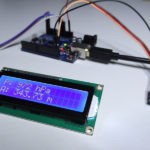
#13: Arduino Stopwatch Project
With this project, you can build an Arduino stopwatch using the simplest components. You will need:
- Arduino Board
- LCD with I2C converter
- Buzzer
- Potentiometer
- Jumper wires
- Breadboard
All you need to do is to set the time between 1 and 120 minutes. After that, it waits for 5 seconds and counts down. When the time is up, it beeps several times. That’s it.
We hope you have been able to build a fully working Arduino project with these ideas. The best thing, you’re not limited to simple projects. When it comes to Arduino, there is an amazing community that’s all about sharing. Many people are happy to share what they did and you can find thousands of Arduino projects, both very simple and very complex.
Related posts:
 Arduino Projects: Building an Arduino Countdown Timer
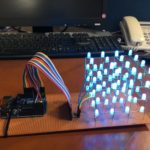 Arduino Projects: LED – 4X4X4 LED Cube
 Arduino Projects: PIR Motion Sensor
 The Best Arduino Starter Kits
 Arduino Relay Project
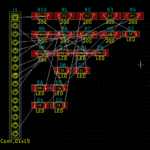 Arduino Projects: Building a Mini Arduino Shield With KiCAD – Part 1
 Arduino Barometer Project Using BMP180
 The Top Alternative IDE for Arduino You Should Start Using Today