One of the most popular ways to display digits for Arduino is using the alphanumerical LCD. Some of the common ways also include display types like graphical (a very popular display from Nokia phones), E-paper, LCD and LED displays.
LED displays are the simplest. It is made out of LEDs, those LEDs are connected into segments mostly called 7 segment display (because it has 7 segments).
In this tutorial, we are going to show you how you can use this type of display in your project, how to connect them, and a simple program that will let you easily implement it.
The biggest advantage of these displays are the Price. They are very cheap and also easy to use.
Arduino 7 segment display project
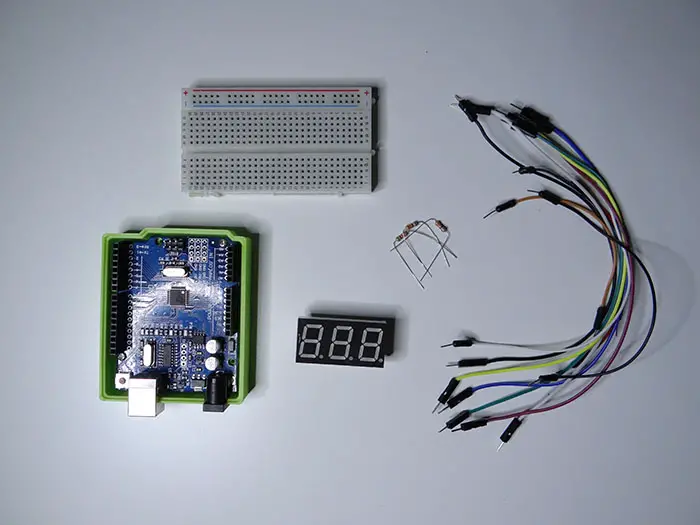
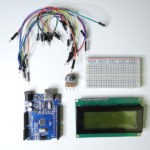
What we need
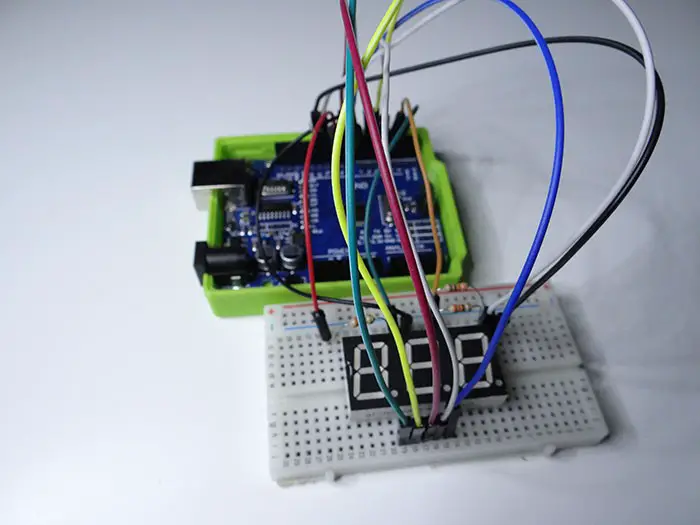
The best way to connect this display to the Arduino board is to plug it into the breadboard and then using male to male cables simply plug it as shown below. Plugging male-female connector to display and then to Arduino is quite hard, and not so solid. We need resistors, as you may know when connecting a LED to Arduino you have to use resistor to protect your Arduino from burning, and as I said this display is made out of LEDs so here we also have to connect resistors to display. Here is the pinout of the display.
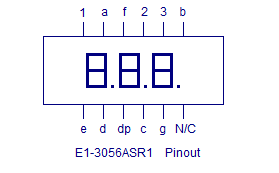
1, 2 and 3 are pins for controlling each digit. a-g are used to control segments. N/C means not connected, dp is decimal point. How do I connect it? Here you go.
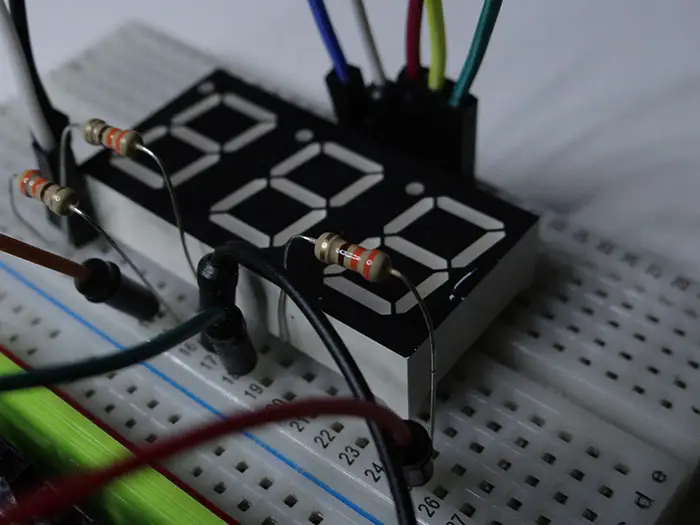
Display 1 -> Arduino 10 through 300Ω resistor
Display 2 -> Arduino 11 through 300Ω resistor
Display 3 -> Arduino 12 through 300Ω resistor
Display a -> Arduino 2
Display b -> Arduino 3
Display c -> Arduino 4
Display d -> Arduino 5
Display e -> Arduino 6
Display f -> Arduino 7
Display g -> Arduino 8
Display dp -> Arduino 9
You can as well choose to use different pins from what I’ve used, but you have to remember to specify it in your code.
When you are done connecting, it is time to work on the code.
The code is a quite simple one. It just shows you how the display works. The most useful part of this code is the show_number function. There are lots of ifs that control the display and you can simply copy, paste, modify and use in your project to save time .
This code just increments the value and shows it on the display. Just for the sake of showing you how to work with the 7 segment display. I would also want to state that the display is not synchronized with the time on your watch.
We hope you have got a glimpse of what is possible using the 7 segment display in an Arduino project. Fell free to share what you have been able to build using this concept in the comment section below.
You might also like:
- Arduino hx711 tutorial
- Arduino magnetic switch
- Best Arduino Kits
- gifts for engineering students
- gifts for engineers
- mpu6050 Arduino projects
- Current sensor Arduino
- Soil Moisture Sensor With Arduino
- Arduino Count up Timer Using the Nokia 5110 LCD
- Arduino Yun: Integrating or Juxtaposing Arduino with Linux
- Arduino Projects: Line Follower Robot
- Arduino RFID Project for Beginners
- Arduino MOSFET Project
- Which Arduino Should You Buy
- What Can You Do With Arduino Boards?
- Great Alternatives to the Arduino Microcontroller
- Arduino Projects: Color Sensor
- Arduino IDE Alternatives
- Arduino Mega vs. Uno
- Arduino Projects: Arduino LCD Display
- Read Arduino Rotary Encoders
- A Selection of the Best Arduino Simulators
- Arduino Projects: IR Receiver
- Arduino Light Sensor Project
- Arduino Projects: Arduino Decibel Meter
- Arduino Stopwatch Project
- Arduino Bluetooth RC Car Project
- Arduino Temperature Logger Project
- Arduino Projects: Arduino 7 Segment Display
- Arduino Projects: Clap ON Clap OFF Light
- Arduino Relay Project
- Install a Library Onto the Arduino IDE
- Arduino Projects: Rainfall Detector
- Arduino Projects: RGB LED Arduino
- Arduino Stepper Motor Project
- Arduino Projects: Arduino DC Motor Control
- The Top Affordable Arduino Robot Kit
- Arduino 3D Printed Case
- Arduino Projects: Asynchronous LEDs Blink
- Arduino Projects: Ultrasonic Distance Sensor
- Arduino Projects: LED – 4X4X4 LED Cube
- Arduino Car Projects: Build an Obstacle Avoiding Robot With Less Than $30
- Arduino Projects: Servo Potentiometer Control
- Arduino LED Project: Knight Rider
- Arduino Projects: PIR Motion Sensor
- The Difference between Arduino and Raspberry Pi
- Top 9 Books Every Engineer Should Read
- Top Used Sensors for Arduino
- First Hand on the Arduino Uno Board
Related posts:
 Arduino Projects: Building an Arduino Countdown Timer
 Arduino Projects: LED – 4X4X4 LED Cube
 Arduino Projects: PIR Motion Sensor
 The Best Arduino Starter Kits
 Arduino Relay Project
 Arduino Projects: Building a Mini Arduino Shield With KiCAD – Part 1
 Arduino Barometer Project Using BMP180
 The Top Alternative IDE for Arduino You Should Start Using Today
Can we stop the counter ?? By button ??