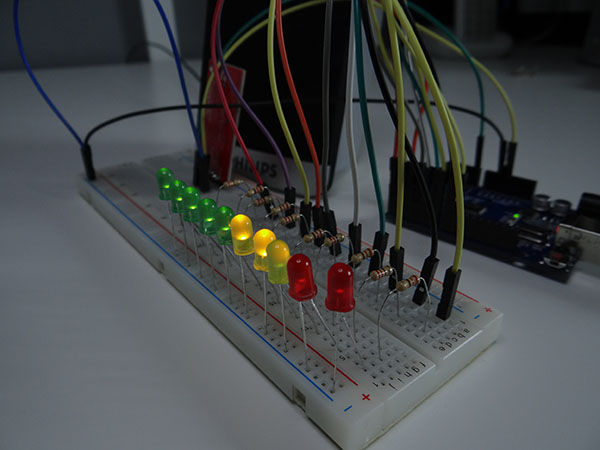
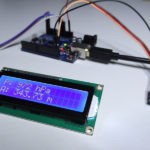
I am sure you know those volume meters we mostly find in professional recording studios. That’s what this project is about, a simple volume meter (or decibel meter) made with Arduino, a microphone and few LEDs.
The Arduino program for this project is very optimized and shortened so you can see what a properly written program looks like.
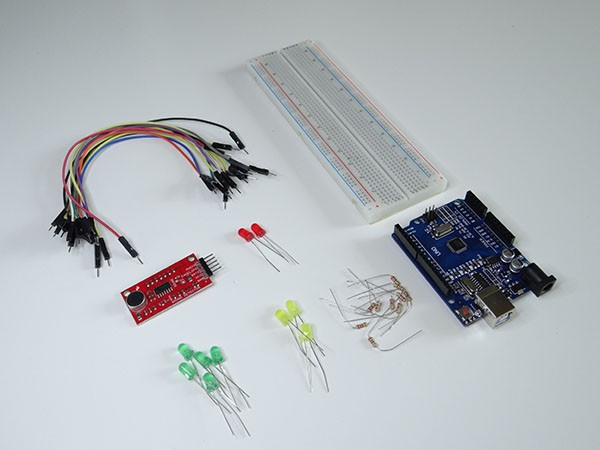
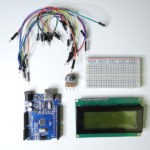
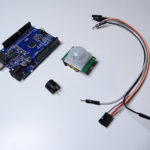
Let’s start with a list of components we need for the project:
Basically, you can use every microphone that is compatible with Arduino just make sure that it has an analog output.
- 10 x LEDs (5 green, 3 yellow, 2 red) Color doesn’t matter so much, but it looks more awesome with different colors.
- 10 x 200-220Ω resistors
- Jumper wires
- 1 x Breadboard
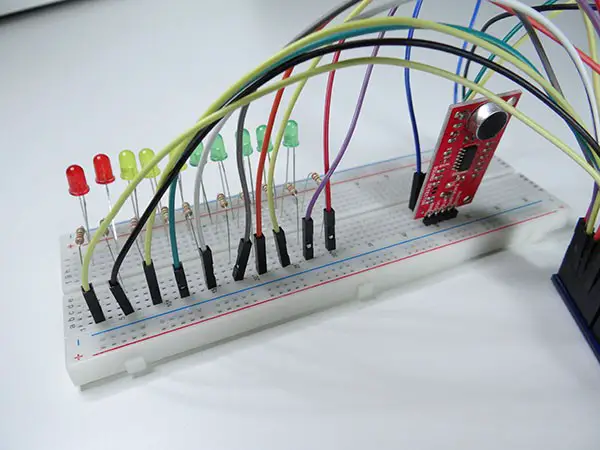
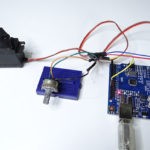
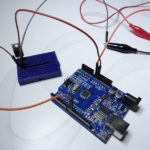
Connect everything using the breadboard and make sure you are properly connecting the LEDs with resistors, it is very easy to make a mistake here.
Use male-male cables to connect everything. The microphone module can also be plugged into the breadboard.
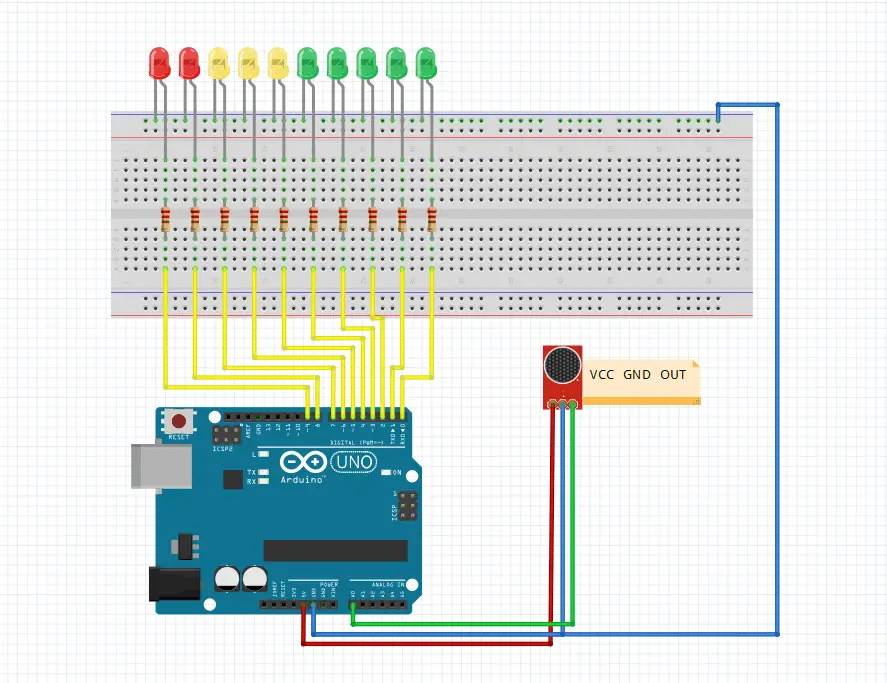
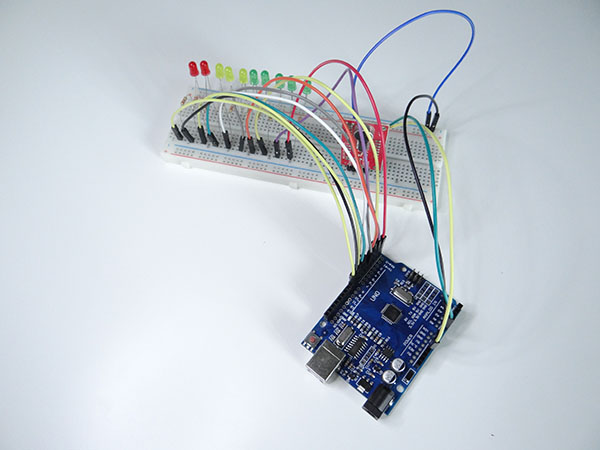
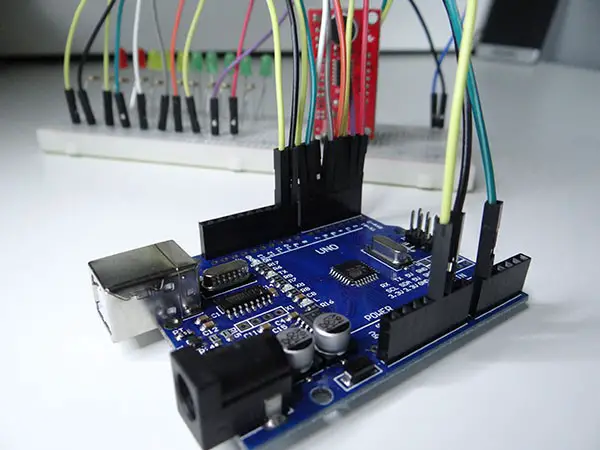
You can use a smaller breadboard as well, no need to use a huge one as I am doing.
You will find the program to upload to the Arduino board below, as I’ve already mentioned, I have tried to reduce the whole thing in 17 lines comments excluded. That is what we called efficient programming right here! 😉
The first loop is the LEDs setup and the second is to control the LEDs. You can adjust the sensitivity by changing the value in the map function. You can change the value where you see 700: smaller for more sensitive or bigger for less sensitive.
Here we have it!
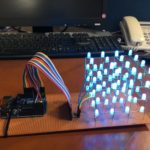
A good exercise will be to try adding more LEDs to the project. You can also try using the RGB LED strip instead of the LEDs we have just used.
You might also like:
- Arduino hx711 tutorial
- Arduino magnetic switch
- Best Arduino Kits
- gifts for engineering students
- gifts for engineers
- mpu6050 Arduino projects
- Current sensor Arduino
- Soil Moisture Sensor With Arduino
- Arduino Count up Timer Using the Nokia 5110 LCD
- Arduino Yun: Integrating or Juxtaposing Arduino with Linux
- Arduino Projects: Line Follower Robot
- Arduino RFID Project for Beginners
- Arduino MOSFET Project
- Which Arduino Should You Buy
- What Can You Do With Arduino Boards?
- Great Alternatives to the Arduino Microcontroller
- Arduino Projects: Color Sensor
- Arduino IDE Alternatives
- Arduino Mega vs. Uno
- Arduino Projects: Arduino LCD Display
- Read Arduino Rotary Encoders
- Arduino Simulators
- Arduino Projects: IR Receiver
- Arduino Light Sensor Project
- Arduino Projects: Arduino Decibel Meter
- Arduino Stopwatch Project
- Arduino Bluetooth RC Car Project
- Arduino Temperature Logger Project
- Arduino Projects: Arduino 7 Segment Display
- Arduino Projects: Clap ON Clap OFF Light
- Arduino Relay Project
- Install a Library Onto the Arduino IDE
- Arduino Projects: Rainfall Detector
- Arduino Projects: RGB LED Arduino
- Arduino Stepper Motor Project
- Arduino Projects: Arduino DC Motor Control
- The Top Affordable Arduino Robot Kit
- Arduino 3D Printed Case
- Arduino Projects: Asynchronous LEDs Blink
- Arduino Projects: Ultrasonic Distance Sensor
- Arduino Projects: LED – 4X4X4 LED Cube
- Arduino Car Projects: Build an Obstacle Avoiding Robot With Less Than $30
- Arduino Projects: Servo Potentiometer Control
- Arduino LED Project: Knight Rider
- Arduino Projects: PIR Motion Sensor
- Arduino vs Raspberry Pi
- Top 9 Books Every Engineer Should Read
- Top Used Sensors for Arduino
- First Hand on the Arduino Uno Board
Related posts:
 Arduino Projects: Building an Arduino Countdown Timer
 Arduino Projects: LED – 4X4X4 LED Cube
 Arduino Projects: PIR Motion Sensor
 The Best Arduino Starter Kits
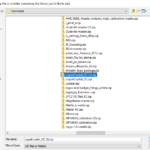 How to Install a Library Onto the Arduino IDE
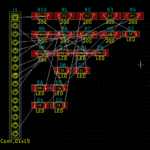 Arduino Projects: Building a Mini Arduino Shield With KiCAD – Part 1
 Arduino Barometer Project Using BMP180
 The Top Alternative IDE for Arduino You Should Start Using Today
Hello,
I didn’t manage to dot it whith a WS2812B RGB led strip.
The strip keeps lighted.
I used the following code :
#include
#define NUM_LEDS 3
#define LED_PIN 4
#define COLOR_ORDER GRB
#define LED_TYPE WS2812B
#define BRIGHTNESS 30
#define MIC 0
CRGB leds[NUM_LEDS];
void setup() {
FastLED.addLeds(leds, NUM_LEDS);
FastLED.setBrightness( BRIGHTNESS );
Serial.begin(9600);
//here is an input for sound sensor
pinMode(MIC, INPUT);
//here we are setting up all pins as an outputs for LEDs
for(int z = 0; z < 10; z++){
pinMode(z, OUTPUT);
}
}
void loop() {
//here we are storing the volume value
int volume = analogRead(A0);
Serial.println (volume);
//max value for analog read is 1023 but it must be very very loud to reach this value
//so I lower it down in map function to 700
//mapping volume value to make it easier to turn LEDs on
volume = map(volume, 0, 700, 0, 10);
//for loop to turn on or off all LEDs
//thanks to this loop code for this project is very short
//we are going through all pins where we have LEDs and checking if the volume is
//bigger then pin number (that's why we are maping the volume)
for(int a = 0; a = a)
{
//if it is bigger we can turn on the LED
leds[a]= CRGB::Green;
FastLED.show();
}
else{
//if it is smaller we can turn the LED off
leds[a]= CRGB::Black;
FastLED.show();
}
}
}
Cann you help me ??
Thank you