Playing with Arduino projects is a lot of fun, but sometimes you can easily damage your Arduino board while working on a project, especially when you have a messy desk and believe me, it is probable that you will at some point if not now, have a messy desk with all those wires.
A piece of metal or cable can kill your Arduino board in a second. A nice remedy to this is to protect your Arduino board with a 3D printed case. You can also buy some cheap Arduino Uno cases online.
Here, I will attempt to 3D print a personalized Arduino Uno case and to show you how easy it is to just build one using the power of 3D printing.
Arduino Uno case
Folding case for Arduino Uno
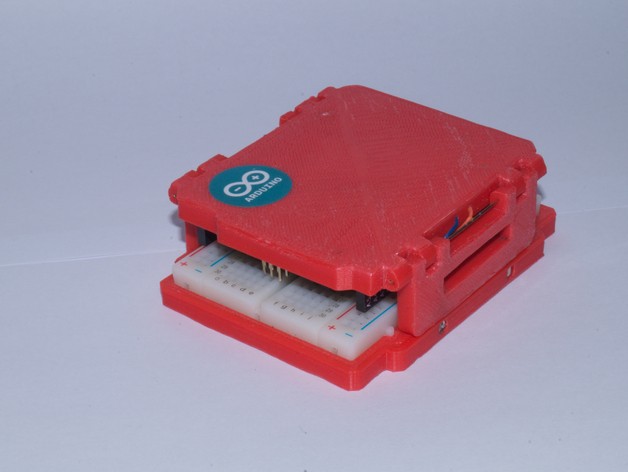
This is a simple and nice Arduino Uno case with an integrated breadboard. It is perfect when you want to pack your Arduino board in your bag, be it for a long trip or for a short one. This case will help you be ready at all times to just start building. It’s compatible with Arduino Uno and Leonardo, but you can’t have an Arduino shield connected to it because it is foldable. You can download the STL file of it here.
Arduino Bumper
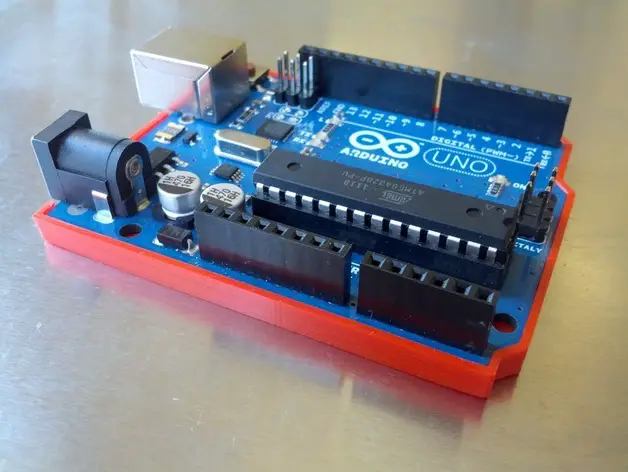
This case is as clean as the previous one and is compatible with both the Arduino Uno board and the Leonardo. It looks more like a smartphone case.
It is very functional in my opinion and it does a good job at protecting the bottom of the Arduino board while letting you have easy access to pins. You don’t need any screws or glue to mount it, the board just sit comfortably on it. Here is the link to the STL file.
Arduino Uno Snug Case
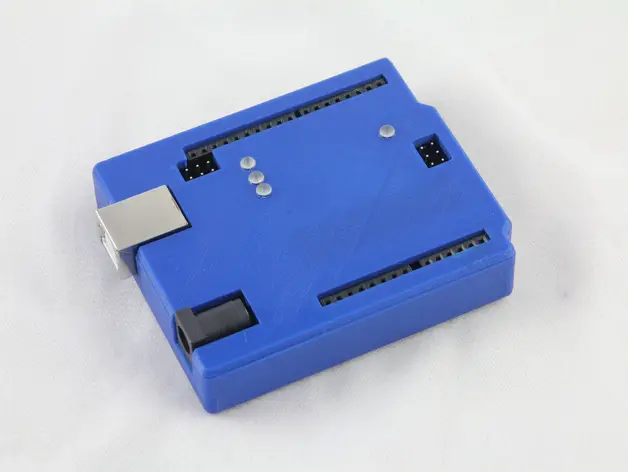
This is the best Arduino Uno case ever, and it looks so amazing. Pure simplicity which is something I love.
It’s extremely functional, you can even attach a shield to it with no problem whatsoever. You have an easy access to all the pins and USB port. It’s small and you can attach your Arduino board to it with screws so it wouldn’t be loose. There are even holes for LEDs.
With this case, our Arduino is protected all from. So, I decided to 3D print it. Here is the download link to the STL file.
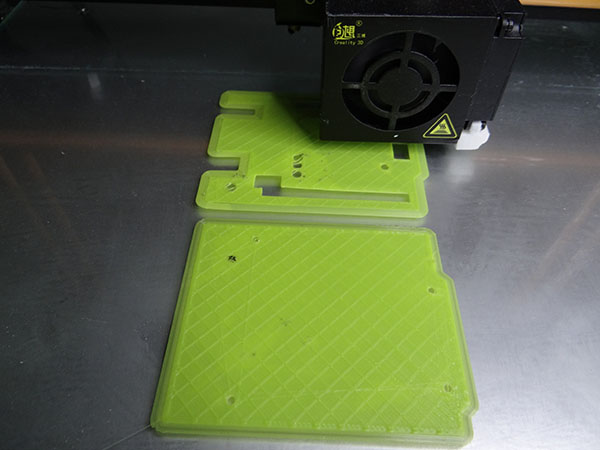
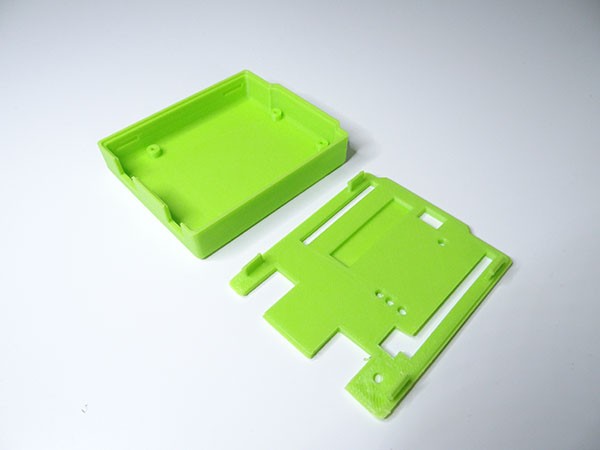
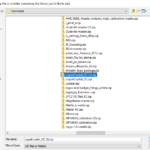
The case has two parts: the top part and bottom part.
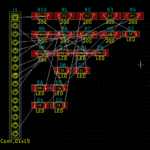
Let’s take a look at it in Cura
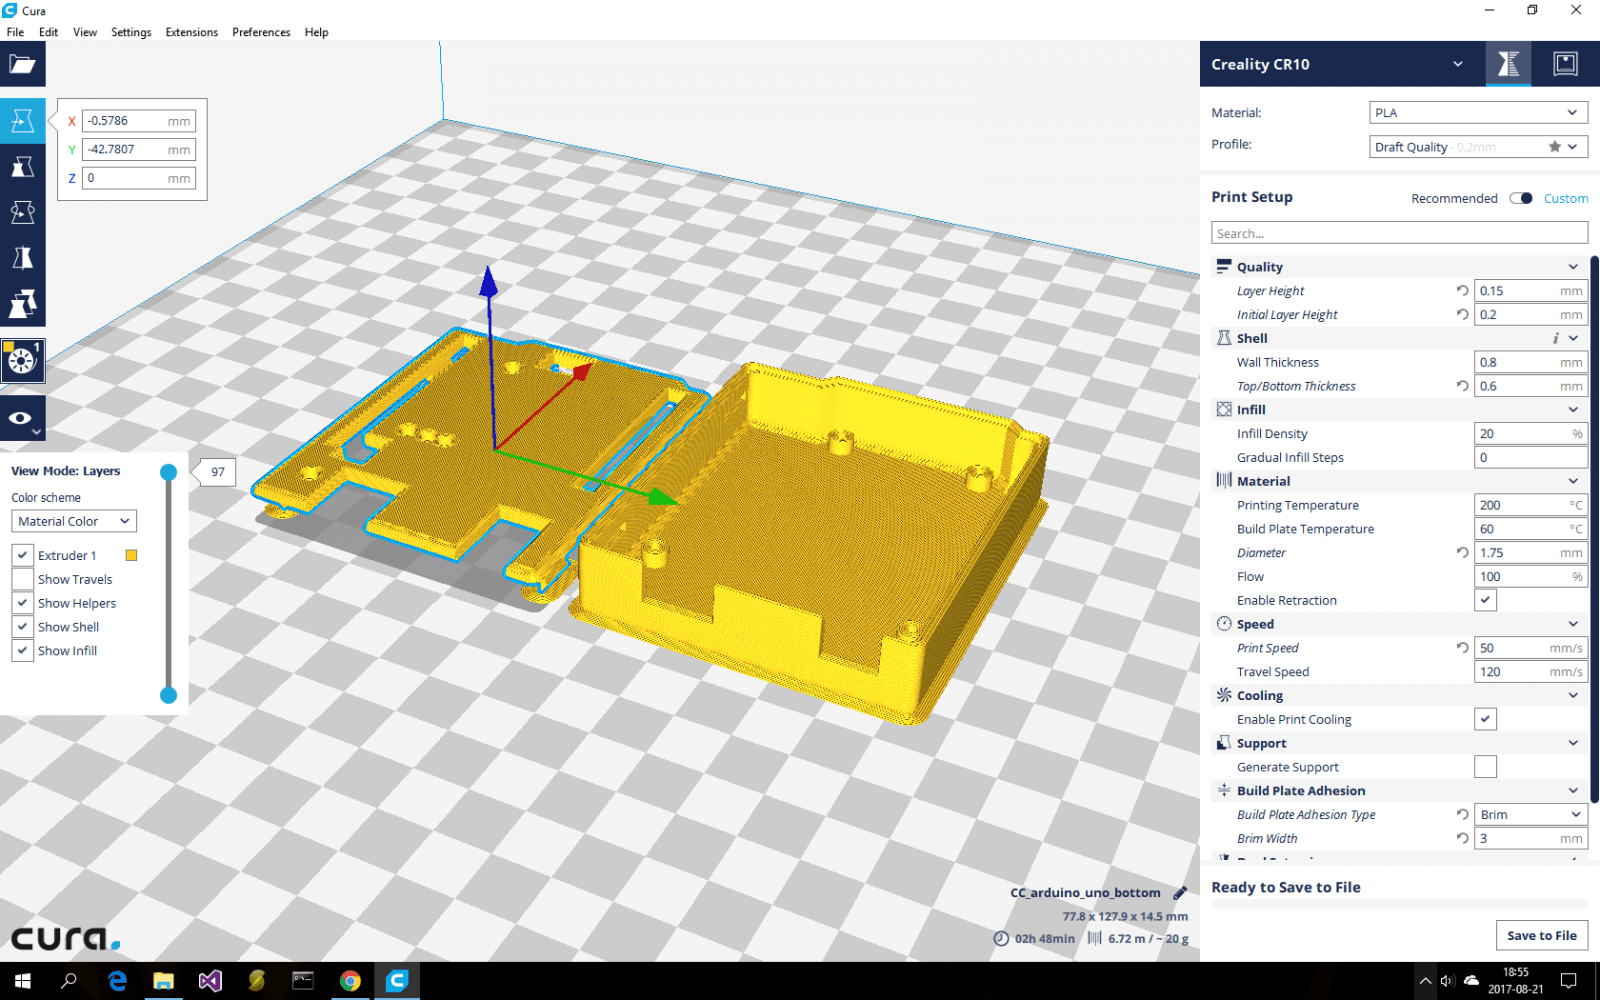
Here are my main settings:
- layer height: 0.15mm (I always use 0.2mm but I decided to make it a little bit smaller just to see if there will be differences in quality)
- infill: 20%
- Wall thickness: 0.8 mm
- Bottom/top thickness: 0.6 mm
- Print speed: 50 mm/s
- I also used 3mm of brim to protect it from unwrapping
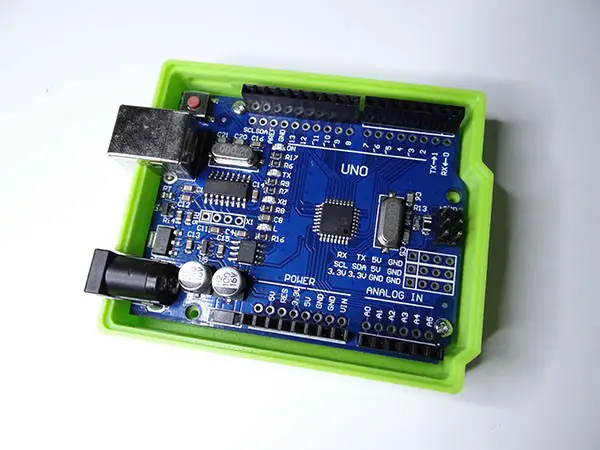
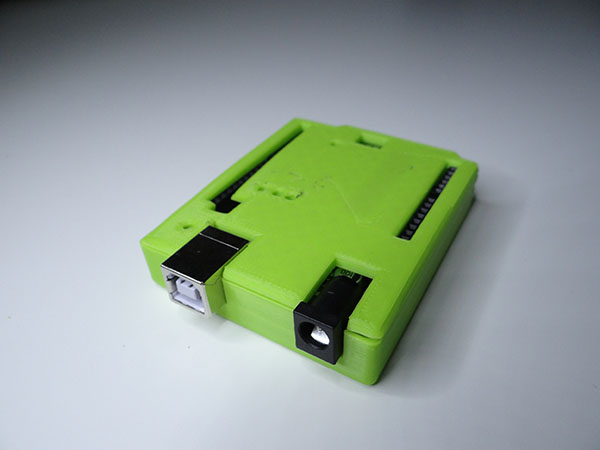
It turns out really good. You can see the results below. To hold my Arduino in place I used M2 screws. If you have some problems with fitting those parts together, you can use a hairdryer to heat it up, then it will become a little bit flexible so you will be able to fit it perfectly.
You might also like:
- Arduino hx711 tutorial
- Arduino magnetic switch
- Best Arduino Kits
- gifts for engineering students
- gifts for engineers
- mpu6050 Arduino projects
- Current sensor Arduino
- Soil Moisture Sensor With Arduino
- Arduino Count up Timer Using the Nokia 5110 LCD
- Arduino Yun: Integrating or Juxtaposing Arduino with Linux
- Arduino Projects: Line Follower Robot
- Arduino RFID Project for Beginners
- Arduino MOSFET Project
- Which Arduino Should You Buy
- What Can You Do With Arduino Boards?
- Great Alternatives to the Arduino Microcontroller
- Arduino Projects: Color Sensor
- Arduino IDE Alternatives
- Arduino Mega vs. Uno
- Arduino Projects: Arduino LCD Display
- Read Arduino Rotary Encoders
- A Selection of the Best Arduino Simulators
- Arduino Projects: IR Receiver
- Arduino Light Sensor Project
- Arduino Projects: Arduino Decibel Meter
- Arduino Stopwatch Project
- Arduino Bluetooth RC Car Project
- Arduino Temperature Logger Project
- Arduino Projects: Arduino 7 Segment Display
- Arduino Projects: Clap ON Clap OFF Light
- Arduino Relay Project
- How to install Arduino Library
- Rain Sensor Arduino Project With Buzzer
- Arduino Projects: RGB LED Arduino
- Arduino Stepper Motor Project
- Arduino Projects: Arduino DC Motor Control
- Best Arduino robot kit
- Arduino 3D Printed Case
- Arduino Projects: Asynchronous LEDs Blink
- Arduino Projects: Ultrasonic Distance Sensor
- Arduino Projects: LED – 4X4X4 LED Cube
- Arduino Car Projects: Build an Obstacle Avoiding Robot With Less Than $30
- Arduino Projects: Servo Potentiometer Control
- Arduino LED Project: Knight Rider
- Arduino Projects: PIR Motion Sensor
- The Difference between Arduino and Raspberry Pi
- Top 9 Books Every Engineer Should Read
- Top Used Sensors for Arduino
- First Hand on the Arduino Uno Board
Related posts:
 Arduino Projects: Building an Arduino Countdown Timer
 Arduino Projects: LED – 4X4X4 LED Cube
 Arduino Projects: PIR Motion Sensor
 The Best Arduino Starter Kits
 How to Install a Library Onto the Arduino IDE
 Arduino Projects: Building a Mini Arduino Shield With KiCAD – Part 1
 Arduino Barometer Project Using BMP180
 The Top Alternative IDE for Arduino You Should Start Using Today