Learning 3D is the logical step that comes after learning how to model in 2D. Let’s use the following design to learn how to go from 2D to 3D using AutoCAD.
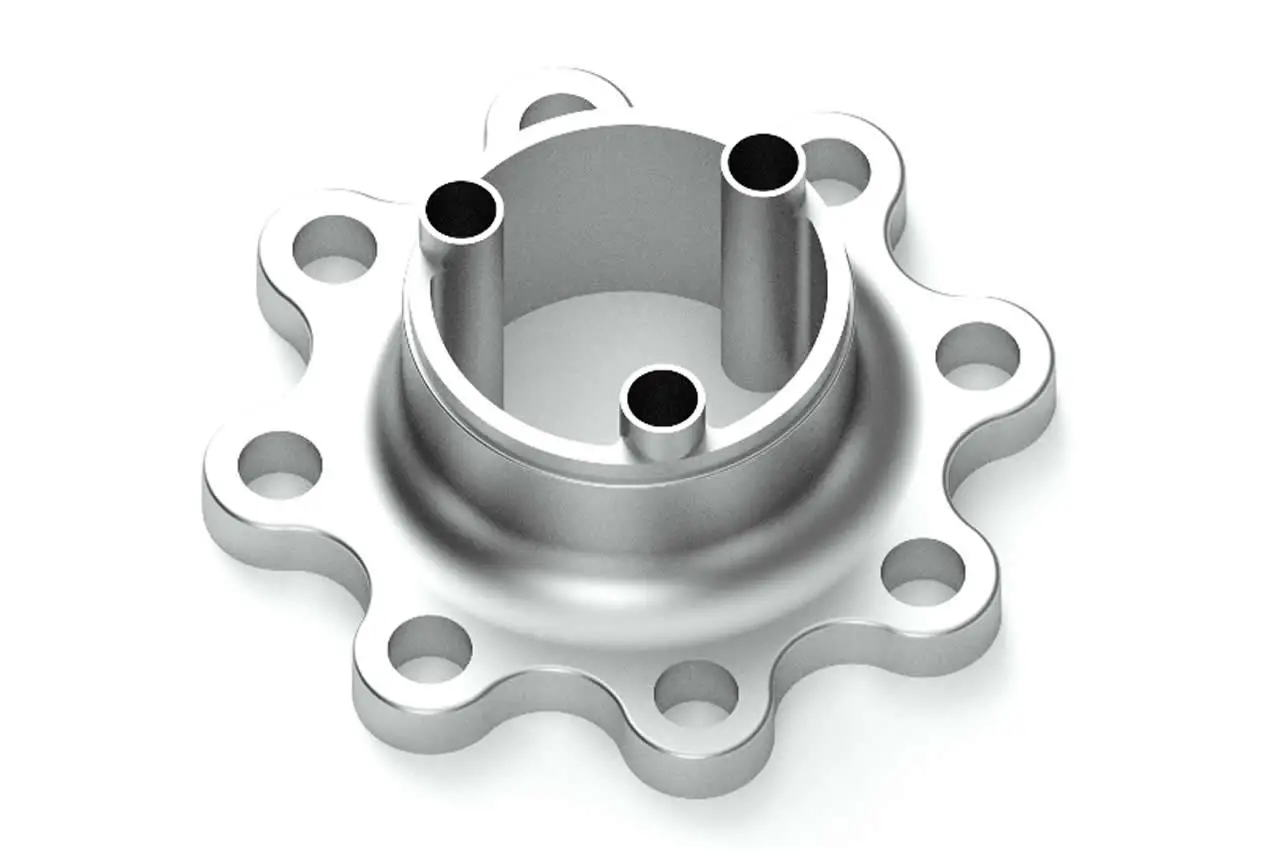
I’ve found this great exercise on MufasuCAD Youtube channel and felt compelled to do another detailed AutoCAD tutorial showing some of the steps you need to take to complete this challenge. It is, in fact, a great one, to help you practice 3D.
Let’s dive into the session.
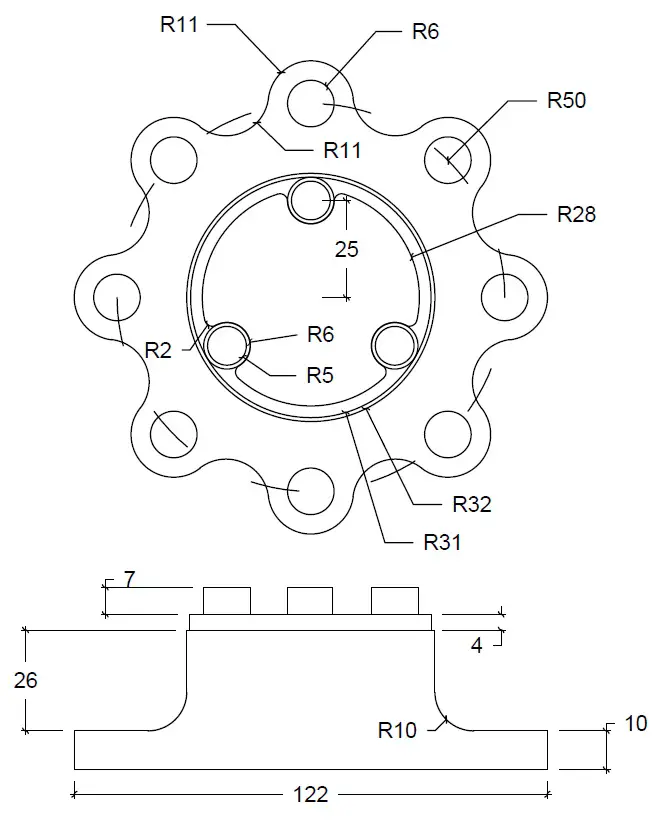
AutoCAD 2D to 3D
Step 1
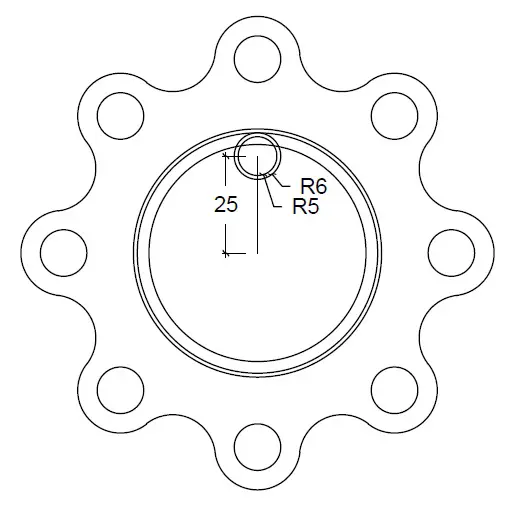
Use the CIRCLE command to create the following circles. They all have the same center.
Step 2
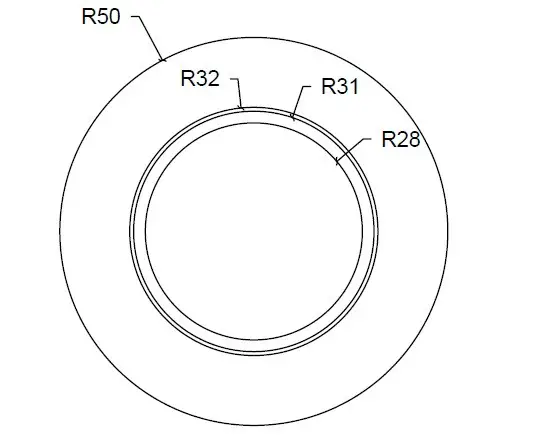
Use the upper quadrant of the biggest circle to create the following 2 circles.
Step 3
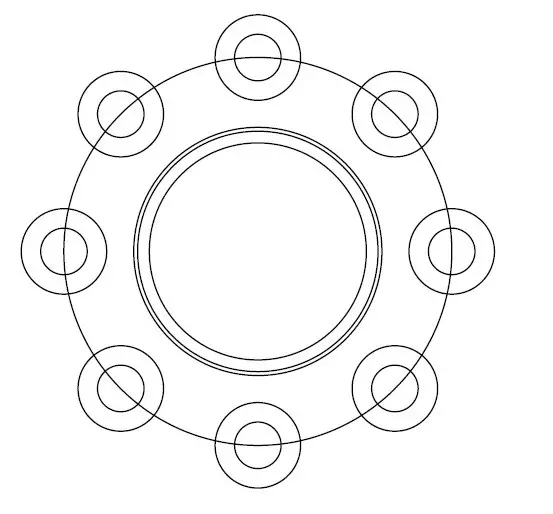
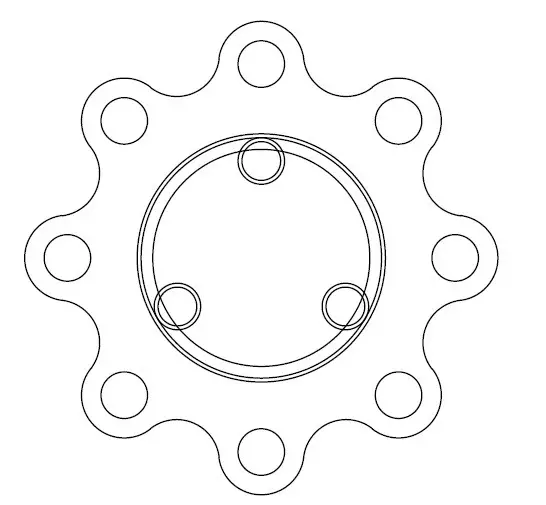
Use the Polar Array command and the two small circles to construct the following set of objects.
Step 4
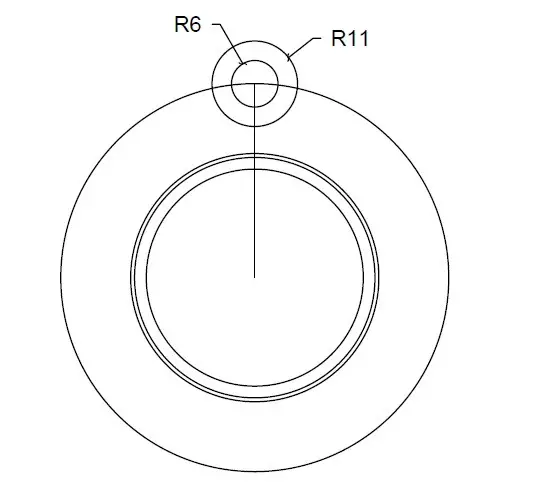
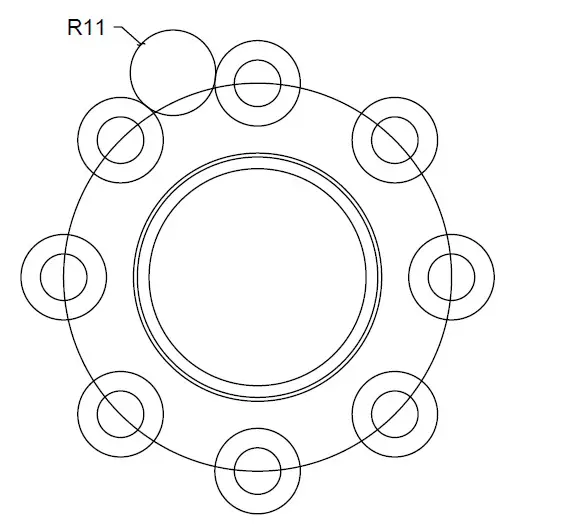
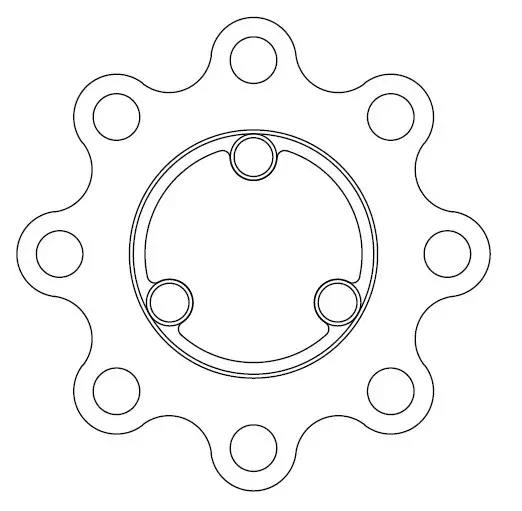
Now, let’s use the feature tan-tan-radius to create this circle of R11.
Step 5
Similar to what we did in step 3, let’s use the circle we have just made to create a polar array of 8 items.

Step 6
Select the circle in the middle of the polar array, and delete it.
Why does this look so gorgeous to me? Anyway, let’s continue.
Step 7
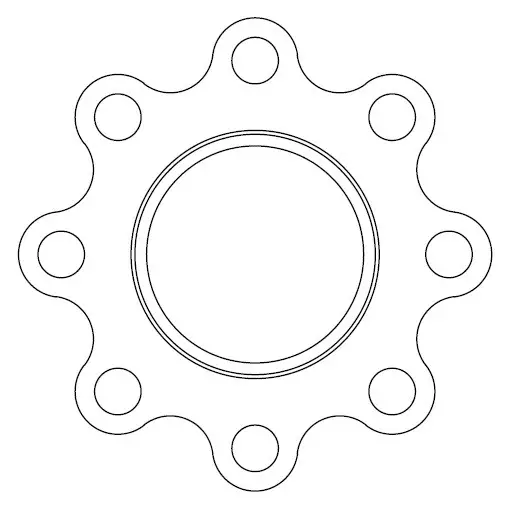
Select the objects in the Polar array and trim them such to have the image below.
Step 8
Create these two circles.
Step 9
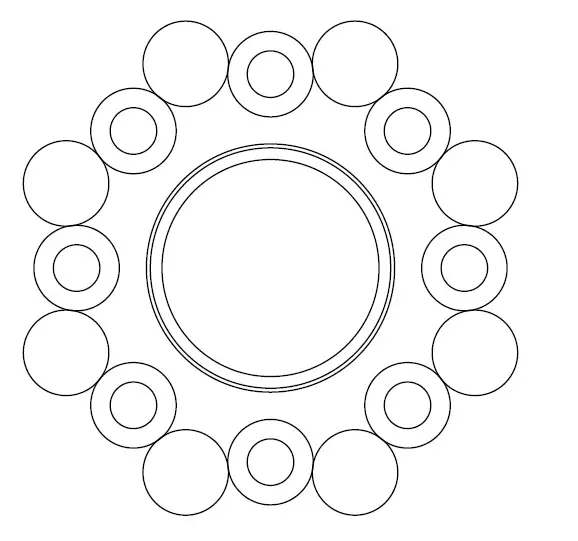
Use the circles created in step 8 to create a Polar array of 3 items as shown on the image below.
Step 10
Now you can use the FILLET command to fillet the inner edges as illustrated on the image below.
Step 11
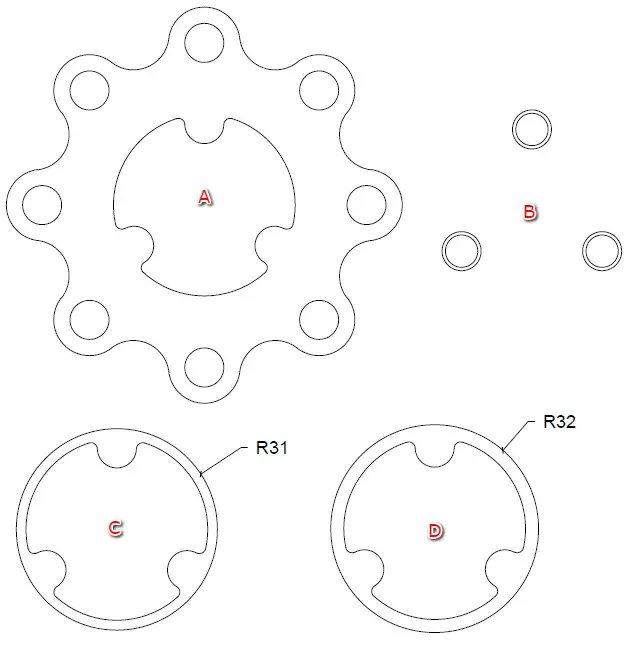
Now, the interesting part. Let’s separate the model in the following objects.
Step 12
Click on the REGION command, select everything in the drawing area and Click on ENTER on your keyboard.
Step 13
Use the Extrude command to extrude:
- A with a distance of 10 units
- B: the internal circle with 47 units and the external circle with 7 units
- C with 4 units
- D with 26 units
You should end up with something like this. You need to 3D-navigate to be able to see the models in this manner. On the piece A, subtract the 8 small circle from the bigger piece.
Step 14
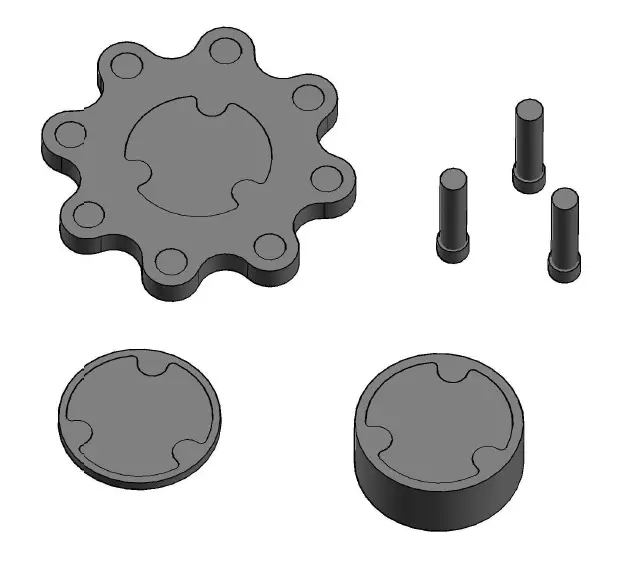
I know this part will be tricky, but try to stack up these objects on top of each other in the order A-D-C-B.
Step 15
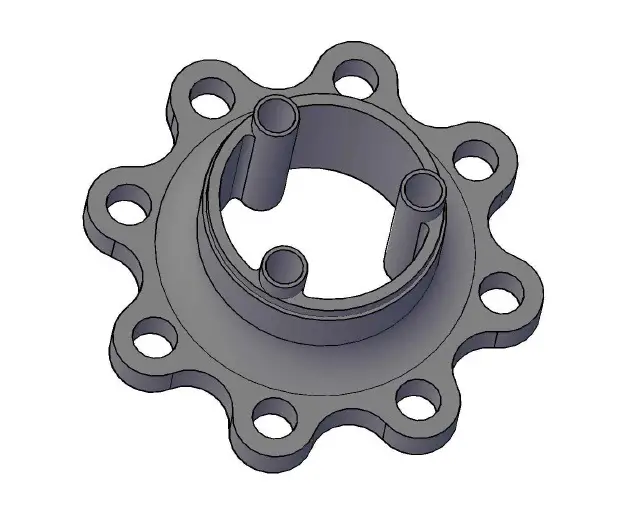
Now subtract the piece in the middle from the outer piece on each level except on the last upper level (the cylinders).
Once it is done. Unite the short cylinders with all the other parts, except the longer cylinder. Subtract the longer cylinder from the union.
You should be left with the following object.
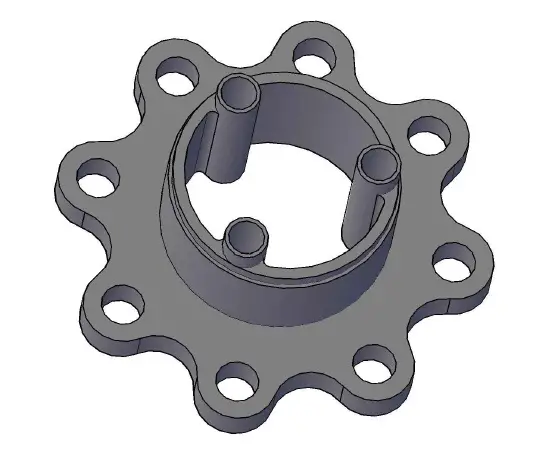
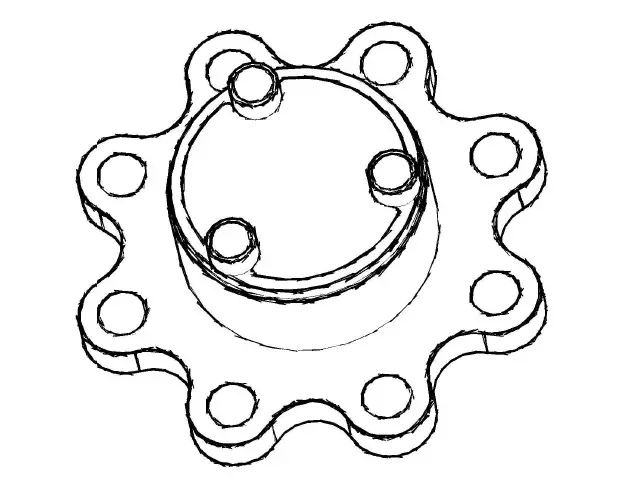
Step 16
Now, Fillet the model as on the image below, and we’ve just completed this challenge.
Hope you have learned a bit of AutoCAD 3D with this. Do not hesitate to drop a comment below if you need further clarification regarding this challenge.
3D Projects (Good 3D practice exercises)
- 3D Design project for beginners – AutoCAD
- An easy Modeling 3D project
- 3D Design project for beginners – A Stool
- 3D design project for Beginners – A table
- CAD projects for Beginners – Tinkercad
- Modeling a Vase with Tinkercad
- How to assemble with Tinkercad
- Beginner’s tips – Autodesk Tinkercad
- Design a mechanical part with Autodesk Tinkercad
- Modeling with AutoDesk Tinkercad
Related posts:
 AutoCAD Tutorial 00: AutoCAD Free Download Full Version
 AutoCAD and its Uses: What is AutoCAD Used for?
 Unique 2D Autocad Exercises to Improve Your Skill Now
 Learn AutoCAD Basics: DAY 4
 Learn AutoCAD Basics: DAY 13
 AutoCAD Tutorial 18: Basics of Annotation in AutoCAD
 The Best Way to Learn AutoCAD
 Convert DWG to STL
mine just show wireframe, not filled, hard to see the first subtractions as a result? Can anyone help?